Deleted
Deleted Member
Posts: 0
|
Post by Deleted on Aug 30, 2014 16:34:06 GMT -5
Great idea knocking the plug nose back some and I'm watching your project with interest. It's a good way to save some cash on a great looking stock.
|
|
Deleted
Deleted Member
Posts: 0
|
Post by Deleted on Aug 30, 2014 17:26:23 GMT -5
Very informative thread, a bunch of "precise" but hard and timely work and it's looking great. Cool to see skilled folks at work as they progress thru projects.. That's gonna be a dandy rig! Thanks again for sharing!
Guy
|
|
|
|
Post by 7mmfreak on Aug 31, 2014 12:18:02 GMT -5
Today's my birthday and I have been lazy most of the morning but my wife is priming and painting a desk so I decided I would do some more stock work. Here is a push-button swivel insert and swivel next to the cheek-piece. I off-set it to the upper portion of the stock because if you don't the gun will tend to tip away from you when slung because the barreled action and optic make them top heavy:  I learned that the hard way when I ordered them pre-installed on the McMillan:  The forward insert is 13" ahead of the triggerguard and lines up with where the insert in the M1913 rail on bottom goes for the bi-pod mount:  |
|
|
|
Post by rambler on Aug 31, 2014 15:18:28 GMT -5
Happy B'day big guy
|
|
|
|
Post by airborneike on Aug 31, 2014 18:18:22 GMT -5
Happy birthday Keith....you don't look a day over 50 ..... :-)
The project and documentation is impressive and the finished project will be excellent.
Takes a lot of work to photograph and write up but it is exactly what makes this board outstanding!
Hows JM school treating you?
Best,
Mike
|
|
|
|
Post by 7mmfreak on Aug 31, 2014 19:04:12 GMT -5
Thanks guys, it's been a pretty good day.
Mike,
I hope I still look like this when I'm fifty. A few years ago I had a young soldier guess my age at 42. I told him I was the fittest 42 year old he knew.
My wife keeps asking why I'm taking so many pictures. Then she teases me about my "internet friends". It has been an enjoyable project and I should be finished tomorrow.
I took the regimental pre-test last week, then the school house pre-test, then jumped late on Thursday. I start JM and go full throttle starting Tuesday. I think I was wrong about the finish date and I should be done around the 20th so I should make it out sometime the following week.
|
|
|
|
Post by 7mmfreak on Sept 21, 2014 12:18:41 GMT -5
Ok, three weeks of school later I am finished and able to do something enjoyable. It's time to paint the stock on the Green Beanie. I masked the bedding, recoil pad, and plugged the threaded inserts for the cheek-piece so we don't get paint anywhere I don't want it. I then used a paint and primer color that is a grey/tan/slate color with a slight pink hue. It is a good base color for a Multi-Cam type pattern: 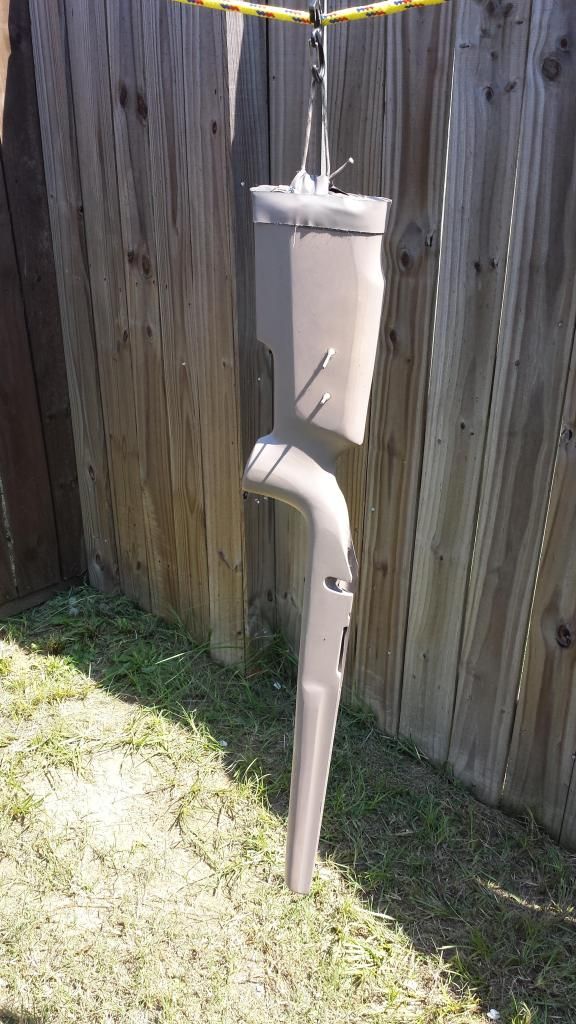 While it is drying I took a piece of wax paper and taped it so that the taped over lapped and drew my stencils:  Once the primer/paint combo dried I faded a flat tan into it in patches. I don't know that you can tell in the picture: 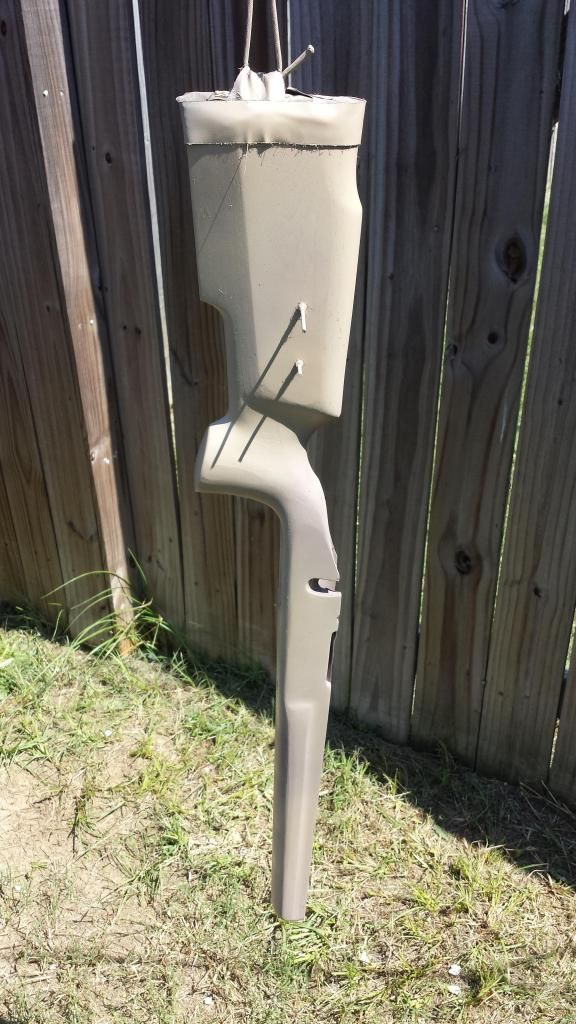 |
|
Deleted
Deleted Member
Posts: 0
|
Post by Deleted on Sept 21, 2014 12:32:15 GMT -5
Looks like it is gonna be a nice looking stock! Can't wait to see the finished product.
|
|
|
|
Post by 7mmfreak on Sept 21, 2014 14:43:36 GMT -5
To create light spots I lay in the decals and then paint over them in a dark brown as they should be grouped together: 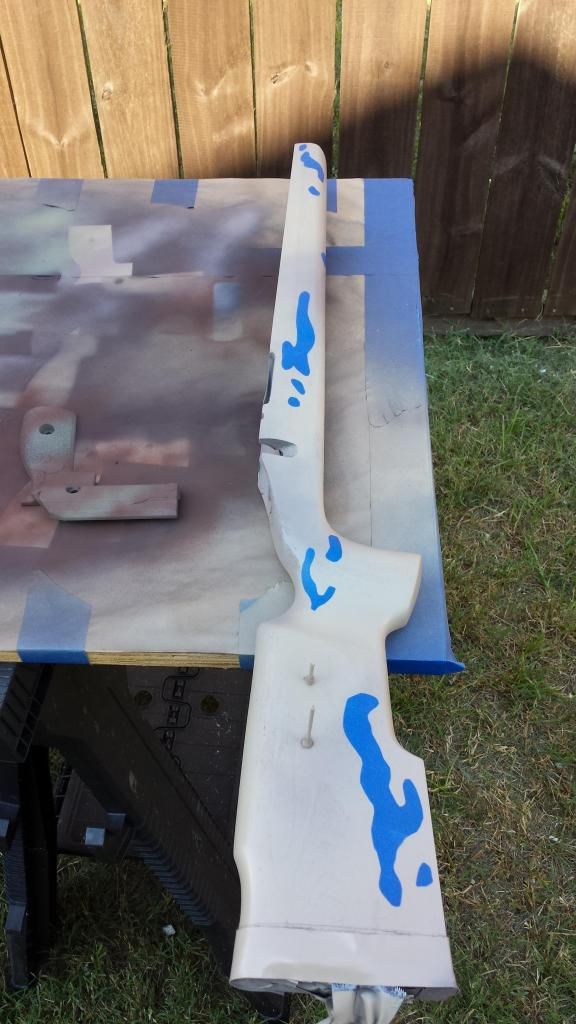 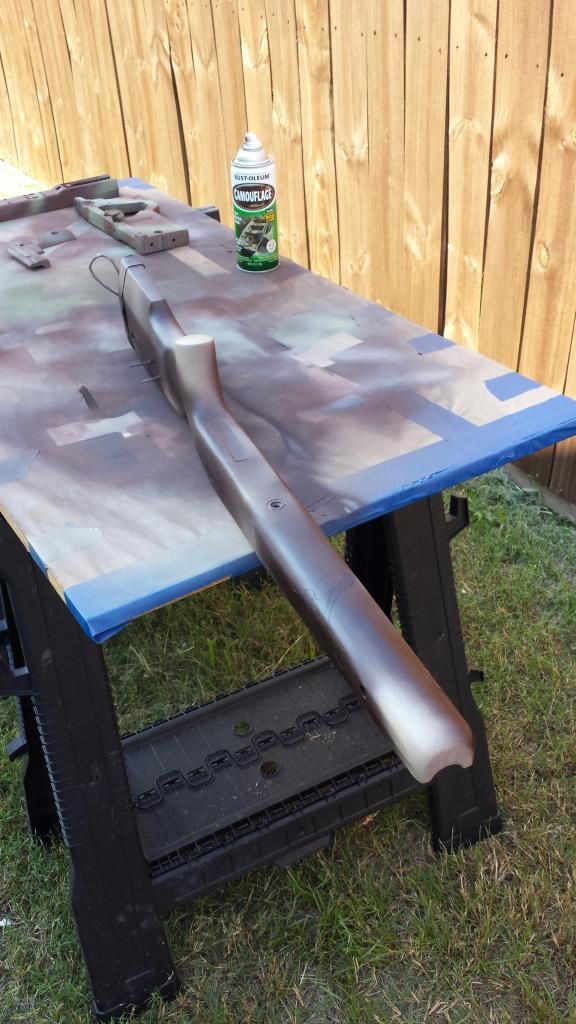 |
|
Deleted
Deleted Member
Posts: 0
|
Post by Deleted on Sept 21, 2014 14:56:53 GMT -5
OK...now this thread is just way to cool to not be a sticky!
Moderators?!
|
|
|
|
Post by 7mmfreak on Sept 21, 2014 17:06:58 GMT -5
The blue decals will be dark chocolate colored and are paired with the grey/tan color from the picture above. I just did the reveal on the match rifle skins and they are sitting next to the Green Beanie stock. My dark brown paint wasn't playing nice with the plastic of the skins so I am going to have to go back and add it in but the Green Beanie should finish up similar to those skins. 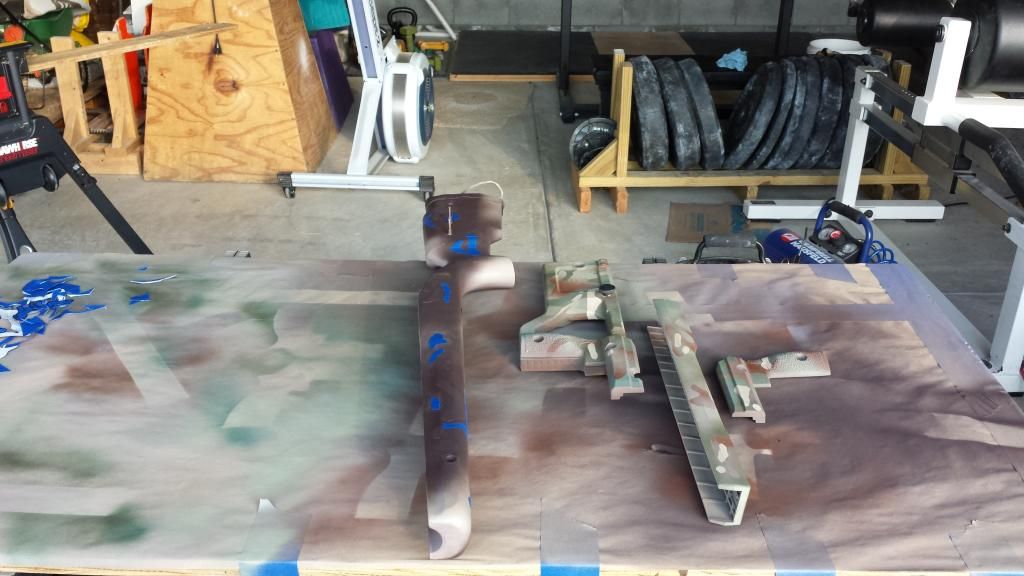 I am going to let the brown dry overnight and tomorrow I will do the last two coats. |
|
|
|
Post by jims on Sept 21, 2014 19:09:33 GMT -5
Looking good.
|
|
|
|
Post by mtj555 on Sept 22, 2014 3:38:13 GMT -5
Keith looks good! I wish I had the time and skills to do that. Watch out for the static line misrouted through short sewn portion chin-strap. Looking forward to getting back and doing some range sessions.
|
|
|
|
Post by 7mmfreak on Sept 22, 2014 6:27:23 GMT -5
Watch out for the static line misrouted through short sewn portion chin-strap. Correct, the Green Beanie was being towed by his Universal Static Line Modified misrouted through short sewn portion chin-strap. Don't worry about JMR, you're good. 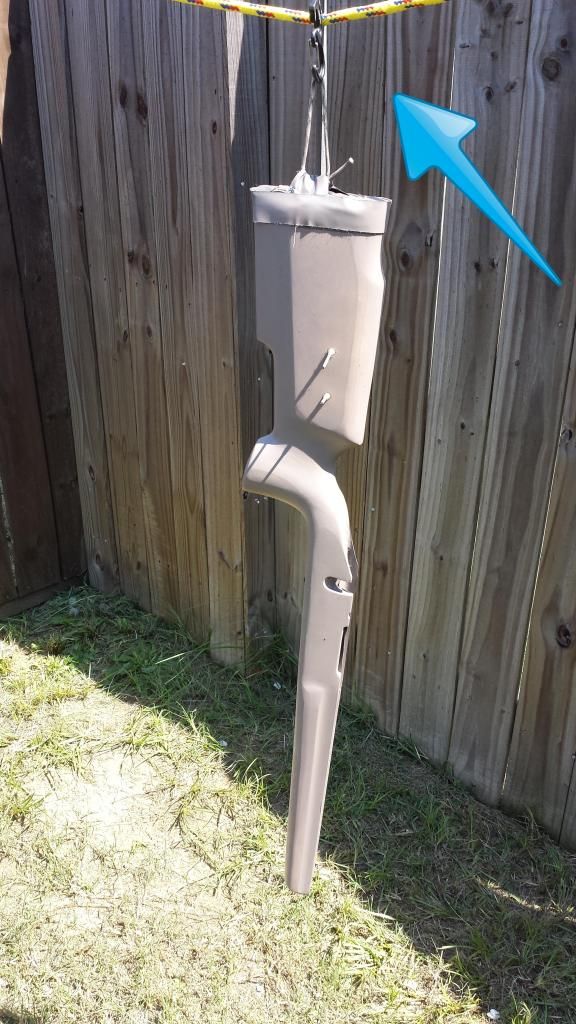 Won't be long and you'll be back and headed to TN for a shot at a big buck. |
|
|
|
Post by 7mmfreak on Sept 22, 2014 8:14:02 GMT -5
To get the mid fade you need a light loam green and a red brown color. The goal is about a 50-50 coverage running in stripes that have some fade to them. I run them at a diagonal so that when I come back for the next coat I can run the other direction (criss cross) to achieve a non-polarizing effect: 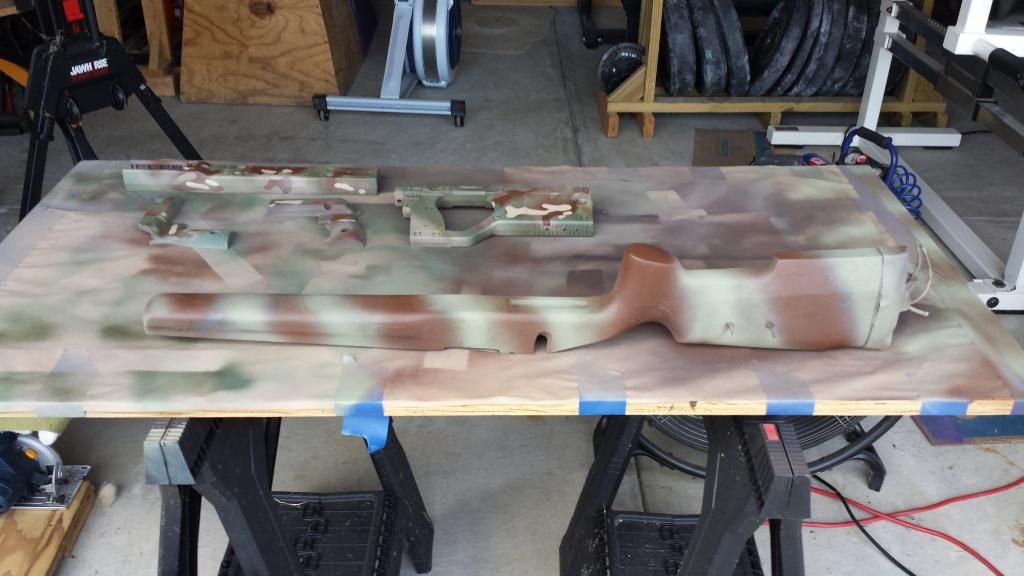 Now that we have a micro detail in light grey/tan and dark brown and macro detail in loam green and red brown we need larger pattern stencils: 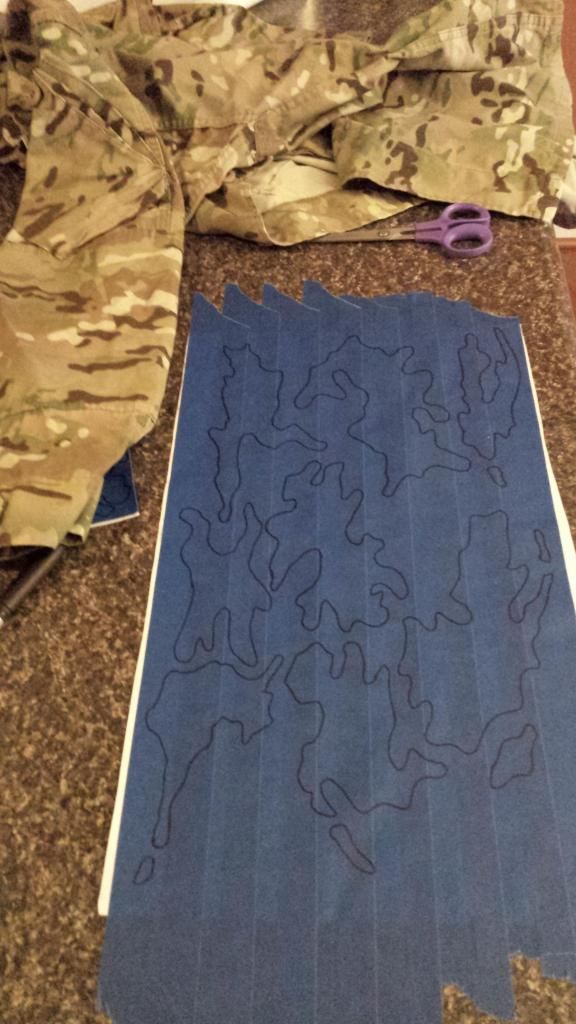 |
|
|
|
Post by airborneike on Sept 22, 2014 12:45:17 GMT -5
At ease in the harness jumper, spoken like a true JM  I vote for a sticky...great post 7mmfreak |
|
|
|
Post by 7mmfreak on Sept 22, 2014 12:55:25 GMT -5
Thanks for the compliments guys. My wife says this looks really tedious but I get in the zone and it seems to go by quickly. I only work on it for a few minutes at a time then wait a few hours and have another go at it. Macro detail in place over mid fade: 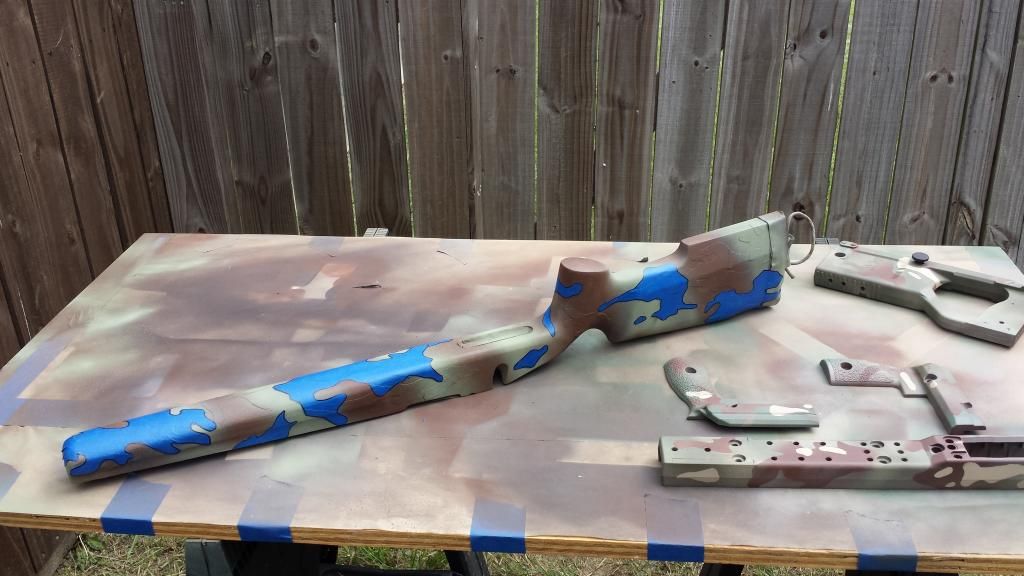 And final fade is tan, olive drab green, and another weird but slightly brighter loam green: 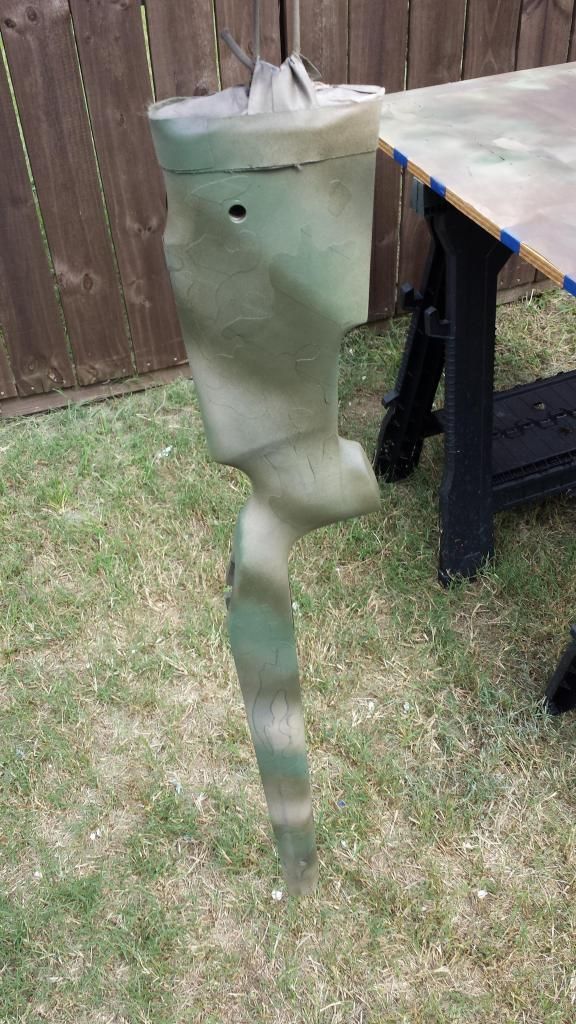 |
|
|
|
Post by 7mmfreak on Sept 22, 2014 14:35:57 GMT -5
All decals removed you have something that looks similar to Multi-Cam:  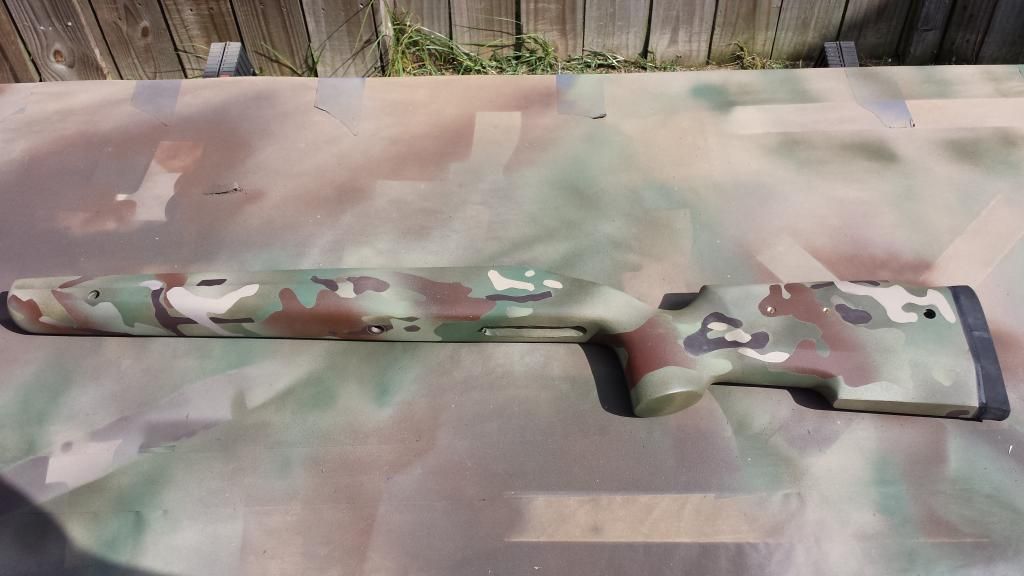  Now, I am clear coating it to flatten out the shine and protect all the edges where paint colors come together and have a tiny seam. After that I will un-mask the bedding. |
|
|
|
Post by 7mmfreak on Sept 22, 2014 15:10:22 GMT -5
All the tape is gone and the stock is matte clear coated. Just needs to sit in the garage a while to ensure that the paint is completely dry and tack free:  |
|
Deleted
Deleted Member
Posts: 0
|
Post by Deleted on Sept 22, 2014 15:13:36 GMT -5
neat stuff! looks great!
|
|
|
|
Post by 7mmfreak on Sept 23, 2014 7:46:06 GMT -5
The Green Beanie is finished. Quick Re-Cap: Remington 700ML with Hunter Bolt Nose Kit PT&G .187" stainless lug McGowen CM 1-24" .442/.451" barrel in a modified Douglas 5A contour crowned at 23", threaded for a muzzle-break Trigger is blueprinted factory and adjusted to 2.25# All CM parts are finished in Graphite Black Cerakote Scope base is Murphy Ti 10 MOA (Devcon bedded, screws siliconed and torqued to 25 in*lbs) Boyd's Tacticool (modified and pillar/glass bedded) Sorry for the poor pictures but the weather is terrible this morning and I didn't feel like getting wet or cleaning guns that got rained on. Here it is on the benchrest equipment. The rifle in front of it is there because in all of the pictures of the Beanie's stock you could see the skins from that chassis getting painted as well:  Cheek-piece mounted and Push-Button QD insert: 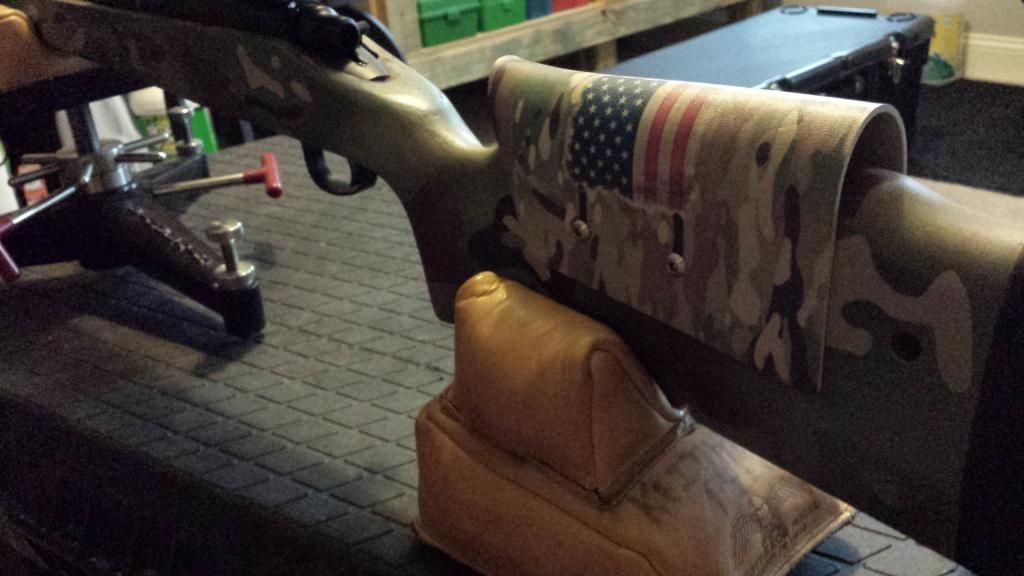 Set up with sling in place (for pics only, it won't work like that on the BR set-up): 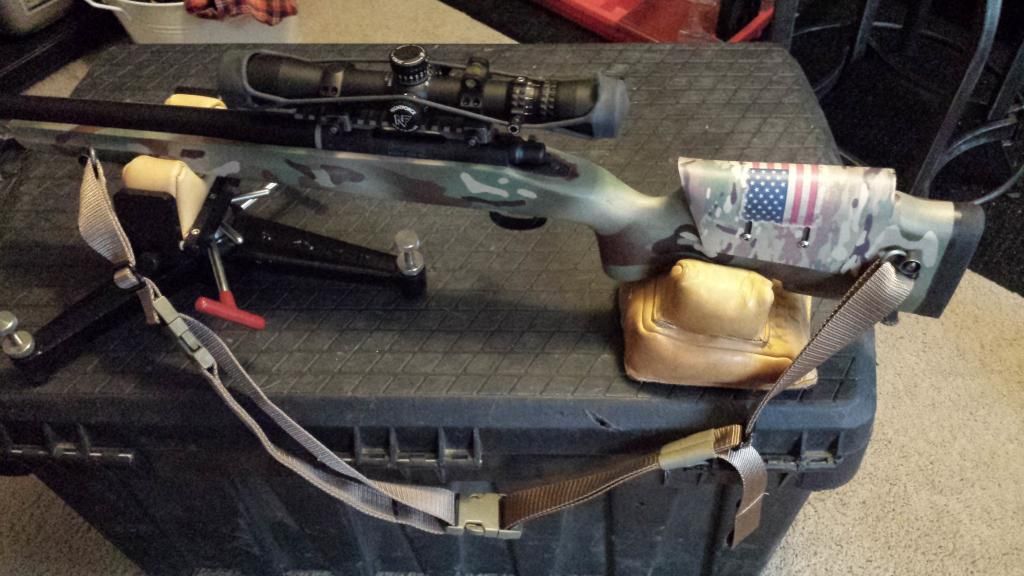 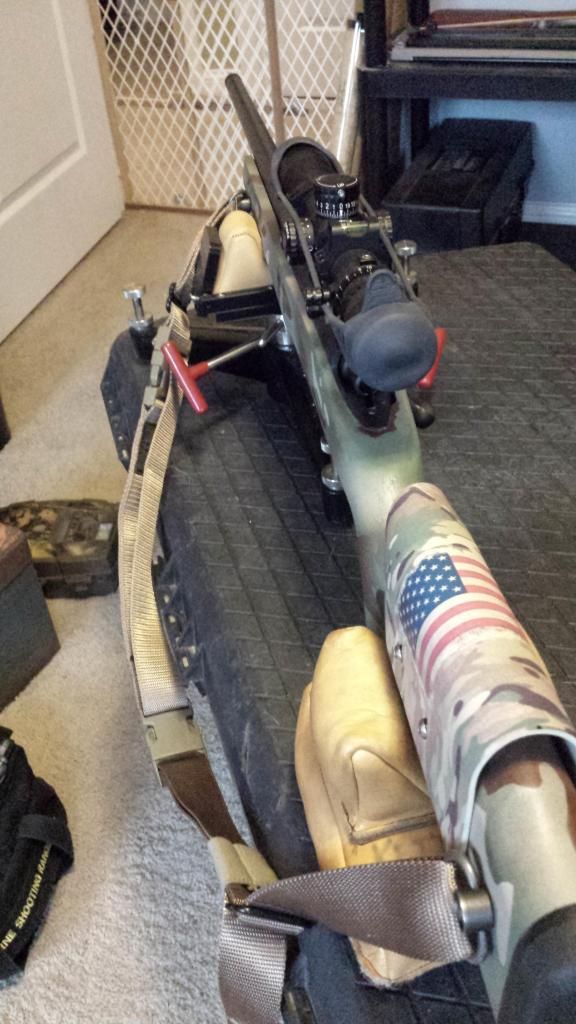 The brake I got at a match last year from Templar Customs (they use it on .458 SOCOM): 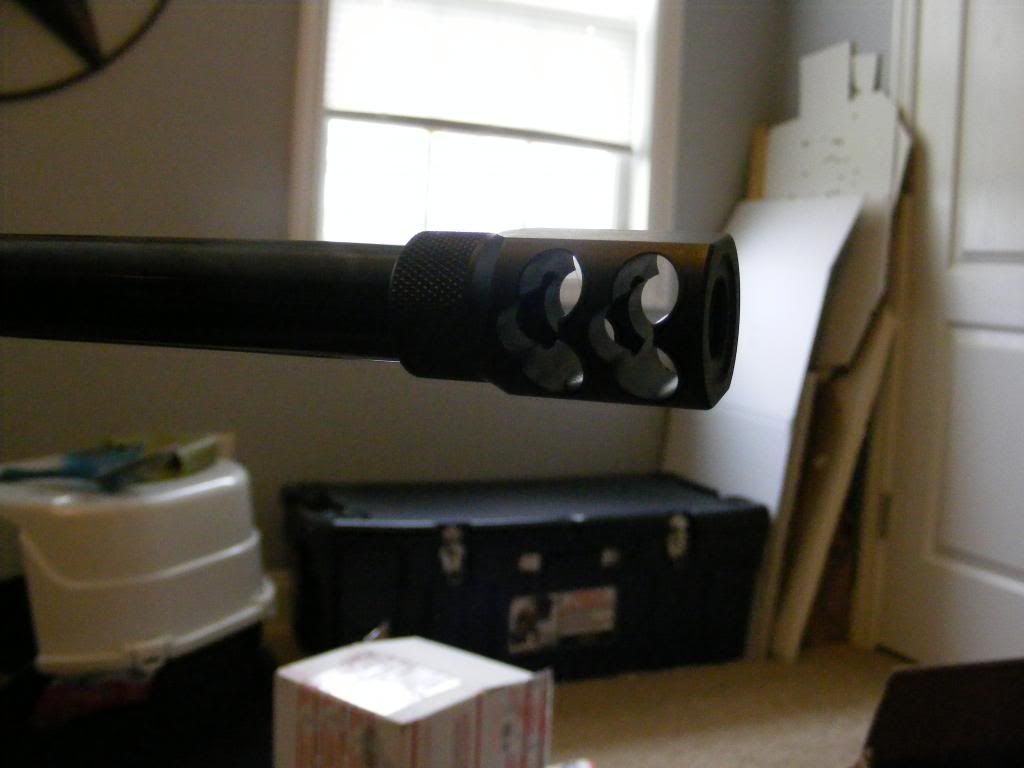 Powder/Bullet funnel: 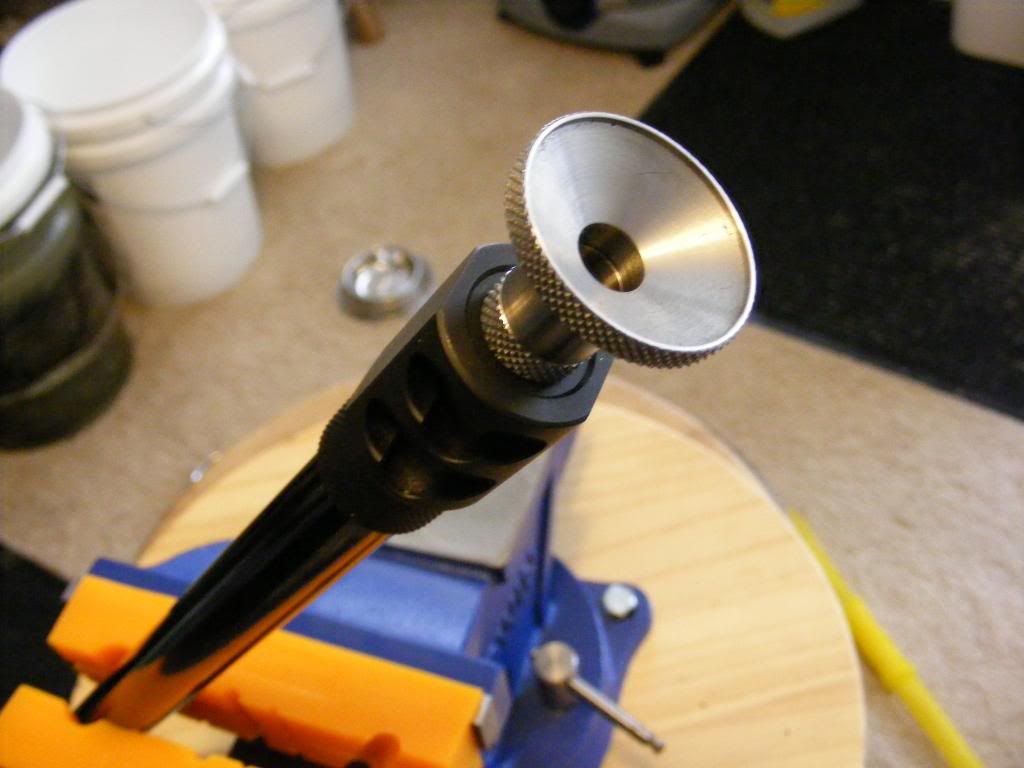 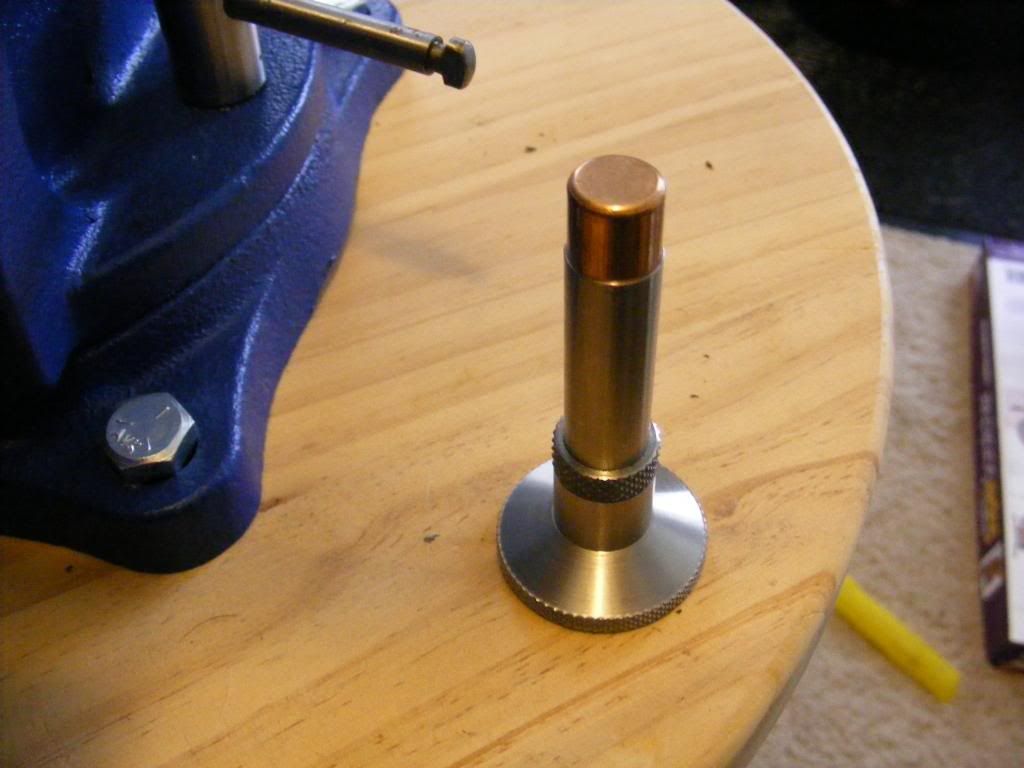 Bullet starter: 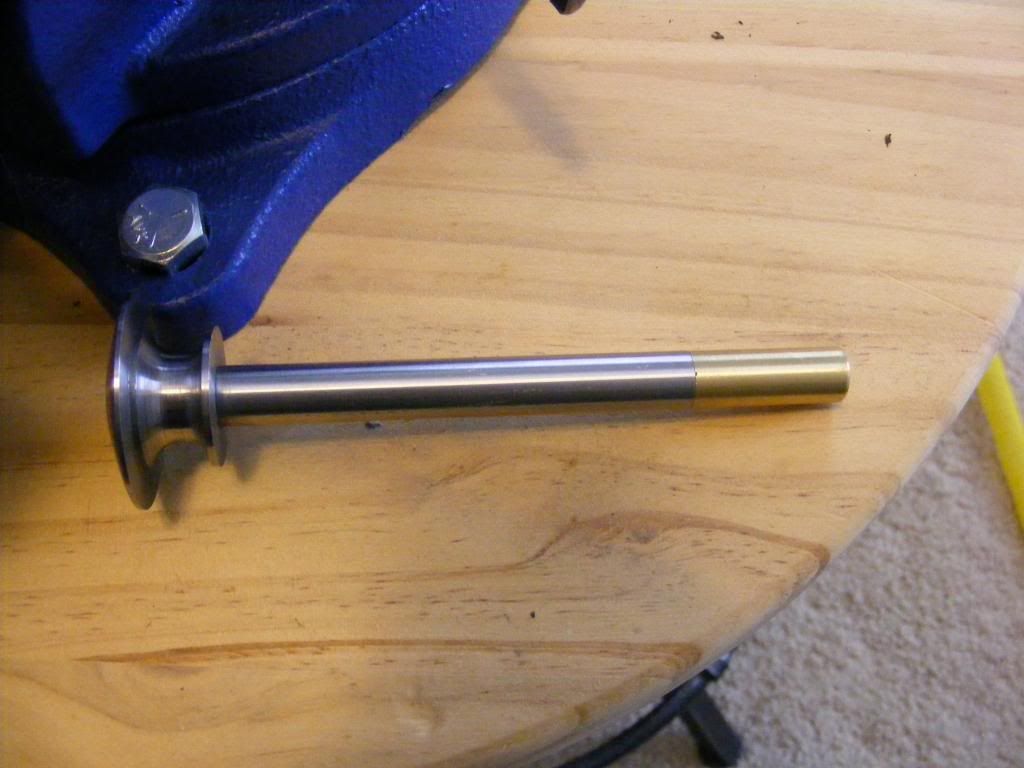 Bullets sized in the dual bushing smooth/full form die: 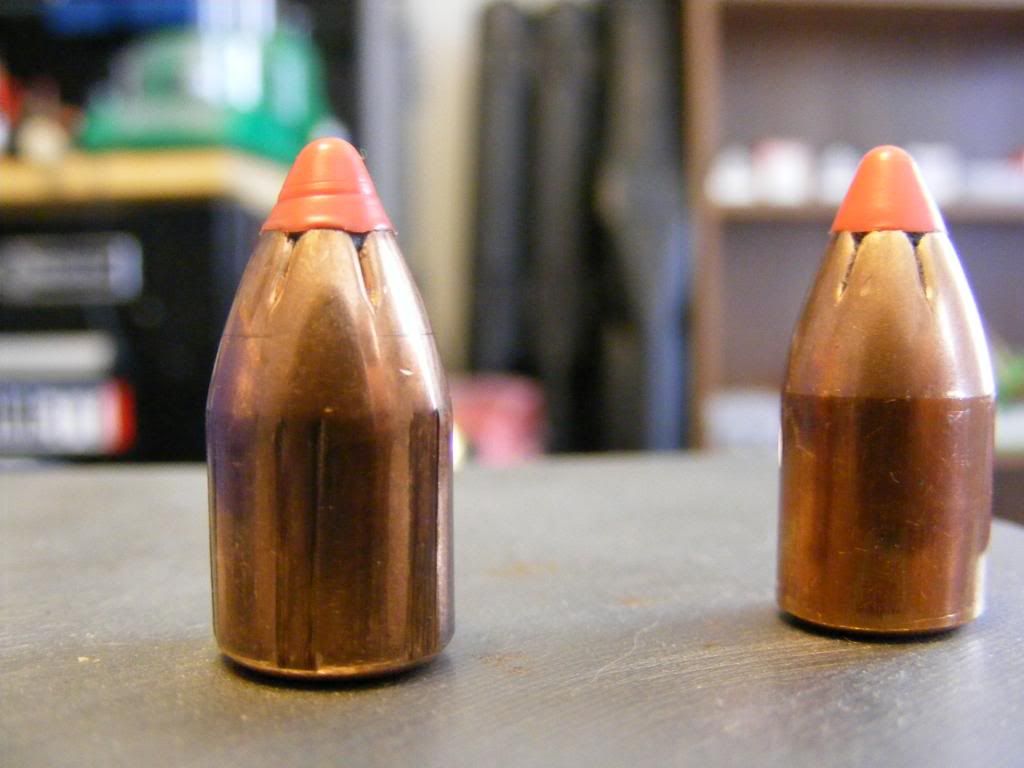 |
|
|
|
Post by rambler on Sept 23, 2014 7:58:22 GMT -5
Can you send me that scope, i'll pay for shipping  |
|
|
|
Post by 7mmfreak on Sept 23, 2014 8:00:58 GMT -5
I almost forgot, it balances 1/3" behind the front action screw. Tough to make a 12# rifle balance properly but I almost nailed it.
|
|
|
|
Post by bestill on Sept 23, 2014 8:02:39 GMT -5
Rite on. I want one?
|
|
Deleted
Deleted Member
Posts: 0
|
Post by Deleted on Sept 23, 2014 8:18:36 GMT -5
very nice rig, looking forward to some groups..
|
|
|
|
Post by 7mmfreak on Sept 23, 2014 8:32:17 GMT -5
Can you send me that scope, i'll pay for shipping Sure, just make sure she's home by 9PM sharp. |
|
|
|
Post by rambler on Sept 23, 2014 8:42:49 GMT -5
The first Christmas the wife and I had together, knowing I'm an avid hunter, she bought me a set of night vision binoculars. Little did she know you can't hunt deer after dark.
That is a really bad ask scope on that unit!!
|
|
Deleted
Deleted Member
Posts: 0
|
Post by Deleted on Sept 23, 2014 8:43:00 GMT -5
Who made the funnel?
|
|
|
|
Post by 7mmfreak on Sept 23, 2014 8:51:14 GMT -5
Myers,
From my first post:
Mike is a friend, brother in arms, and an artist with metal: more to follow on that when I post the complete project. I don't get to see him as freely as I would like but he has been inspirational as a man and artisan.
He did all the metal work except the Cerakote. He made the funnel and starter. The dies are his dies (he posted a how to on here a while back) and as far as I know was the first to make a dual capability die. He is a quiet and humble guy who stays out of the spot light but everyone needs recognition now and again.
|
|
Deleted
Deleted Member
Posts: 0
|
Post by Deleted on Sept 23, 2014 9:11:23 GMT -5
Got ya, I was impressed with the funnel those would be some tough little knurls to pull off. He definitely has more talent than he would claim.
|
|