Remington 700ML or Savage .45 Conversion?
Jan 22, 2012 13:57:52 GMT -5
Post by DBinNY on Jan 22, 2012 13:57:52 GMT -5
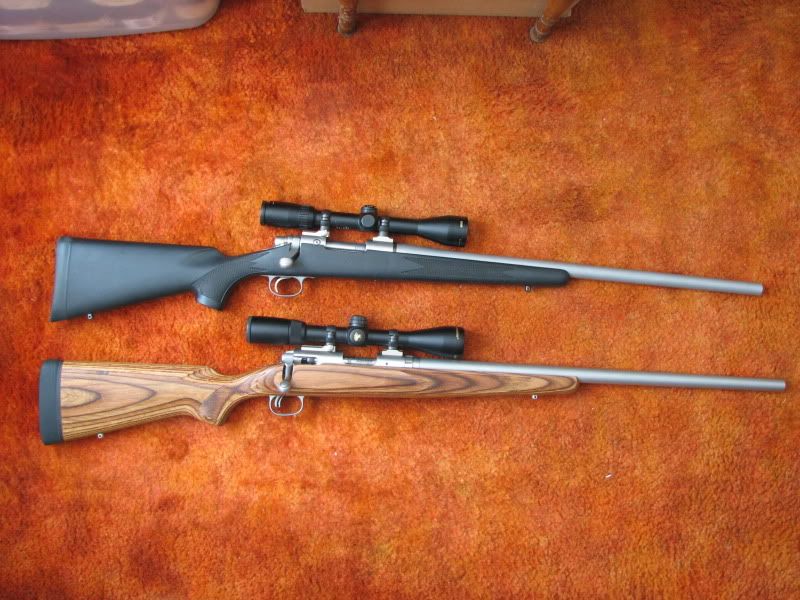
Having done one of each I'll share my thoughts. Both guns have the 25" Pacnor 22 twist .45 DD barrels chambered for the Savage breech plug. The Savage has the 7 contour and the Remington is the Sendero. I did not invent any wheels here but used info gathered from Richard, Fishhawk, Hillbill and other board members as guidance. The Savage is in the factory laminate stock and the Remington is the lovely factory injection molded plastic original. Having done the Savage first, the goal for the Remington was to have a little lighter all weather beater that I didn't have to worry about scratching etc. I was not overly concerned about the looks of the Remington stock but it turned out looking pretty good to me. The Savage is a time tested winner. I haven't shot the Remington much but the initial sight in and first season hunting results were very encouraging.
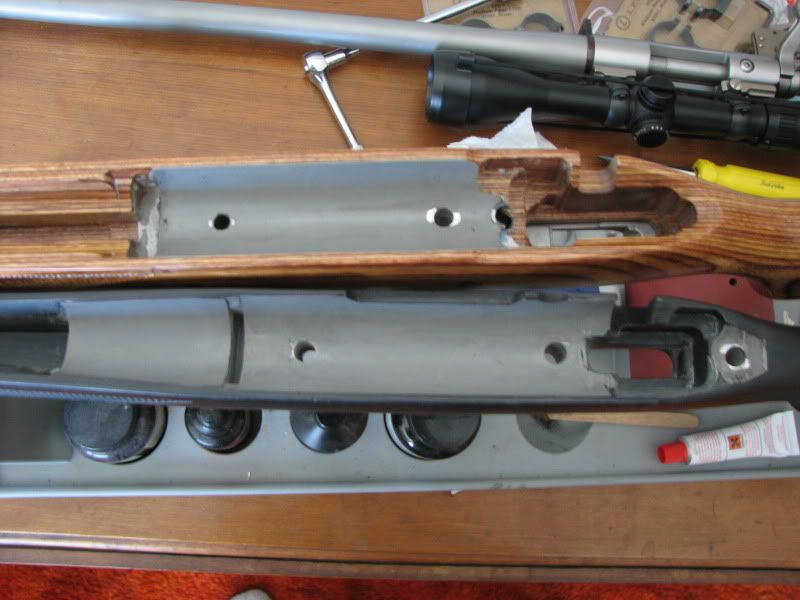
I added the third pillar to the Savage (the one in front of the trigger guard) and pillared all three action screws in the Remington. I did not upgrade the front trigger guard screw on the Remington but built the pillar to do so if ever needed. I made all the pillars from 1/2" aluminum stock on a unimat lathe. All the bedding is JB weld. I found the wood more fun to work with as that plastic really likes to load up sand paper. The plastic also requires a lot of hole drilling to provide mechanical lock because the epoxy doesn't necessarily like to stick to the stuff. As you can see, the tang is bedded on the Rem and floating on the Savage. I also bedded the initial portion of the barrel on the Rem like Hillbill does in an attempt to stiffen the forearm. The Savage was a near perfect fit but the Sendero on the Remington required a lot of barrel channel relief to be properly floated. I also found a black sharpie tamed with a little steel wool to greatly enhance the show line.
I also sprayed some of that expanding foam into the butt stock on the Remington to take some of the ring out of it. I put a grind fit kick-eze recoil pad on the Savage.
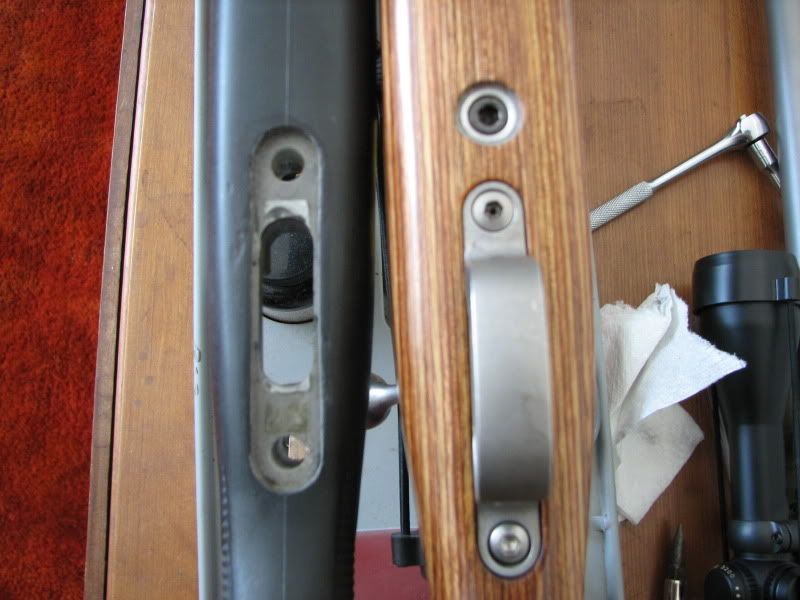
Lacking Fishhawk's end mill, I took the pillars down under the trigger guard on the Remington with sandpaper and a hand grinder. This was relatively ugly so I just bedded the trigger guard right over the ugly. My thinking here was that a little epoxy and a lot of aluminum was superior to a little plastic and a lot of air. On the right is the bottom of the third pillar on the Savage.
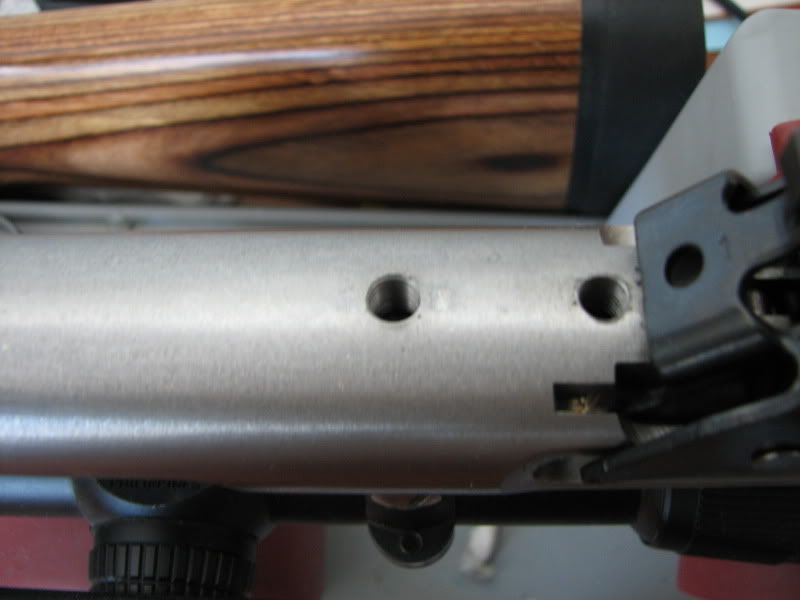
The most intimidating step in all of this (at least for those who haven't done it) is drilling and tapping the receiver on the Savage for the third pillar screw. I did this with a drill press and I also had a tap holder that went in the drill press. The key here is just taking your time being very careful. You want thought to exceed action.
In summary, both of these projects were fun, challenging and rewarding. Both guns shoot well. Complete with scope, the Savage weighs 10 1/2+ and the Remington weighs about 9 1/2. The Remington is decidedly easier to get your hands around. I like them both!
I added the third pillar to the Savage (the one in front of the trigger guard) and pillared all three action screws in the Remington. I did not upgrade the front trigger guard screw on the Remington but built the pillar to do so if ever needed. I made all the pillars from 1/2" aluminum stock on a unimat lathe. All the bedding is JB weld. I found the wood more fun to work with as that plastic really likes to load up sand paper. The plastic also requires a lot of hole drilling to provide mechanical lock because the epoxy doesn't necessarily like to stick to the stuff. As you can see, the tang is bedded on the Rem and floating on the Savage. I also bedded the initial portion of the barrel on the Rem like Hillbill does in an attempt to stiffen the forearm. The Savage was a near perfect fit but the Sendero on the Remington required a lot of barrel channel relief to be properly floated. I also found a black sharpie tamed with a little steel wool to greatly enhance the show line.
I also sprayed some of that expanding foam into the butt stock on the Remington to take some of the ring out of it. I put a grind fit kick-eze recoil pad on the Savage.
Lacking Fishhawk's end mill, I took the pillars down under the trigger guard on the Remington with sandpaper and a hand grinder. This was relatively ugly so I just bedded the trigger guard right over the ugly. My thinking here was that a little epoxy and a lot of aluminum was superior to a little plastic and a lot of air. On the right is the bottom of the third pillar on the Savage.
The most intimidating step in all of this (at least for those who haven't done it) is drilling and tapping the receiver on the Savage for the third pillar screw. I did this with a drill press and I also had a tap holder that went in the drill press. The key here is just taking your time being very careful. You want thought to exceed action.
In summary, both of these projects were fun, challenging and rewarding. Both guns shoot well. Complete with scope, the Savage weighs 10 1/2+ and the Remington weighs about 9 1/2. The Remington is decidedly easier to get your hands around. I like them both!