

stock texturing
Dec 17, 2009 0:04:42 GMT -5
Post by rossman40 on Dec 17, 2009 0:04:42 GMT -5
Stock Texturing
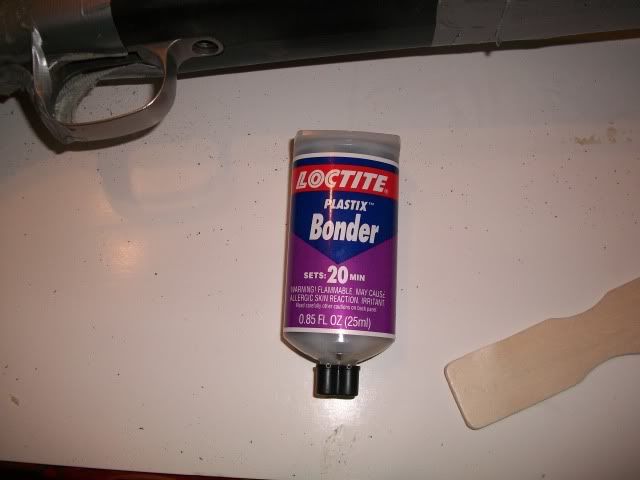
Adding texture to a synthetic stock is nothing new. I’ve done it numerous times but usually used some hardcore epoxies that when done left some texture that could cut you. While visiting a friend he was helping his daughter with a school project and he was using a epoxy that I have never used before, Loctite Plastix Bonder. It seemed to me that when cured it was a bit rubbery, then the light bulb turned on. This stuff would be great for texturing stocks. So being bored I bought some and thought I would try it on my Savage 10ML synthetic stock.
It comes in a dual syringe package that contains .85oz, the perfect amount to do the side panels and pistol grip. Look for it at Lowes or Home Depot.
You want to use a product that has a fairly quick set time, 10 to 20 minutes. I have done it before with say Devcon liquid and think I had the texture I wanted and then leave and when I come back it has “flowed” or smoothed out.
Tools needed would be a Dremel tool, some tape, a razor knife (or a super sharp leatherman), some break cleaner and a flat stick like a tongue depresser or a paint stirrer.
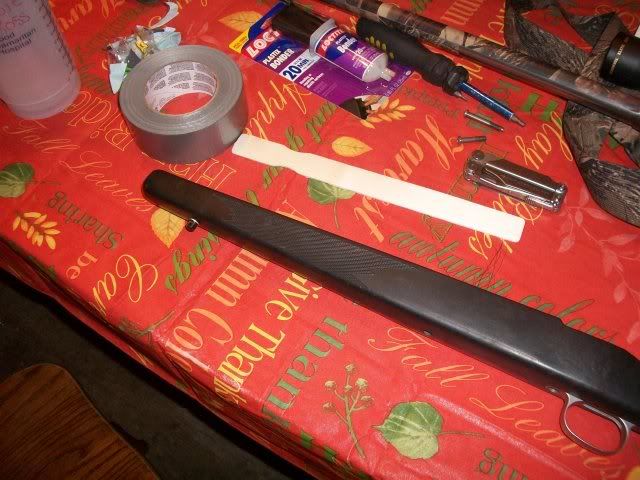
To prep the stock determine the area you want to texture and mark it off. I roughed up the area I want to texture using a rasp bit in a Dremel tool on low speed. To get detail on the edges use the back edge of the bit. I couldn’t find my blue painters tape so I used the old stand-by, duct tape to tape off the area to be textured.
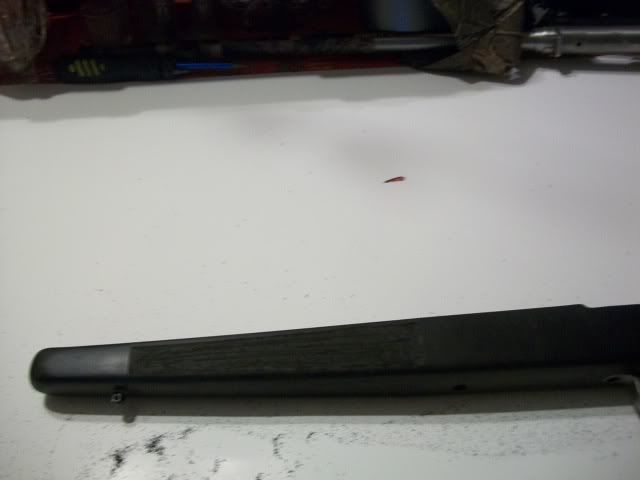
I would just do one panel first to get your technique down. Once you got the area prepped and cleaned with the brake clean mix up between a fourth and a third of the tube and put the entire amount in a layer on the area. You might have to wait a few minutes but then start spanking the epoxy with the flat side your stick, when it gets the right “set” it will start to peak like the meringue on your grandma’s lemon meringue pie. With the Plasitx Bonder it seems to look yellow when it gets thin at the top of the peaks, do not worry about it. If epoxy builds up on your stick and you stop getting the texture you want just wipe off the excess on your stick. Once you have the texture you want stop and let it finish setting. If for some reason you did not get the texture you liked, let it finish setting, grind it off and start over.

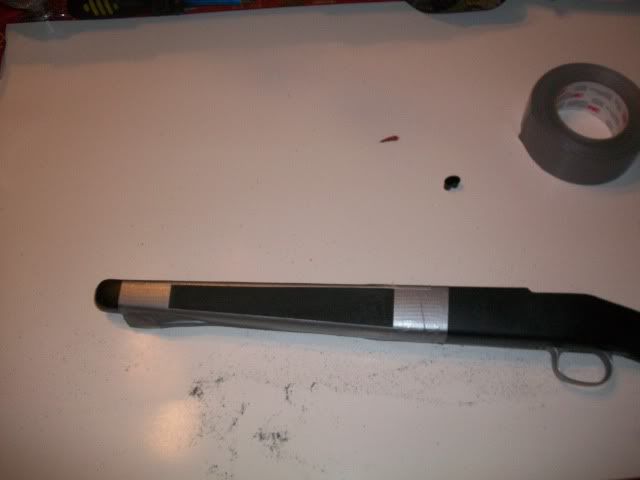
With the Plastix Bonder I waited about 8-12 hours and rubbed it and the very thin tops of the peaks just broke off. I then took the razor knife and cut right along the edge of the tape (prevents rising the epoxy up on the area you textured) and the removed the tape. Now the Plastix Bonder will be fully set in 24hrs. One thing I did notice is the Plastix Bonder doesn’t like the brake cleaner I used when I used it to remove some tape glue. Also the Plastix Bonder once fully set wasn’t as rubbery as I hoped but enough to give a “gripier” surface then other epoxies I have used in the past plus no super sharp points. Works great with gloves and still "soft" enough to use without gloves. In the rain on opening day it worked well when using gloves and in the snow later in the week.
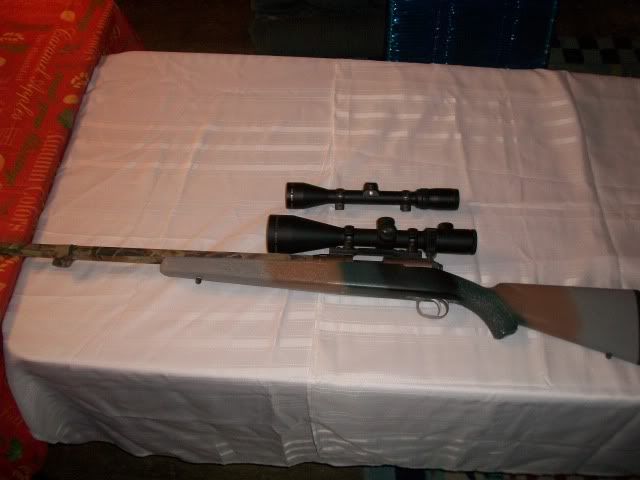
To finish the job I sanded the stock (not the textured areas) and then put a base coat of Krylon Fusion textured paint on the stock and then did a simple camo paint job.
I ended up with a job that I thought the deer would line up for a chance to get shot with a rifle that looked so good.
Adding texture to a synthetic stock is nothing new. I’ve done it numerous times but usually used some hardcore epoxies that when done left some texture that could cut you. While visiting a friend he was helping his daughter with a school project and he was using a epoxy that I have never used before, Loctite Plastix Bonder. It seemed to me that when cured it was a bit rubbery, then the light bulb turned on. This stuff would be great for texturing stocks. So being bored I bought some and thought I would try it on my Savage 10ML synthetic stock.
It comes in a dual syringe package that contains .85oz, the perfect amount to do the side panels and pistol grip. Look for it at Lowes or Home Depot.
You want to use a product that has a fairly quick set time, 10 to 20 minutes. I have done it before with say Devcon liquid and think I had the texture I wanted and then leave and when I come back it has “flowed” or smoothed out.
Tools needed would be a Dremel tool, some tape, a razor knife (or a super sharp leatherman), some break cleaner and a flat stick like a tongue depresser or a paint stirrer.
To prep the stock determine the area you want to texture and mark it off. I roughed up the area I want to texture using a rasp bit in a Dremel tool on low speed. To get detail on the edges use the back edge of the bit. I couldn’t find my blue painters tape so I used the old stand-by, duct tape to tape off the area to be textured.
I would just do one panel first to get your technique down. Once you got the area prepped and cleaned with the brake clean mix up between a fourth and a third of the tube and put the entire amount in a layer on the area. You might have to wait a few minutes but then start spanking the epoxy with the flat side your stick, when it gets the right “set” it will start to peak like the meringue on your grandma’s lemon meringue pie. With the Plasitx Bonder it seems to look yellow when it gets thin at the top of the peaks, do not worry about it. If epoxy builds up on your stick and you stop getting the texture you want just wipe off the excess on your stick. Once you have the texture you want stop and let it finish setting. If for some reason you did not get the texture you liked, let it finish setting, grind it off and start over.
With the Plastix Bonder I waited about 8-12 hours and rubbed it and the very thin tops of the peaks just broke off. I then took the razor knife and cut right along the edge of the tape (prevents rising the epoxy up on the area you textured) and the removed the tape. Now the Plastix Bonder will be fully set in 24hrs. One thing I did notice is the Plastix Bonder doesn’t like the brake cleaner I used when I used it to remove some tape glue. Also the Plastix Bonder once fully set wasn’t as rubbery as I hoped but enough to give a “gripier” surface then other epoxies I have used in the past plus no super sharp points. Works great with gloves and still "soft" enough to use without gloves. In the rain on opening day it worked well when using gloves and in the snow later in the week.
To finish the job I sanded the stock (not the textured areas) and then put a base coat of Krylon Fusion textured paint on the stock and then did a simple camo paint job.
I ended up with a job that I thought the deer would line up for a chance to get shot with a rifle that looked so good.


