|
|
Post by 7mmfreak on May 23, 2015 6:57:32 GMT -5
I have been slammed busy and haven't had a chance to shoot the gun that Jeff barreled for me recently. We have a four-day weekend in observance of Memorial Day so I have a chance to get some shooting and gun work done. I was going to shoot it yesterday but I didn't have a 1/2" socket that would fit inside of my bolt raceway. I wanted to go shoot, not to the store, so I grabbed a couple of pistols and my match rifle and headed to the range. It's just as well that I chose other guns because the McMillan stock on this rifle is not good to go yet. As I mentioned in the Billy Goat Gruff thread, the inletting is a little off: The pillars that McMillan installed are not square to the centerline 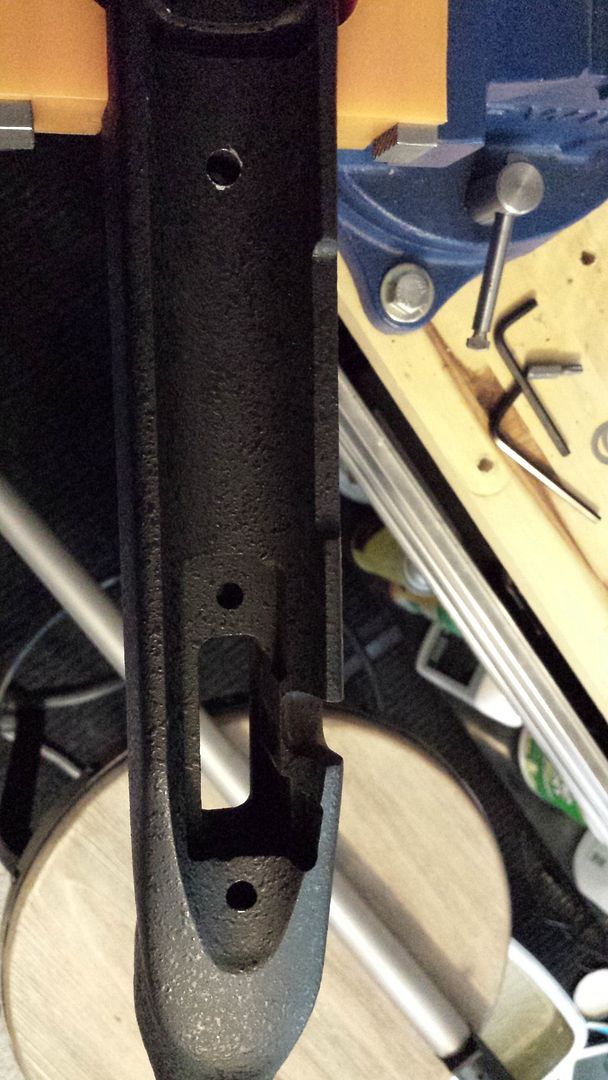  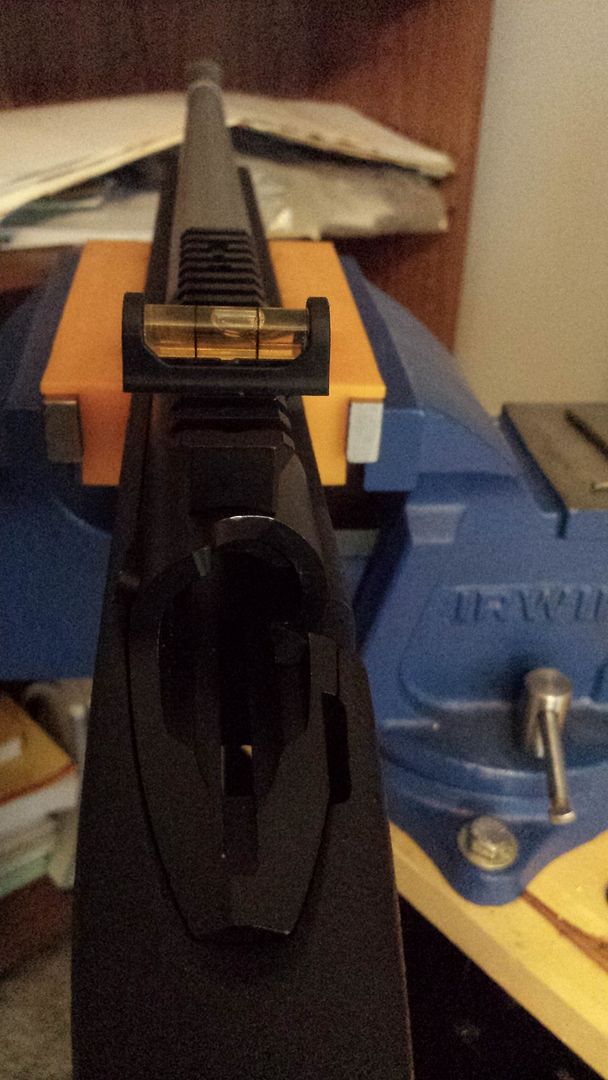 Someone asked in the other thread if the scope mount could have been off and I said cross-test levels said no. Here you can see that the same crooked pillars place the trigger significantly off center in the trigger well (not sure how well you can see it but it is noticeable, especially when the trigger guard is in place but is nearly impossible to photograph like that)  Last, but not least, is the trigger guard inletting: I need to either mill off a portion of the guard at the top or deepen the inlet as the triggerguard is sitting proud 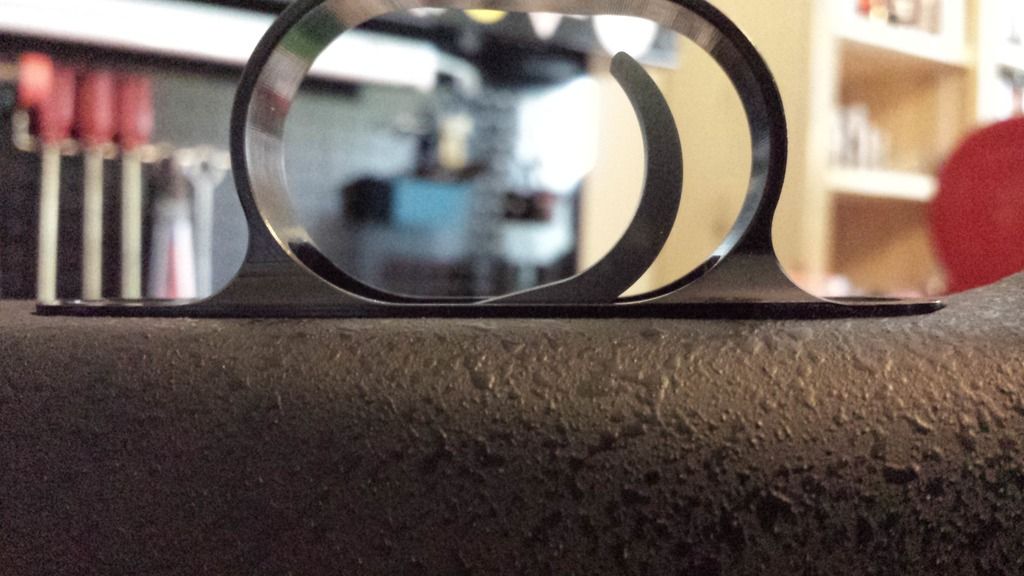 There is also a fulcrum somewhere because when you tighten (snug) the rear action screw the trigger-guard raises in the front (this is why I bed them with a bushing up front, to eliminate any stress by a trigger-guard screw)  Additionally, the stock had an ADJ LOP spacer kit on it which I removed and installed on a rimfire trainer. When I ordered a 1" Pachmayr Decelerator from McMillan, ground to fit an A2 spacer system, I received a pad for an A5: The toe on the A5 is flat like a Boyd's Tacticool (only it is actually square, not bevelled like all the Tacticools I have seen) and the comb is polygonal instead of elliptical:  The screws were also too long to work without spacers; McMillan only has 3" and 3.5" screws 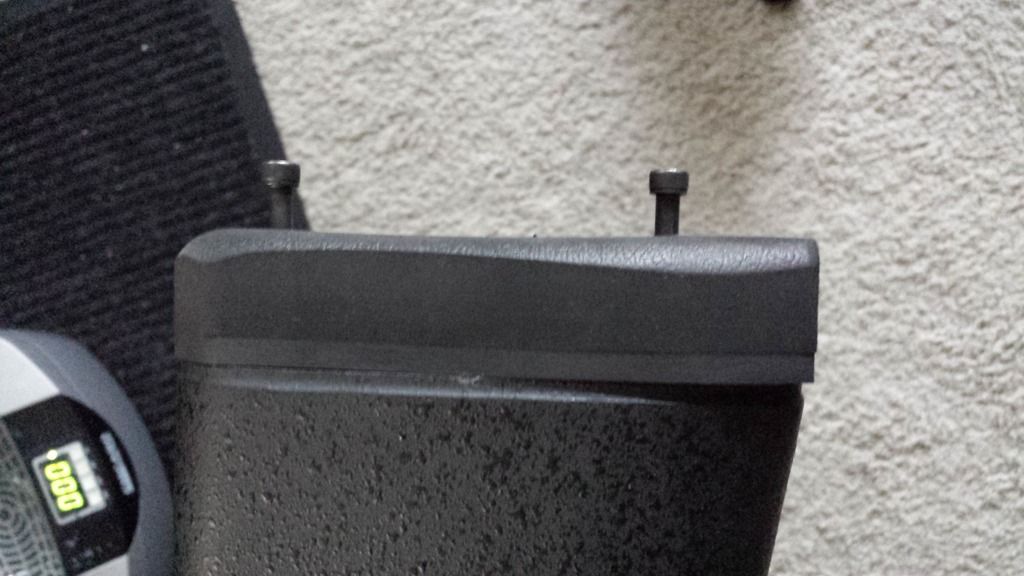 Their website says the screws are 1/4-20, which they are not, they actually are 10-24. I bought some 1.5" screws yesterday at the local hardware store, along with a box of .30-30Win for the Marlin 336 .30-30AI. A quick call to Eileen a week or so ago got the issue fixed. She mailed out a new A2 pad that day and just said send her back the A5 pad. I installed it yesterday morning  While I will not use Shilen barrels, I do think they make good triggers. These are very good triggers that are less complicated than a Jewell and better suited to a field gun. This one is currently set at 1.5# while I do the testing with this gun. It will back up to 2.5# for hunting. I have had this one on a 7mm Rem Mag for testing but just changed it over to this gun: It has no bolt stop/release as the action has an integral unit  I had to buy a Rifle Basix safety kit for the trigger as it ships without safety  I'm going to shoot it as is just to do a before and after test, non-bedded vs bedded. I have the pillars, I just need to take care of the inletting, and glue it all up. I just need to go buy a 1/4" drive socket (thanks for the heads up Bill) so I can pull the breech-plug and clean the barrel prior to test firing. |
|
|
|
Post by jims on May 23, 2015 7:11:24 GMT -5
Good photos and write up.
|
|
|
|
Post by Dave W on May 23, 2015 8:56:12 GMT -5
Nice post, you make it easy even for this dummy to understand.
|
|
Deleted
Deleted Member
Posts: 0
|
Post by Deleted on May 23, 2015 9:25:36 GMT -5
Holy smokes, Love the pictorial!
Thanks Keith!
|
|
|
|
Post by rambler on May 23, 2015 10:08:09 GMT -5
Nice pics. Where do you come up with all these bizarre subject titles lol
|
|
|
|
Post by 7mmfreak on May 31, 2015 16:57:55 GMT -5
Tomorrow I am shooting with MTJ555 and I will be taking this HIS-Brux out for the first time. I keep meaning to get out with it but haven't yet. I've been shooting a lot of mid to long range with an AR and a lot of pistol; I shot 400 rounds of pistol this morning and about 500 rounds of rifle over the last two weeks. I sized a fistful of bullets today to shoot tomorrow:  1. On the left are some Hornady .452/250gn XTP I used to set up my Swinglock smooth die. I use them to get the guns on paper after I swap scopes since I don't always keep records of sight settings between guns; I know I should but I don't and it is a good opportunity to conduct a lost zero drill and work my reticle. 2. In the center are some bullets I used to set up my Hankins Full-Form die; I have misplaced my die instructions but I'm pretty sure I have a handle on the die after taking it apart and looking at it when swapping out the smooth bushing for the rifled bushing. After using them to work down the FF die I ran them through a .454 sizer, a .452 sizer, and then through the Swinglock SF die. It pretty much ironed out the rifling and left just faint traces of the rifling. It looks like Marlin Micro-Groove right now since they got run through, on multiple passes, non-indexed, just to achieve the fit I wanted. I'll shoot them over wads for some practice at alts. 3. On the right are five each of virgin smooth and full formed bullets. All of them will go down range over single charges of H4198 to see how the gun shoots unbedded. The powder funnel that Jeff provides will allow you to feed a smooth formed bullet from the top and push it down the barrel. You cannot do that with a full-formed bullet. You can, though, just barely slip it in from the under side and drop it through the brake. Give it a turn with just a touch of downward pressure and the bullet will seat in the muzzle when properly indexed. Then press the bullet home. I also took a look at the primer modules for the first time today. I think one of the reasons they probably seal well is that the module neck (not sure what Jeff call's it) ahead of the flash-hole is very thin like a cartridge case neck. Most of the other primer modules, being cut down brass, are much thicker as they cut off just ahead of the case web where it is still quite thick from being drawn. I couldn't get a good picture of them but they are obviously cut and attempting to uniform them would be a waste of time; I don't know if they will require uniforming over time like cartridge cases do as they are fired over and over. The pockets are good and tight and seating primers on the Co-Ax I can feel a positive stop:  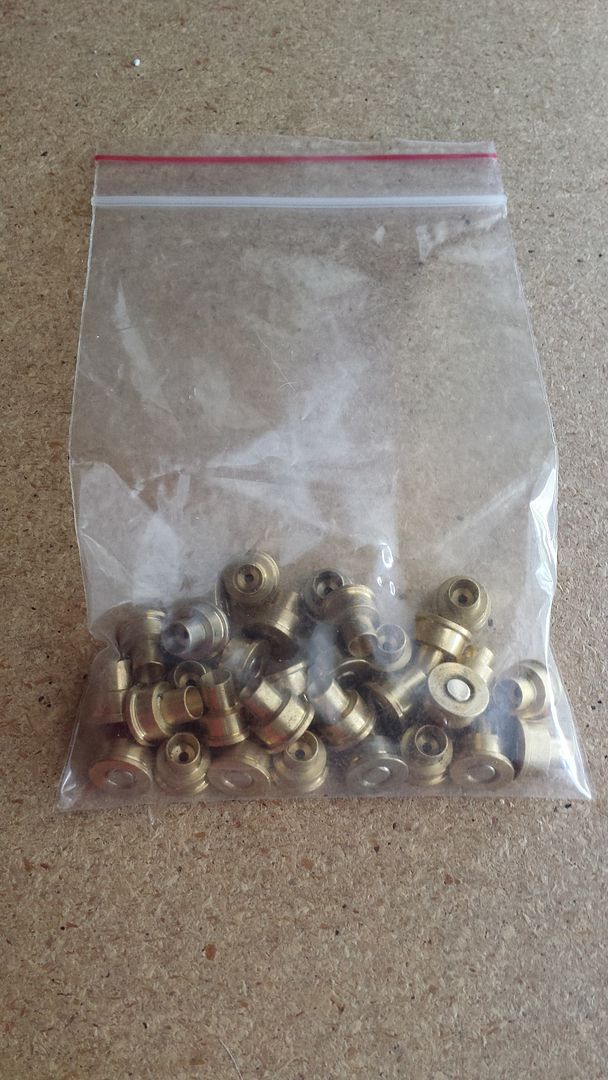 Now I just need a better way to get my stuff to the range. Since my wife is constantly doing a woodworking project I have talked to her about planing down some hardwood and making a "BESTILL" range block. While I haven't used them yet, I like the idea of a priming module vice having to slide a 209 into a dovetailed bolt nose. More importantly I like the idea of not having to wiggle and work a bulged primer out of that dovetail if and when it sticks. For those of you that have used these, do you clean them just like metallic cases and over repeated firings do primer pockets get shallower and need uniforming? |
|
Deleted
Deleted Member
Posts: 0
|
Post by Deleted on May 31, 2015 18:51:48 GMT -5
Keith,
No need to uniform the primer pockets on the HIS Modules. If you have an ultrasonic cleaner, you might want to use that on the modules after a few firings. Kyle
|
|
Deleted
Deleted Member
Posts: 0
|
Post by Deleted on May 31, 2015 18:53:33 GMT -5
By the way, glad to see that your die is back up and running. Kyle
|
|
|
|
Post by 7mmfreak on May 31, 2015 19:14:23 GMT -5
Thanks for the reply, I figured with the bushing there isn't enough pressure on the case head to cause pocket issues but thought I'd ask. I'm sorry to say the die is not back up and running yet; those are bullets I had on hand from that fateful day.
|
|
Deleted
Deleted Member
Posts: 0
|
Post by Deleted on May 31, 2015 20:04:40 GMT -5
have fun at the range Keith...
|
|
|
|
Post by 7mmfreak on Jun 1, 2015 20:52:07 GMT -5
Today was a good range day; warm but not sweltering, mirage wasn't bad until about noon and only at 300yds, and winds were steady 3mph. I took the Billy Goat Gruff (BG²) and Mike had his DMPS 6.5 Creed after swapping out the factory 5-stage trigger for a Geissele SSA-E. Once we finished up on the long range we went over to the bays and beat up a pistol rack and popper target with the belly guns. These are the "BEFORE" bedding control targets for the BG²:  They were shot in the same order they were posted above: Hornday XTP (conducted lost zero drill, impact was 2mil right), multi-formed bullets, virgin smooth, virgin full form. After my 4th shot with the XTP my ramrod ferrule cracked loose so I had to check fire and pull my brake. I just need to tap it back into place and will probably put a tiny spot of Rocksett: 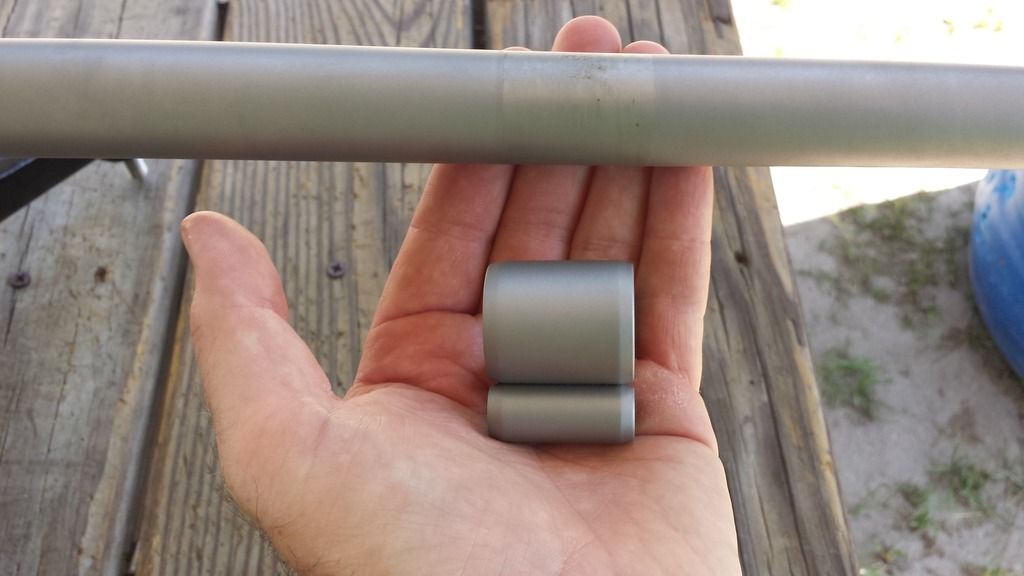 Mike also decided to brave the muzzle blast to video a shot. This video demonstrates why a good cheek weld is necessary, especially on a big gun; I think I described it as a "bobble head" effect before, First Law of Motion and all that. I need to cut the comb and install the hardware but haven't had time to do that or bed it yet. They are slow motion so skip to the last 25% if you care to watch:  There isn't much of a frame of reference here but you can see that the brake keeps the gun traveling very nearly straight back. For anyone who has shot a clean .458Lott/Win Mag/Dakota/etc you know they have quite a bit of muzzle jump and these SML are pretty similar:   I took a short break to put some rounds down range with Mike's 6.5 Creed, one each from Mike and myself(good catch Jims, I don't number so good sometimes) : 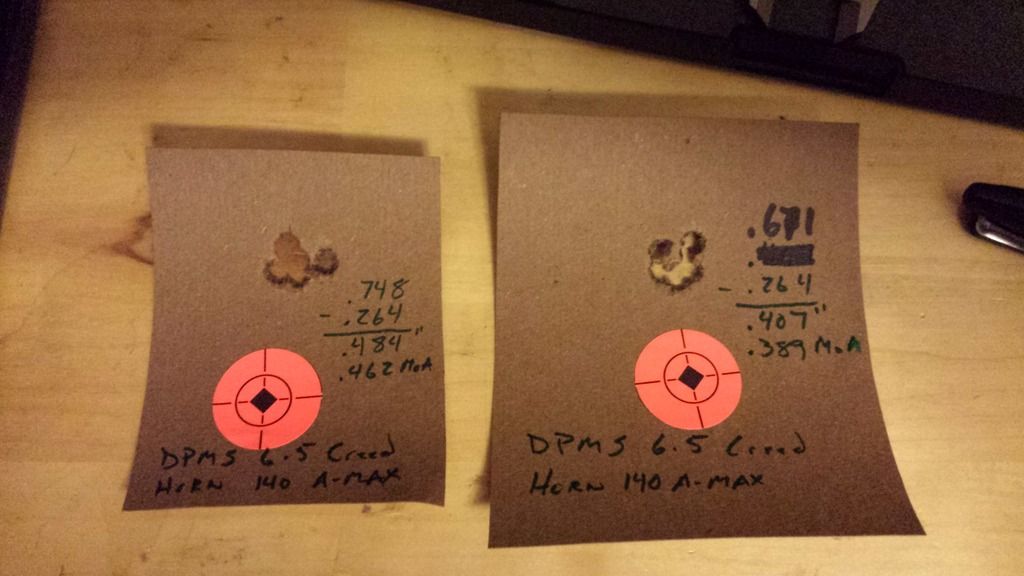 Mike also dug a few of the 316gn BOMBs out of the berm. Dirt berms are not good representations of flesh and bone but they do put a bullet to the test when it is still screaming along. I can only describe them as "violent": 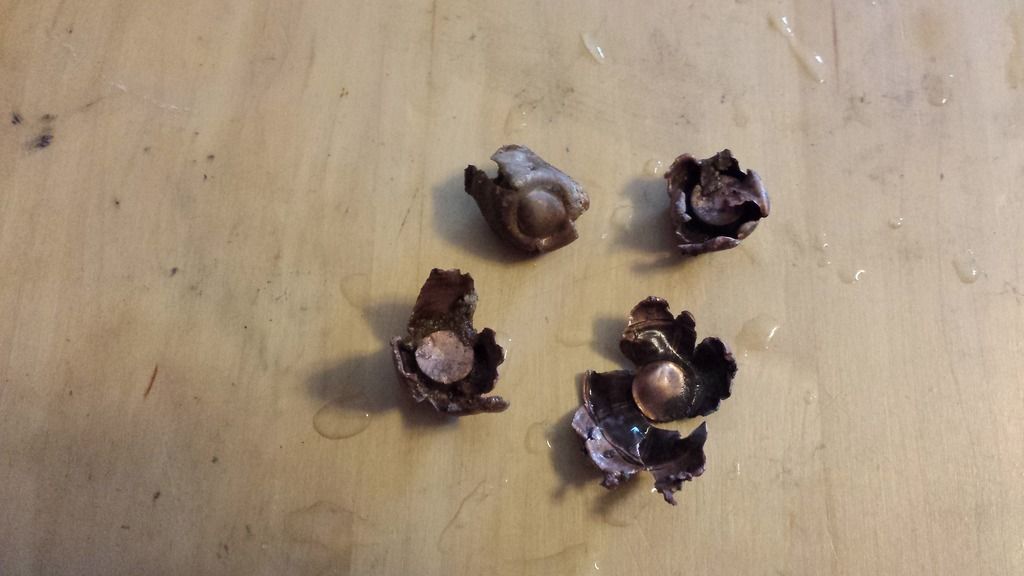 Hopefully, next weekend I can get it bedded it then shoot the "AFTER" pictures and get on to doing a load ladder instead of arbitrary charges for proof work. |
|
|
|
Post by Jon on Jun 2, 2015 6:46:38 GMT -5
Watching with interest. Thank you for taking the time!
|
|
Deleted
Deleted Member
Posts: 0
|
Post by Deleted on Jun 2, 2015 17:03:15 GMT -5
very interesting! good post
|
|
|
|
Post by mtj555 on Jun 2, 2015 19:59:47 GMT -5
I have some 270 E-Max you can shoot as well since the SML fairway has yet to return my gun from repair. It's needs to get back so I can send it off for the new breach plug. It's torture not being able to shoot. I guess it's time to take my anger out on the steel with the 6.5 Creed and more work with the belly guns..
|
|
|
|
Post by Dave W on Jun 2, 2015 20:20:02 GMT -5
What do you guys think of the 6.5 Creed? TIA
|
|
|
|
Post by 7mmfreak on Jun 2, 2015 20:38:16 GMT -5
What do you guys think of the 6.5 Creed? TIA I'm about to barrel up a pair with a 6.5 Creedmoor Match reamer for practical matches. It's not the fastest of the winning cartridges but offers good performance and barrel life with low recoil. I would prefer a 6mm Creed or SLR but when it comes to a match gun being able to buy factory ammo is a consideration in case your gun gets to a match but not your handloads; don't ask me how I know. I also don't want to chase my barrel if I don't have to so I'm going 6.5 instead of 6. Mike's gun shoots great and the round has a good reputation plus I can make brass from Lots of stuff, if push comes to shove, but right now 6.5 Creedmoor is available and fairly priced. |
|
Deleted
Deleted Member
Posts: 0
|
Post by Deleted on Jun 3, 2015 21:04:52 GMT -5
How far you guys shooting the Creeds?
|
|
Deleted
Deleted Member
Posts: 0
|
Post by Deleted on Jun 3, 2015 21:12:30 GMT -5
Nice report, glad to see you throwing some more of your bullets downrange. Hopefully I will have my new rig put together by the time you get your dies back up and running. Will be sending some cash your way as soon as you start selling bullets!
|
|
|
|
Post by markb317 on Jun 3, 2015 22:38:57 GMT -5
How far you guys shooting the Creeds? I have seen guys hitting steel at 1165yds in matches around here. They seem to be catching on a little more, guys like how they shoot. |
|
|
|
Post by 7mmfreak on Jun 4, 2015 5:00:32 GMT -5
How far you guys shooting the Creeds? We only shot at 100 and 300 yards that day (it was still holding .3-.5 MoA precision but mirage was getting heavy and winds were swirling on that end of the range). I'm still waiting on my new Manners to show up for my match gun and was just told it won't ship until July. The first PRS match of the season is in two weeks so I am going to borrow Mike's 6.5 Creed and I'll run it out in the neighborhood of a grand in that match most likely. You don't see auto's in those kind of matches usually but I have pushed auto .308 Win rifles out around 1350m and the 6.5 Creed will outrun the .308 Win with a 175gn bullet. I will barrel up the bolt guns in 6.5 Creed about two weeks after the match and intend to shoot matches in July and August with them. I'm still short on experience with this round but I am 100% confident they will do really well; I've been successful with the .308 Win and this cartridges is flatter, drifts less, kicks less, and costs less to feed. |
|
Deleted
Deleted Member
Posts: 0
|
Post by Deleted on Jun 4, 2015 7:43:23 GMT -5
Thanks for the replies. Very interesting and will be looking forward to seeing your builds and see how you guys do at the matches.
|
|
|
|
Post by Dave W on Jun 4, 2015 20:35:19 GMT -5
How far you guys shooting the Creeds? We only shot at 100 and 300 yards that day (it was still holding .3-.5 MoA precision but mirage was getting heavy and winds were swirling on that end of the range). I'm still waiting on my new Manners to show up for my match gun and was just told it won't ship until July. The first PRS match of the season is in two weeks so I am going to borrow Mike's 6.5 Creed and I'll run it out in the neighborhood of a grand in that match most likely. You don't see auto's in those kind of matches usually but I have pushed auto .308 Win rifles out around 1350m and the 6.5 Creed will outrun the .308 Win with a 175gn bullet. I will barrel up the bolt guns in 6.5 Creed about two weeks after the match and intend to shoot matches in July and August with them. I'm still short on experience with this round but I am 100% confident they will do really well; I've been successful with the .308 Win and this cartridges is flatter, drifts less, kicks less, and costs less to feed. Guy at our range was after me to get one and start shooting metal matches with him. You pretty much reiterated what he had to say about his and what I read elsewhere. Good luck with yours! |
|
|
|
Post by 7mmfreak on Jun 7, 2015 13:39:28 GMT -5
I am honestly glad that Bill did the Bedding 101 thread (saved me a lot of time) because that is what I was going to do with this rifle. He did a phenomenal job so I am only going to add things I do differently that may be of help or interest. I really need to be out shooting right now since I have a match next weekend but the range rules doesn't allow for shooting on Sunday until noon so I don't disturb the churchgoers. Instead, I began to prep this stock for bedding this morning (until my wife came into the garage all sleepy eyed and asked why I had a shop vac and air compressor running, and said it was too early to be waking up the neighborhood). I normally bore out my pillar holes with this 9/16" Piloted Forstner bit (it has interchangeable pilots): 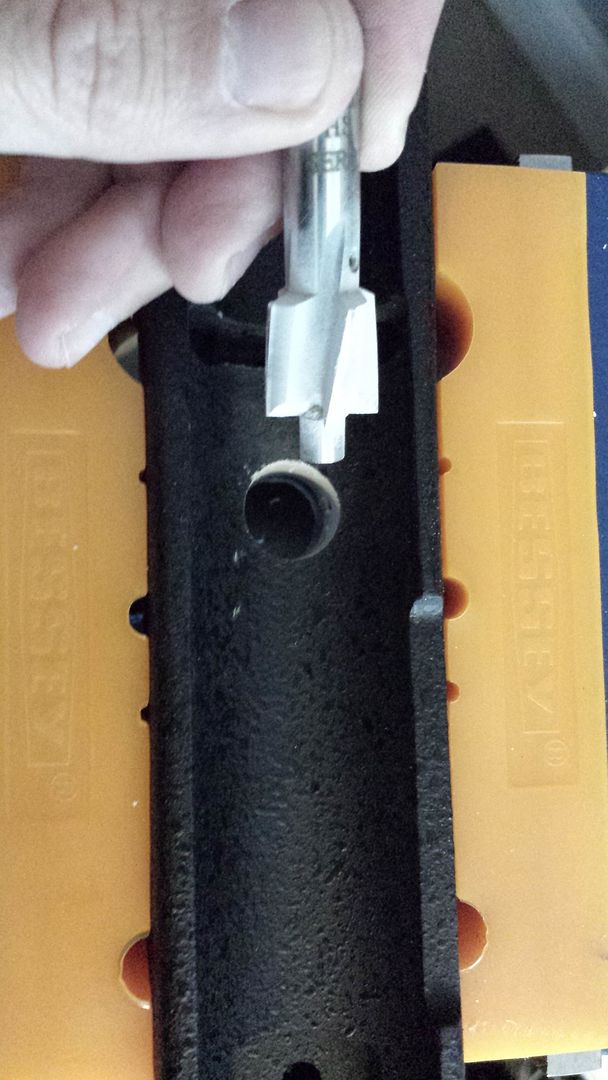 As already noted, this stock had pillars installed but they were a little crooked. I just took a series of drill bits and stepped it up until I had drilled out the existing pillars then just finished up boring out the holes with the Forstner. I finished up the job with a round file where needed. All barrel fitting and action relief are done the same way Bill does it: 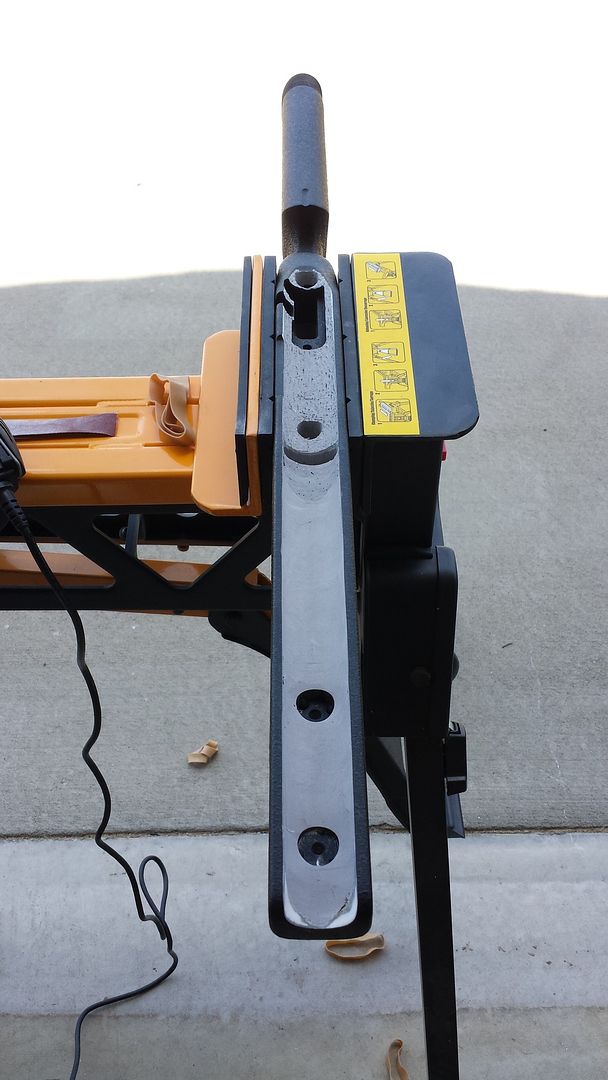 The two large black circles in the barrel channel are 10-32 T-nuts for mounting an Atlas rail on the underside. They will get filled in with epoxy to make the barrel channel look finished. There also some small voids that need to be filled in with epoxy. This one is actually a large one that is inside the wrist just under the tang and I found it when I bored out the rear pillar: 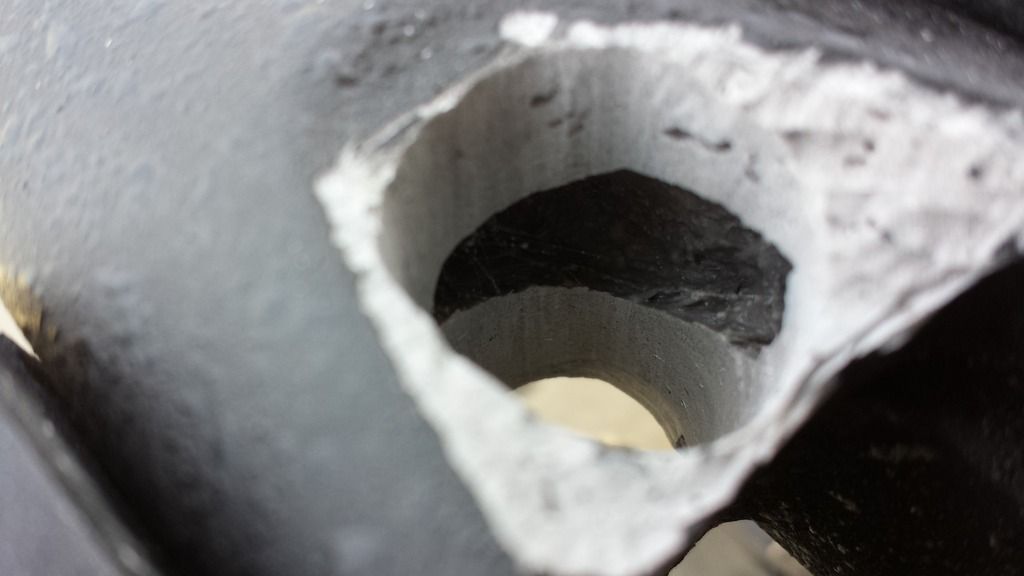 That is one of the advantages of getting a glass stock without paint. You can tap (voids will collapse) and inspect the gel-coat for voids that you won't find if they have been painted already. You then fill them with epoxy to prevent future spalling when they take a hit. Once I have fitted everything the last thing I do with the barreled action is center it up. I start by leveling the stock along two axis:  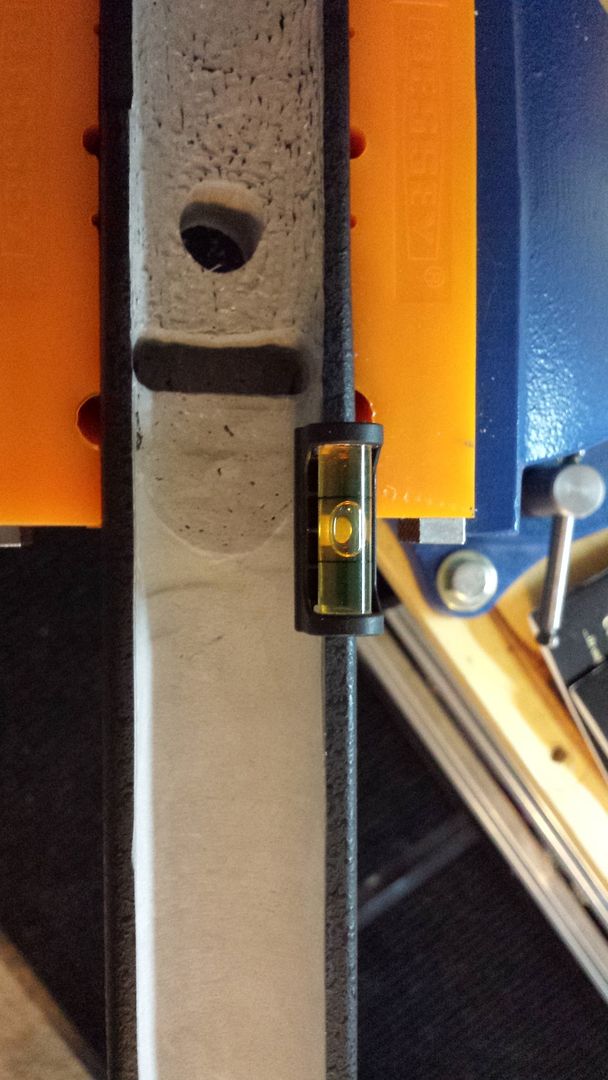 I can now ensure that the barreled action is centered and parallel to the show-line. I start with a few wraps of tape then place a magnet level on the receiver (won't work with the base in place as it is a 20MoA off-set mount) to see if I am parallel with the stock: 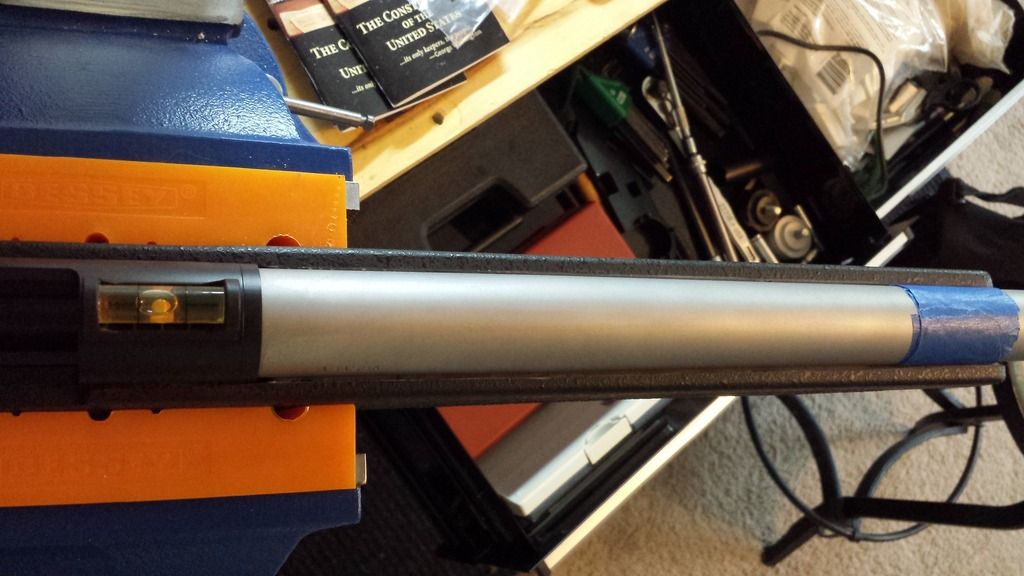 I keep adding wraps of tape until I show level: 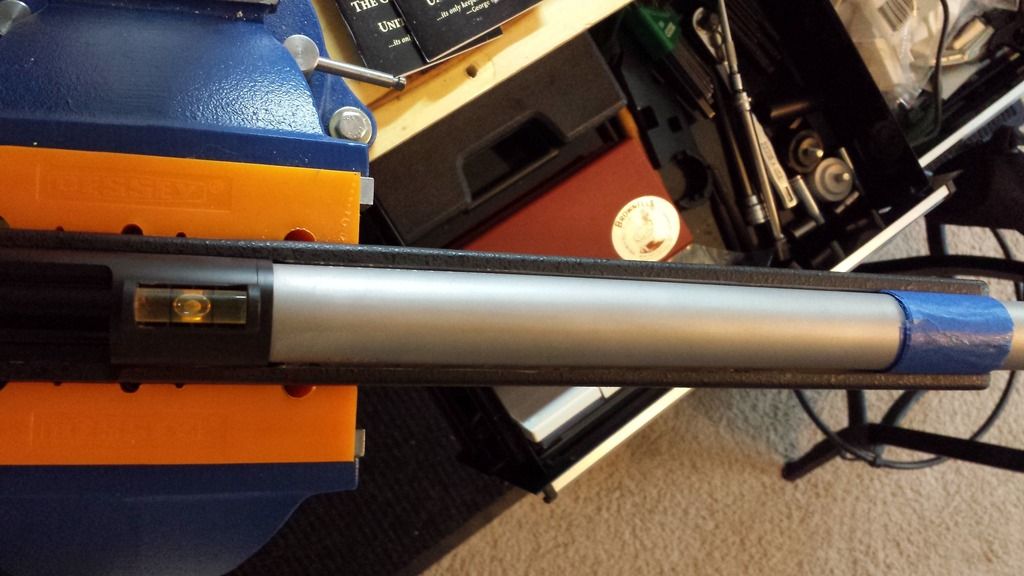 With the rifle centered at the forearm tip and resting on about 1/8" at the tang I just need to add some tape wraps at the end of the barrel cylinder/shank to add in some shoring and to help dam the flow of the Devcon. I do not normally bed ahead of the recoil lug but this stock has lost a lot of material due to the size of this barrel. I will also be milling out the ramrod flute so I am going to do a solid Devcon fill under the barrel cylinder. I now have what is a serviceable stock for bedding. I mask both stock and action the same way Bill does. I will get this finished up some time this week or next. For now I need to go buy groceries, cook the week's lunches and dinners (ensures I have time to both shoot and work out every evening this week), then get out to the range with a pistol and long gun. |
|
Deleted
Deleted Member
Posts: 0
|
Post by Deleted on Jun 7, 2015 20:41:04 GMT -5
looking good Keith, everything should come out nice....
|
|
|
|
Post by airborneike on Jun 8, 2015 0:50:05 GMT -5
Keith,
Need to get you into your own gunsmith shop so you can get "rich" like the rest of us :-)
Seriously, you have a lot of talent and good communication skills
I like the copies of the US Constitution in the pictures....now if we could only get the a** clowns in Washington to follow it.
Great post!
Mike
|
|
Deleted
Deleted Member
Posts: 0
|
Post by Deleted on Jun 8, 2015 5:39:24 GMT -5
Looks good! Can't wait to see the before and after bedding group comparison. I have to admit I usually just bed, don't take the time to find out if it's well worth it or not. Informative post as usual.
|
|
Deleted
Deleted Member
Posts: 0
|
Post by Deleted on Jun 8, 2015 10:03:29 GMT -5
Thanks for sharing your bedding/alignment techniques ,It looks like the first level is canting just a very minutesmidge high on the port side from the photo...As Myers mentioned,can't wait to see before and after groups...
|
|
|
|
Post by 7mmfreak on Nov 27, 2015 19:51:07 GMT -5
Well, 6 months or so later I finally have a truly free weekend. Got this thing bedded up:  I run a small bead of plasticene along both sides of the recoil lug to help prevent chipping at the hard edge (and it is easier than cleaning it up with a scraper) plus it looks good: 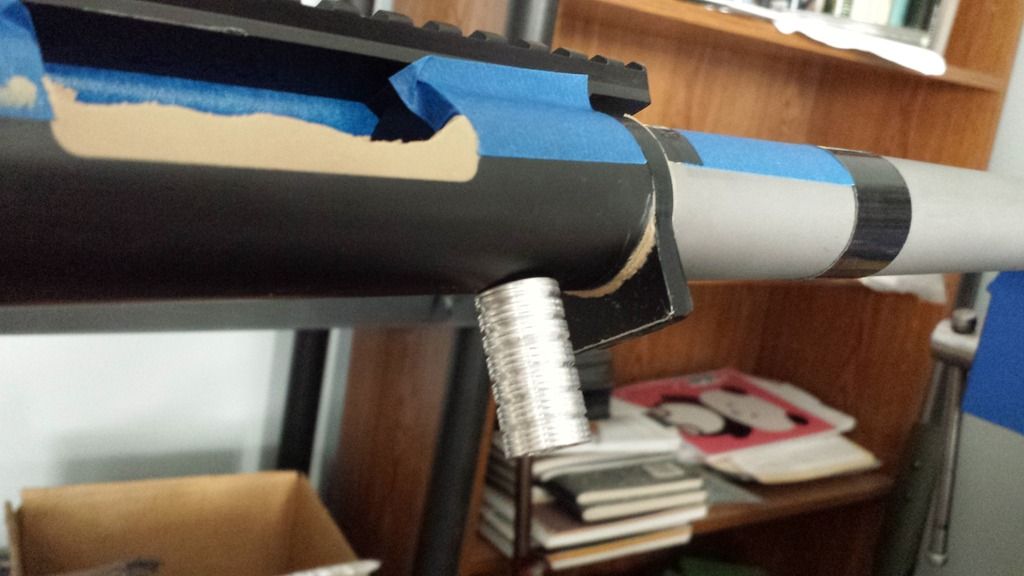 |
|
|
|
Post by 7mmfreak on Nov 28, 2015 20:36:21 GMT -5
I'm not sure if you can tell but the plasticine bead leaves a nice bevel that wont chip and prevents that thin edge where the barrel shoulder meets the radiused portion of the lug: 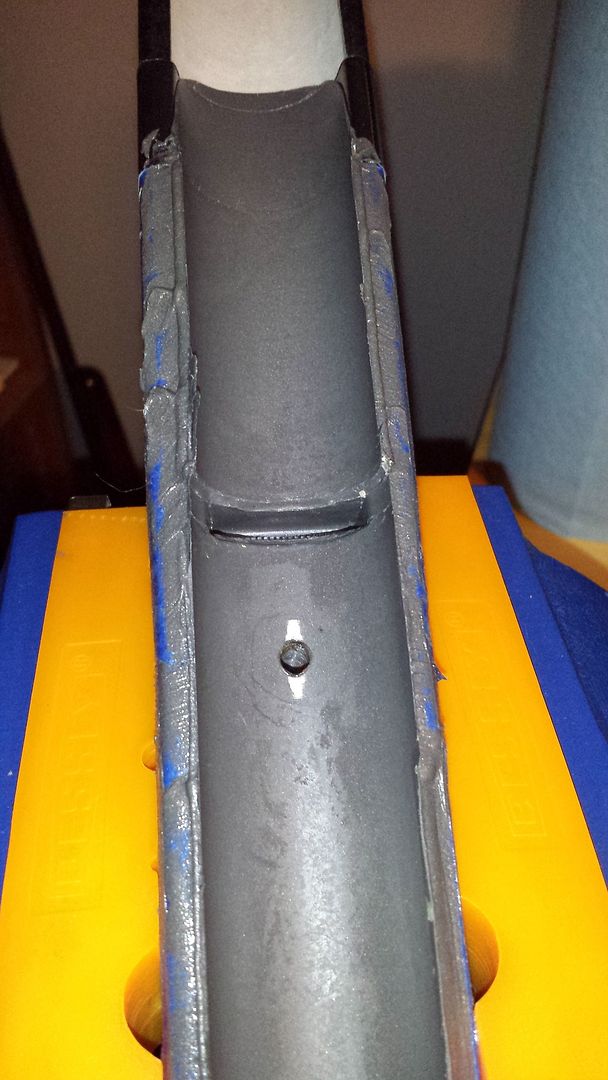 I'm all ready to hit the range tomorrow to proof the bedding job with a slew of 275BE, 275MH, 327MH, and 316gn BOMB with 78gn charges of IMR4198 and 70gn of H4198 as appropriate : 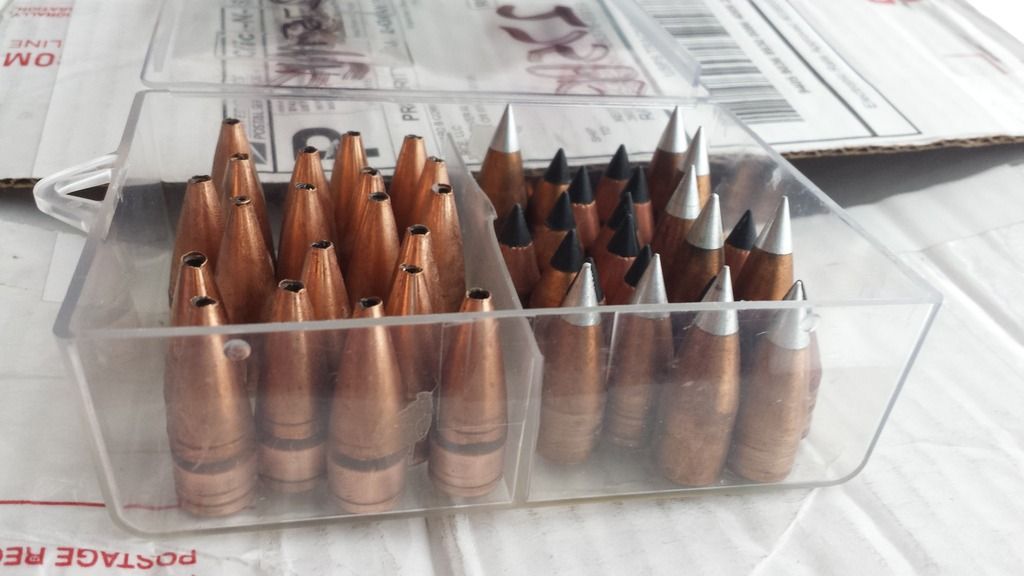 |
|
|
|
Post by rambler on Nov 28, 2015 20:47:20 GMT -5
Can we see the finished product??
|
|