Rem/Pac-Nor ML build
Jul 30, 2011 15:00:04 GMT -5
Post by Richard on Jul 30, 2011 15:00:04 GMT -5
.45 cal. Remington/Pac-Nor muzzle loader build
This build started out with a bunch of key parts gifted to me by a very generous member of our board. He is mainly silent as far as postings, but reads everything. This party knew I was interesting in doing a build and he had these parts and was not in the market to use them as the barrel was heavier than he wanted. He had gotten the parts from a relative. Our deal is that sometime in the future, I will put together a rifle for him when he acquires the desired parts. What I started with is a P-N .45 ca. 1 - 20” twist barrel which starts out at 1.200” for a spell and then tapers to .900”---- 28” later. It is set up for the Savage breech plug to be used with Hunters conversion (which was already completed). The action is Rem. SS along with the trigger and bottom metal. Also included was Remington’s synthetic stock.
Upon examining the stock I felt it was not what I wanted…………..too flimsy and light. So, I ordered and received a Boyds Varmint thumbhole in their “Pepper” coloring…………..laminated wood. Upon receipt of the stock I was well pleased with the reasonable cost…………..$99.00, the quality of the stock and their timely shipping. Things fit together pretty well except for the barrel channel which needed some “hogging-out!”. The forend is generous enough that it was not a problem.
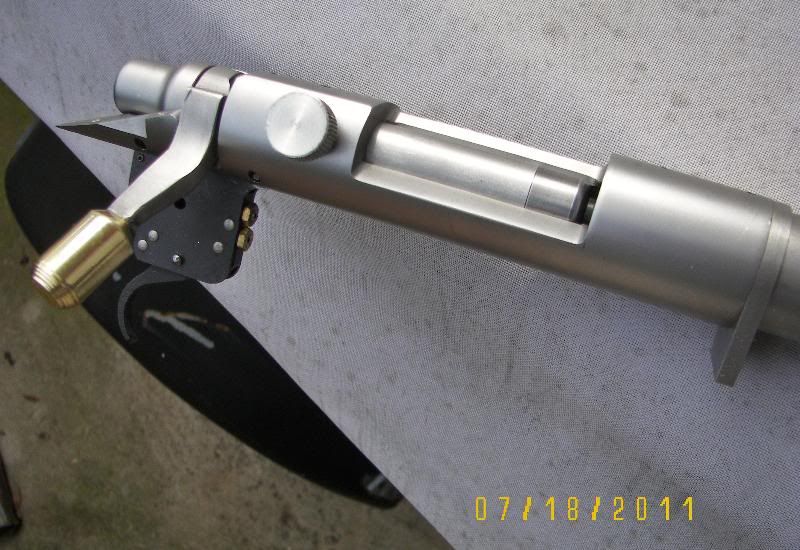
My first order of business was to re-do the bolt handle to make it look a bit more custom. To do this, I needed to re-shape the know on the handle.
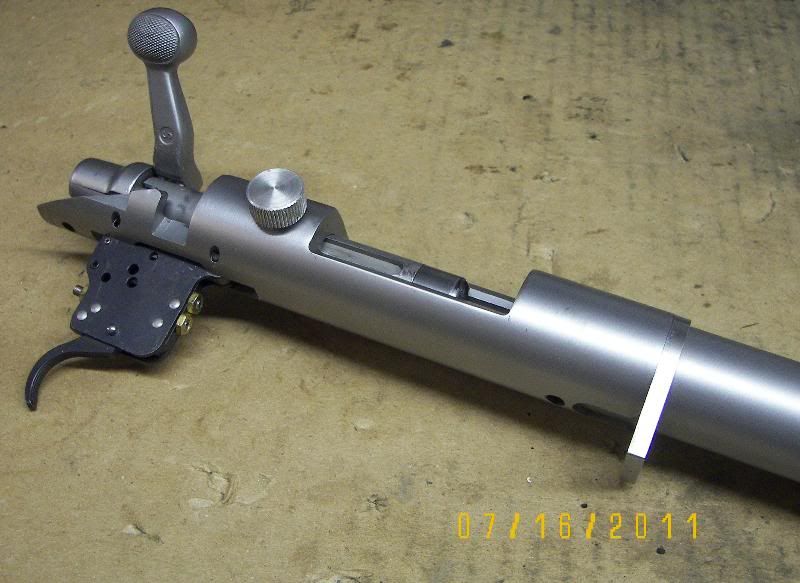
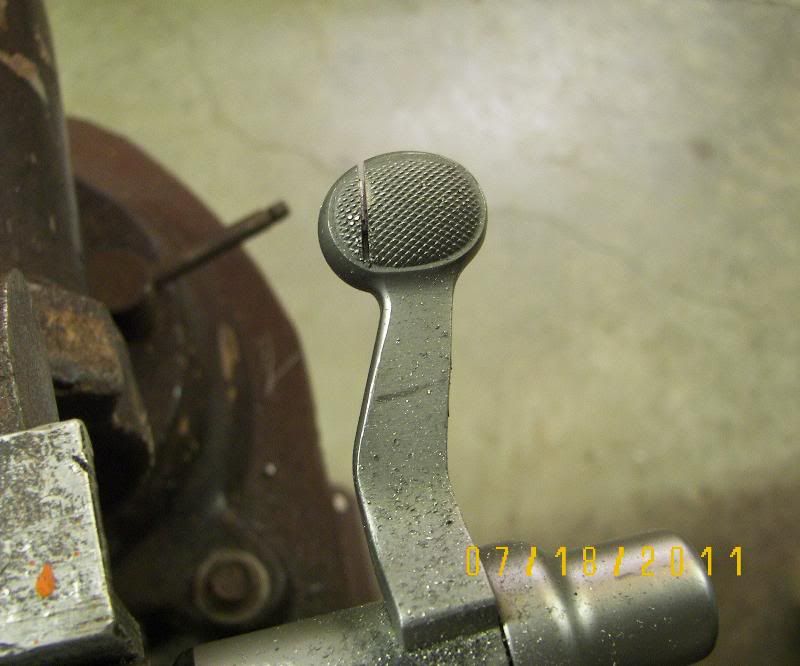
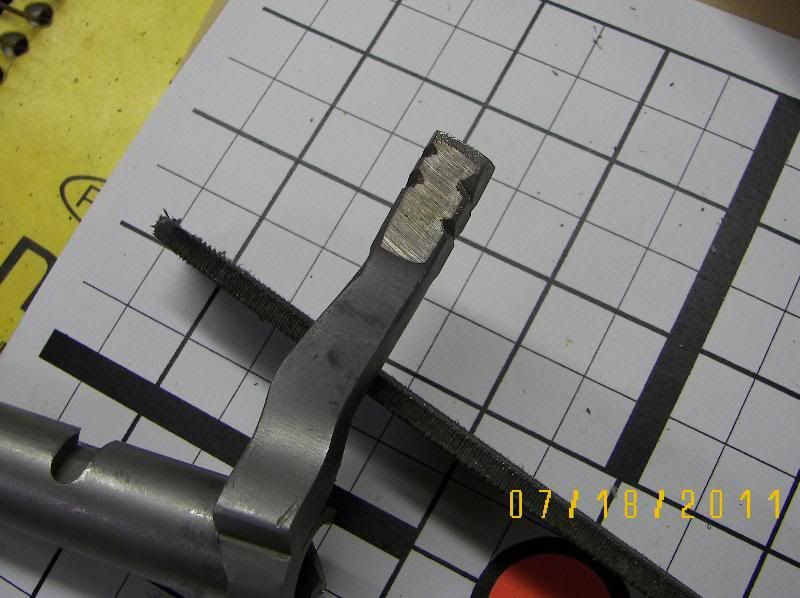
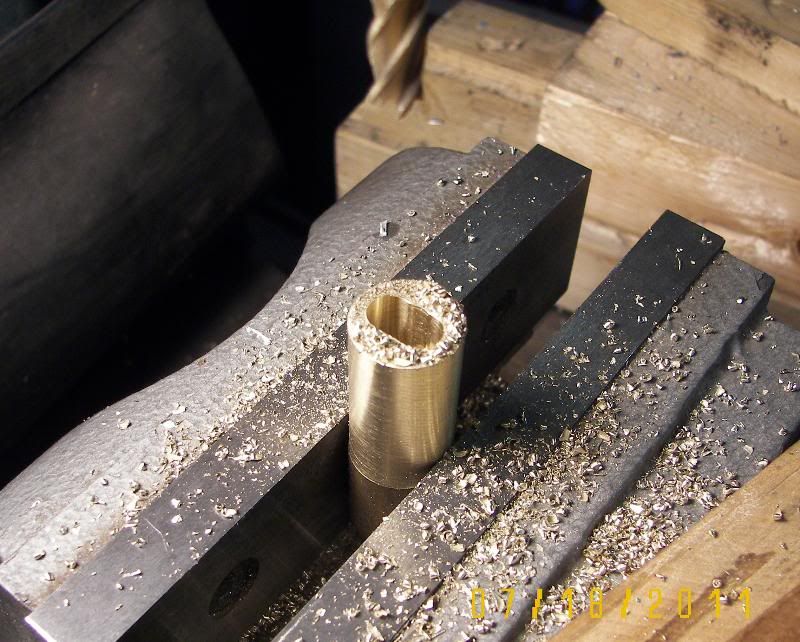
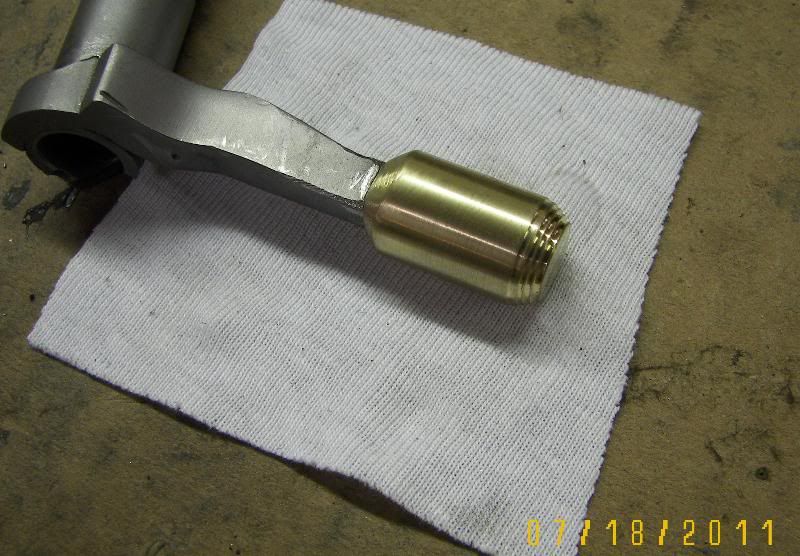
My portable band saw removed most of the side to side metal and the bench grinder the rest. I ground in a number of indents to act as mechanical locks for the Marine-Tex epoxy. Indents were also made inside the new knob. I turned the new handle/knob from a piece of brass. The inside was drilled oblong with an end mill as to match the shape of the bolt handle. The brass piece was then polished and epoxied to the handle.

Not wanting to have to rely on an allen key to remove the bolt body from the action, I fashioned a knob which was pressed onto a cap head allen bolt and fit to the action. A bushing had to be inserted into the recess in the action so the know would lock up flush. (yes, I could have machined a bolt and threaded it, but this was easier J )
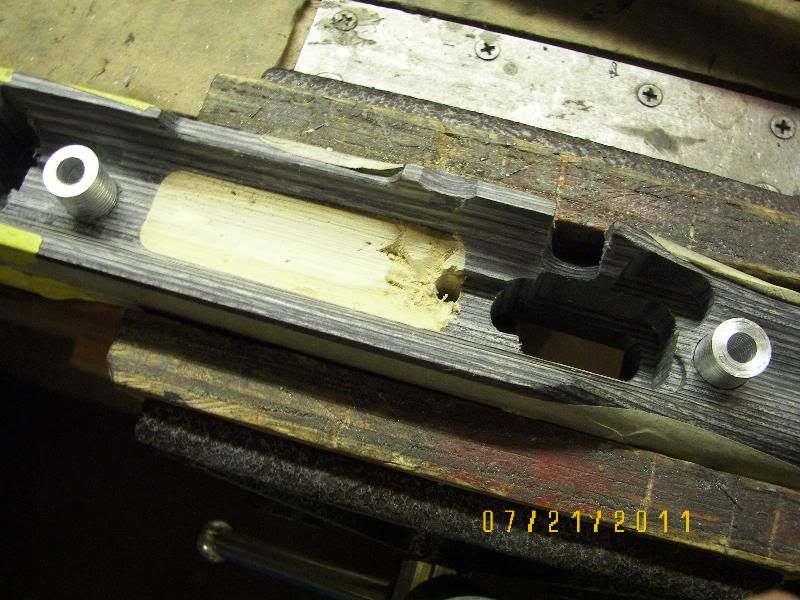
Next I filled the magazine well with a block of wood and some autobody filler. In keeping with the looks on my present ML, I created a piece of aluminum which runs from the trigger guard to the front action screw.
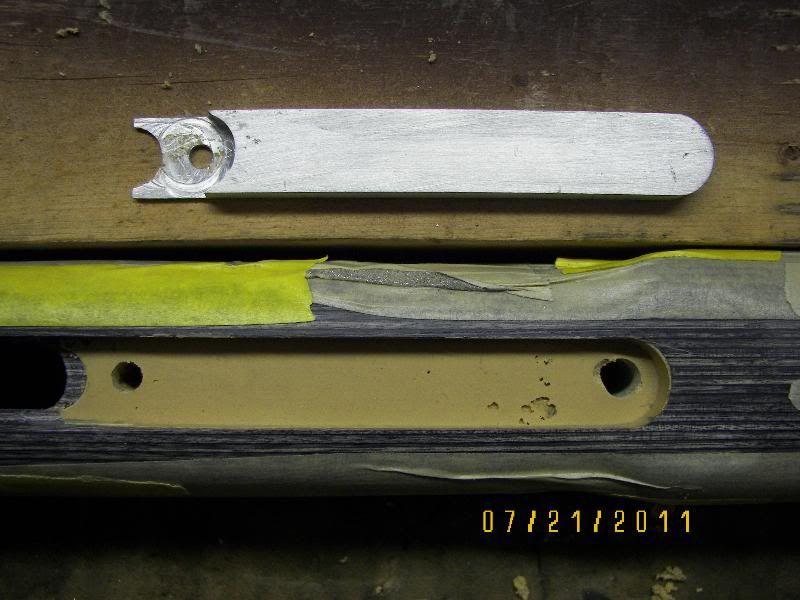
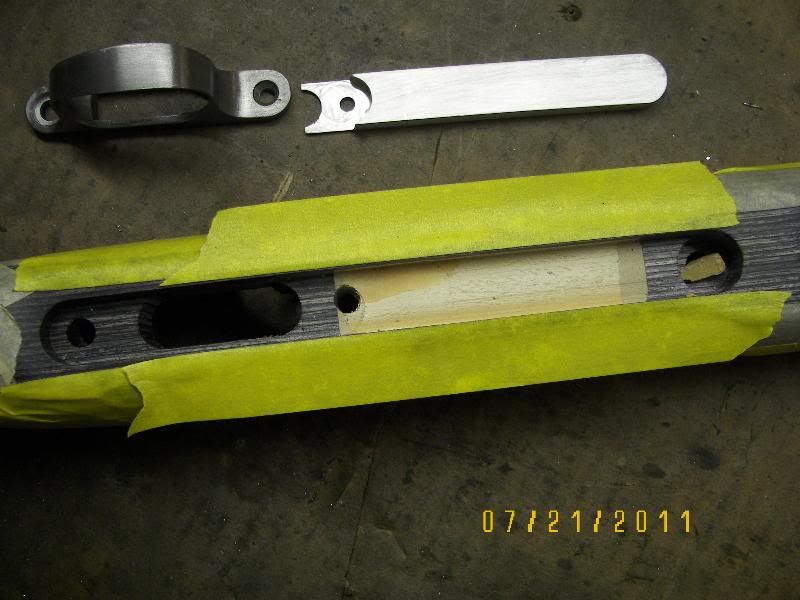
Moving along, I made up two aluminum pillars 5/8” in diameter and glued them in after opening up the holes provided by Boyds..
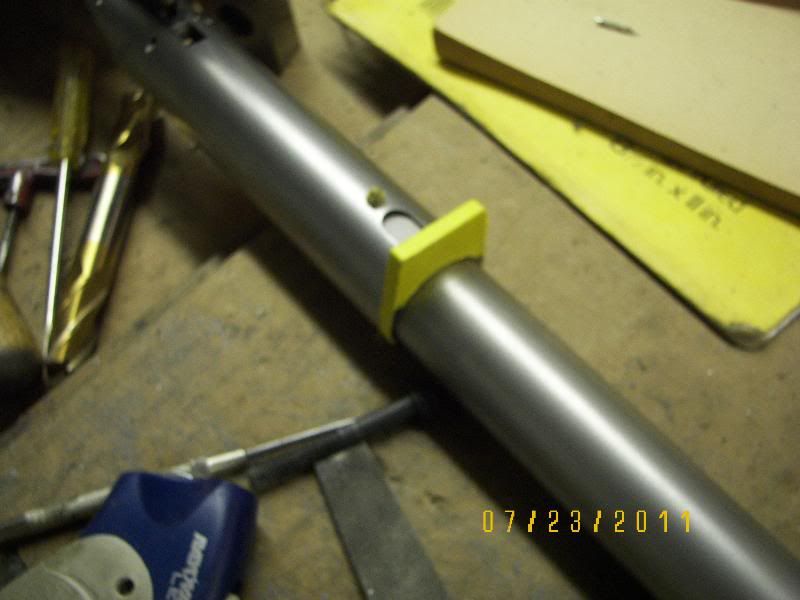
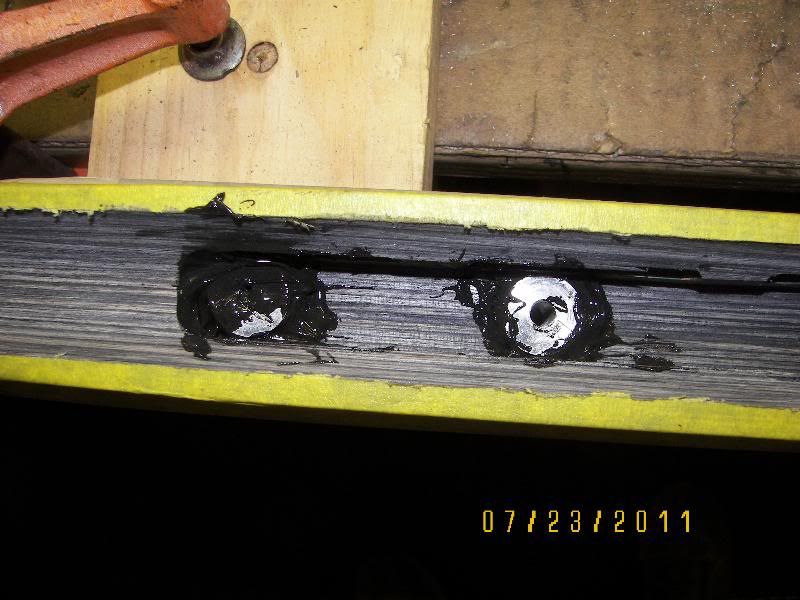
My next step was to do an initial bedding which consisted of the area just around and forward of the recoil lug (and under an inch or so of the barrel) and the tang. You can see where I taped the muzzle side of the recoil lug, along with the sides and bottom with about three layers of masking tape. (Once cured and the tape removed, it will allow both tapered and square recoil lugs to slip in and out of the stock---------only the “butt” side of the lug need make contact with its abutment.) With the Marine Tex in place I set the barreled action into the stock. Using a machinists “parallel” on end, it contacted the flat surface of the raceway…….allowing for a level to be placed on top. The stock had already been leveled in my wood workers vise. Now I could get the action square and parallel to the stock. No screws were used in this process. I then placed a heavy chunk of aluminum on the action to force it into the epoxy. Note the layers of yellow masking tape around the forward end of the barrel? That is keeping the barrel centered in the channel and the whole deal parallel, fore and aft. I also used some tape to act as a wedge on one side of the stock to get the action level.
![]()

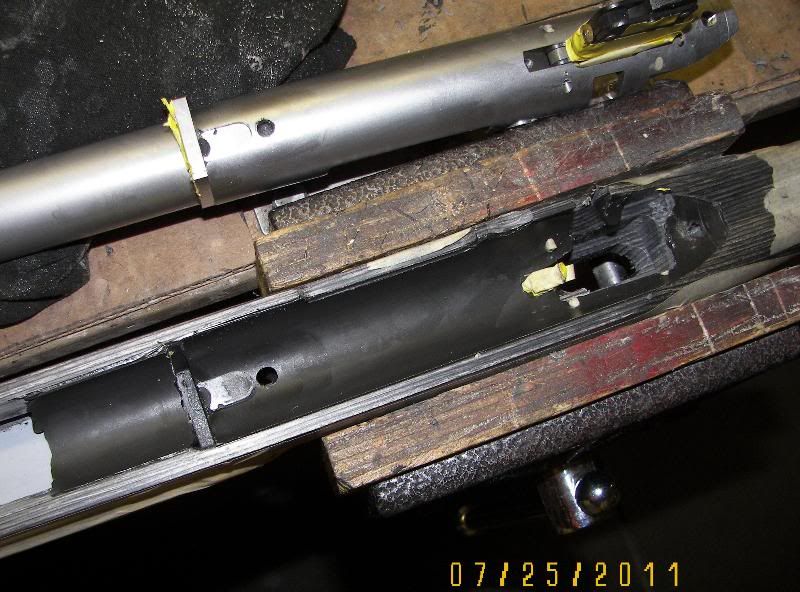
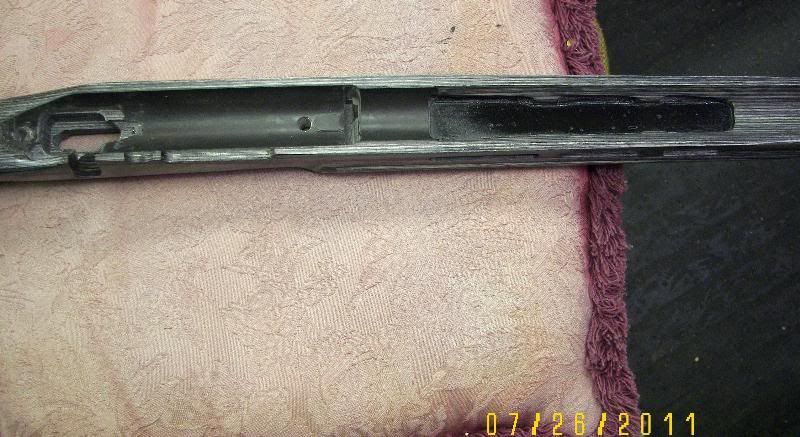
Once this was cured, I re-ground out some of the epoxy (leaving some contact points) and rough sanded it in preparation for my final end to end bedding. Pictures 16 and 17 show the bedding when the stock was first removed and after it was trimmed up.
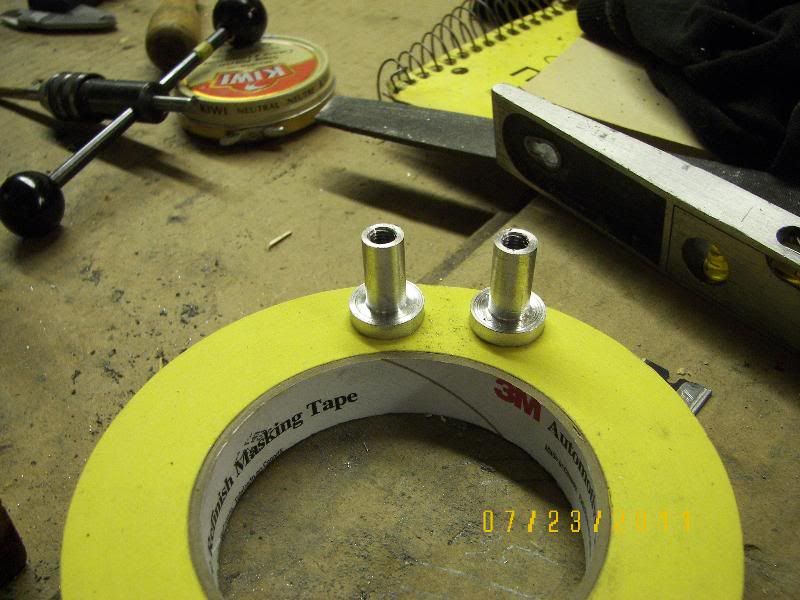
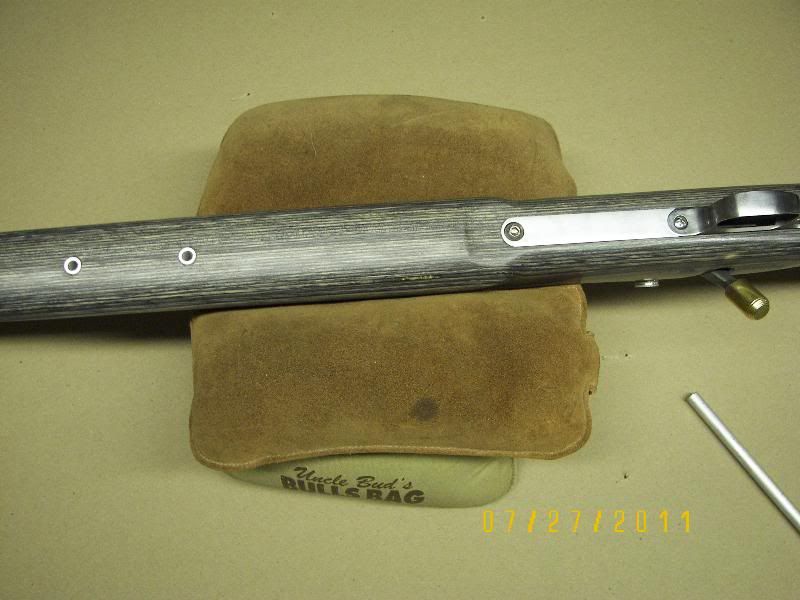
As I prefer to have swivel studs screw into metal inserts rather than just via their normal wood screw arrangement, I machined two “mushrooms” which enter from inside the forend and then fit flush with the exterior. These are threaded 1/4x28 for a more substantial stud. I will also use this to attach a 3” wide block to fit my 3” sand bag on the lead sled.
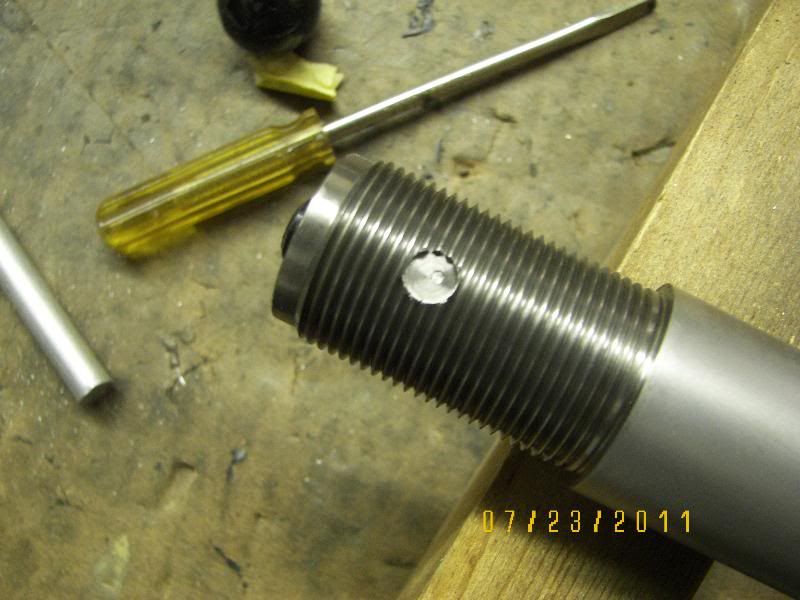
In picture #21 you will see the tennon of the barrel with a round spot within the threads. I locked the barrel up tight, put a mark from thru the front action hole, onto the barrel. I then removed the barrel and with a end mill, cut a round circle flush with the bottom of the threads. This allows the front action screw to fully engage all the threads in the action. Without this arrangement, your screw would bottom out on the threads and you would probably loose one thread in the action as far as “grip!”. Since there are so few threads to grip the screw, I want the most holding power I can get! J
Picture 22 just shows the completed bottom metal along with the forward stud anchors.
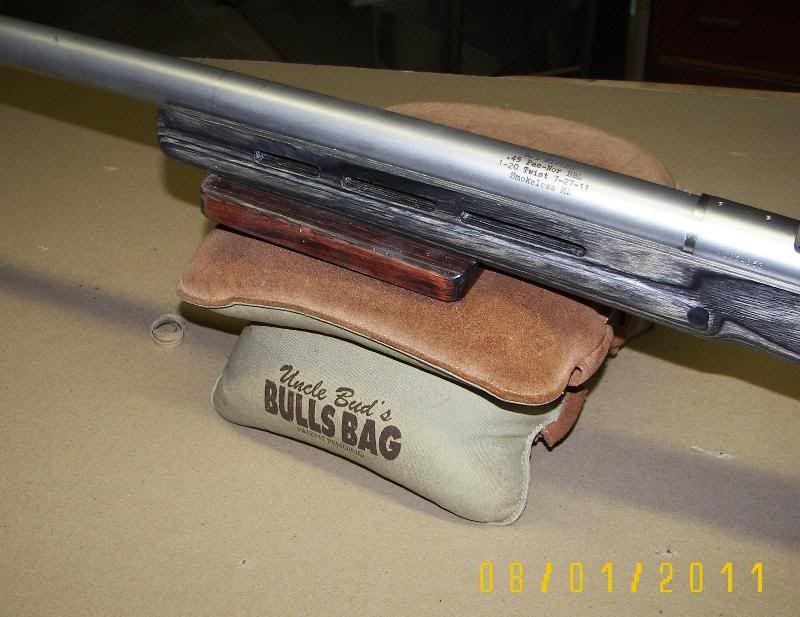
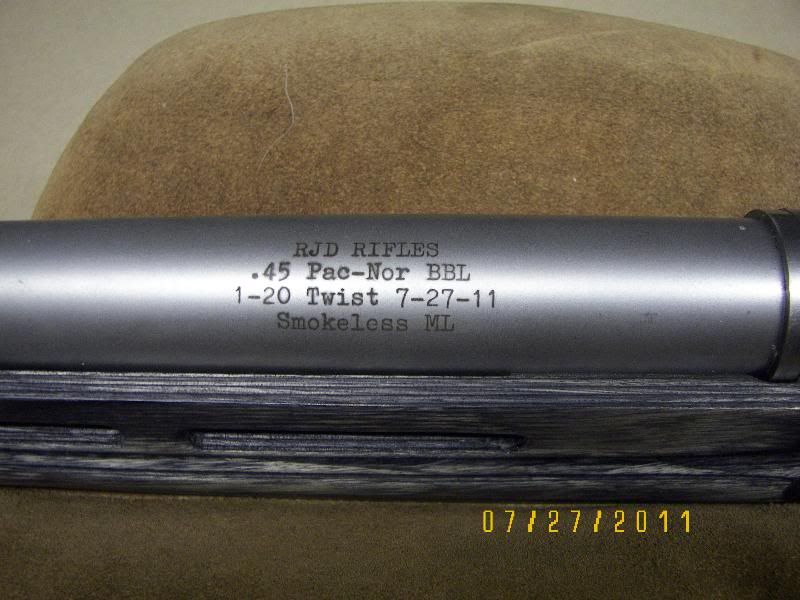
#23 shows the acid etching I do to log the pertinent information on the barrel.
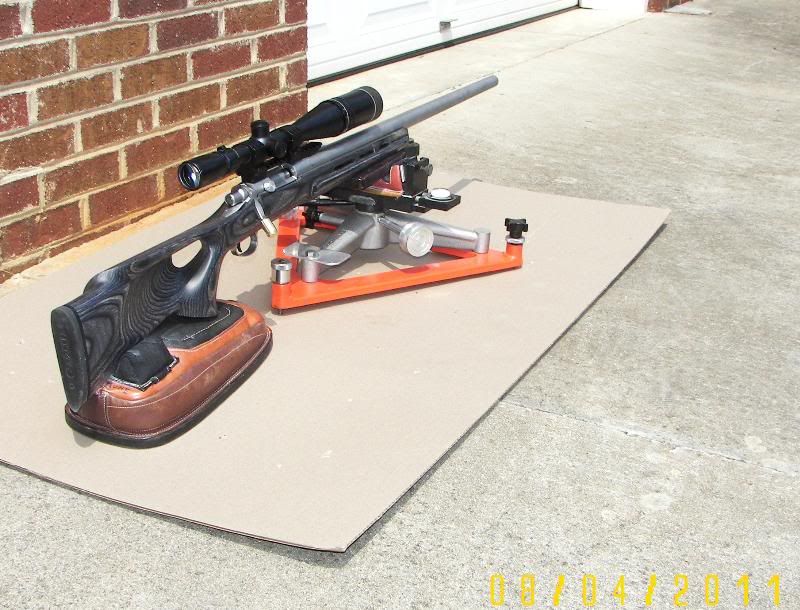
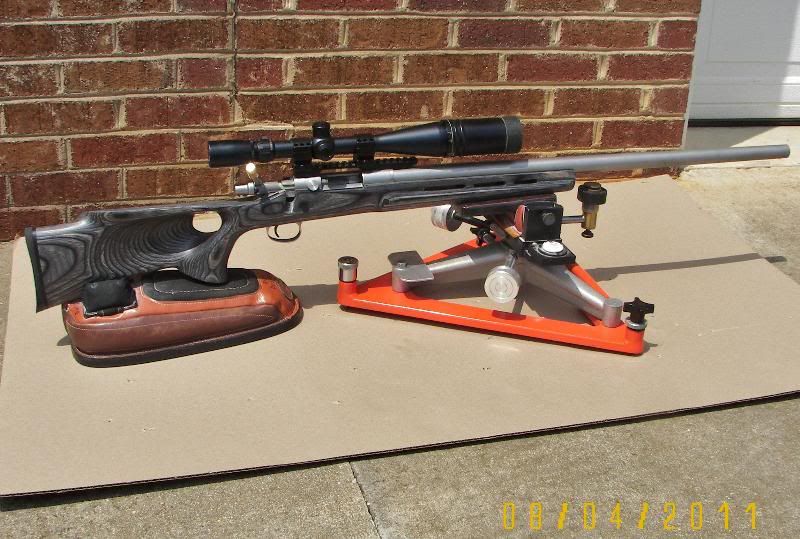
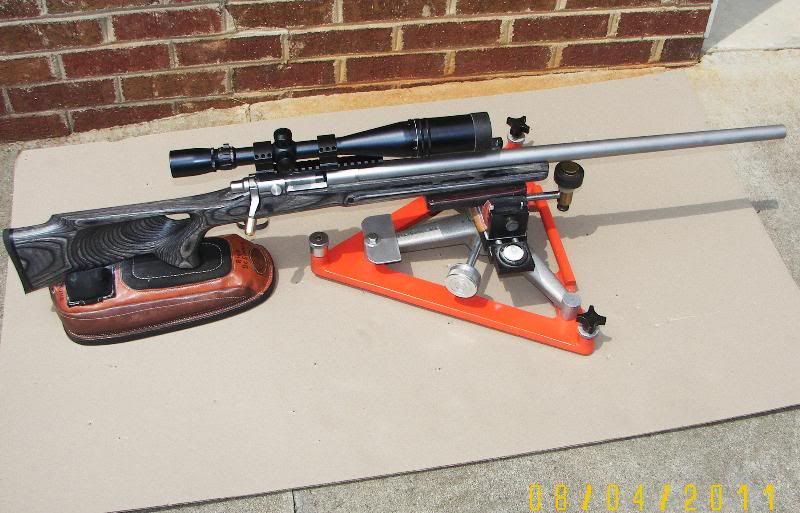
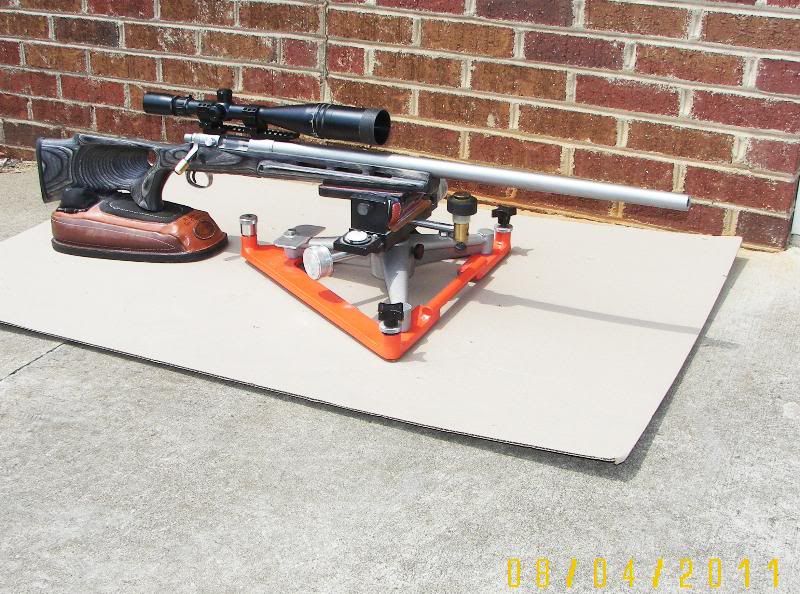
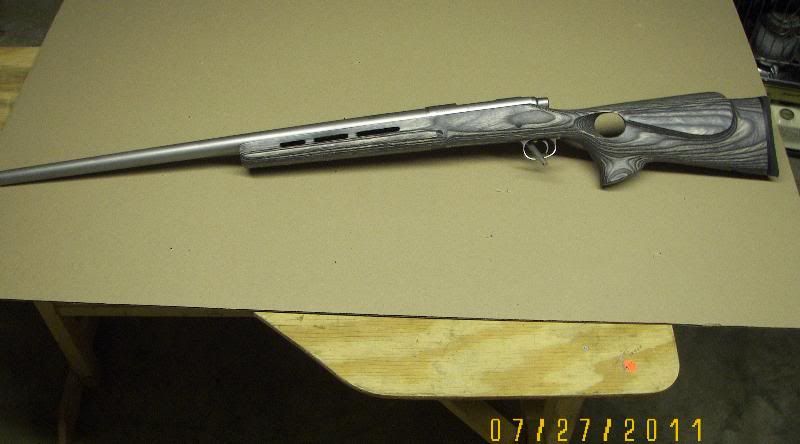
The last three are the completed rifle.

I am still waiting on my one piece base and rings so the Sightron scope can be mounted.
Oh, and the trigger is Shilen 2 oz.
Richard
This build started out with a bunch of key parts gifted to me by a very generous member of our board. He is mainly silent as far as postings, but reads everything. This party knew I was interesting in doing a build and he had these parts and was not in the market to use them as the barrel was heavier than he wanted. He had gotten the parts from a relative. Our deal is that sometime in the future, I will put together a rifle for him when he acquires the desired parts. What I started with is a P-N .45 ca. 1 - 20” twist barrel which starts out at 1.200” for a spell and then tapers to .900”---- 28” later. It is set up for the Savage breech plug to be used with Hunters conversion (which was already completed). The action is Rem. SS along with the trigger and bottom metal. Also included was Remington’s synthetic stock.
Upon examining the stock I felt it was not what I wanted…………..too flimsy and light. So, I ordered and received a Boyds Varmint thumbhole in their “Pepper” coloring…………..laminated wood. Upon receipt of the stock I was well pleased with the reasonable cost…………..$99.00, the quality of the stock and their timely shipping. Things fit together pretty well except for the barrel channel which needed some “hogging-out!”. The forend is generous enough that it was not a problem.
My first order of business was to re-do the bolt handle to make it look a bit more custom. To do this, I needed to re-shape the know on the handle.
My portable band saw removed most of the side to side metal and the bench grinder the rest. I ground in a number of indents to act as mechanical locks for the Marine-Tex epoxy. Indents were also made inside the new knob. I turned the new handle/knob from a piece of brass. The inside was drilled oblong with an end mill as to match the shape of the bolt handle. The brass piece was then polished and epoxied to the handle.
Not wanting to have to rely on an allen key to remove the bolt body from the action, I fashioned a knob which was pressed onto a cap head allen bolt and fit to the action. A bushing had to be inserted into the recess in the action so the know would lock up flush. (yes, I could have machined a bolt and threaded it, but this was easier J )
Next I filled the magazine well with a block of wood and some autobody filler. In keeping with the looks on my present ML, I created a piece of aluminum which runs from the trigger guard to the front action screw.
Moving along, I made up two aluminum pillars 5/8” in diameter and glued them in after opening up the holes provided by Boyds..
My next step was to do an initial bedding which consisted of the area just around and forward of the recoil lug (and under an inch or so of the barrel) and the tang. You can see where I taped the muzzle side of the recoil lug, along with the sides and bottom with about three layers of masking tape. (Once cured and the tape removed, it will allow both tapered and square recoil lugs to slip in and out of the stock---------only the “butt” side of the lug need make contact with its abutment.) With the Marine Tex in place I set the barreled action into the stock. Using a machinists “parallel” on end, it contacted the flat surface of the raceway…….allowing for a level to be placed on top. The stock had already been leveled in my wood workers vise. Now I could get the action square and parallel to the stock. No screws were used in this process. I then placed a heavy chunk of aluminum on the action to force it into the epoxy. Note the layers of yellow masking tape around the forward end of the barrel? That is keeping the barrel centered in the channel and the whole deal parallel, fore and aft. I also used some tape to act as a wedge on one side of the stock to get the action level.
Once this was cured, I re-ground out some of the epoxy (leaving some contact points) and rough sanded it in preparation for my final end to end bedding. Pictures 16 and 17 show the bedding when the stock was first removed and after it was trimmed up.
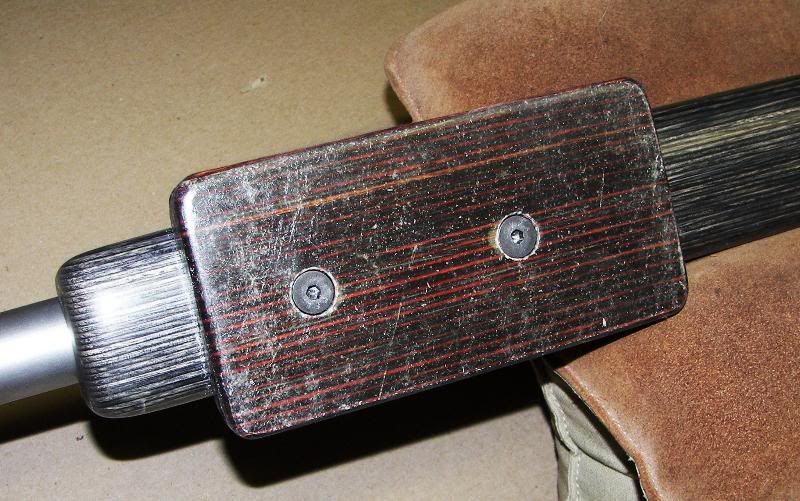
As I prefer to have swivel studs screw into metal inserts rather than just via their normal wood screw arrangement, I machined two “mushrooms” which enter from inside the forend and then fit flush with the exterior. These are threaded 1/4x28 for a more substantial stud. I will also use this to attach a 3” wide block to fit my 3” sand bag on the lead sled.
In picture #21 you will see the tennon of the barrel with a round spot within the threads. I locked the barrel up tight, put a mark from thru the front action hole, onto the barrel. I then removed the barrel and with a end mill, cut a round circle flush with the bottom of the threads. This allows the front action screw to fully engage all the threads in the action. Without this arrangement, your screw would bottom out on the threads and you would probably loose one thread in the action as far as “grip!”. Since there are so few threads to grip the screw, I want the most holding power I can get! J
Picture 22 just shows the completed bottom metal along with the forward stud anchors.
#23 shows the acid etching I do to log the pertinent information on the barrel.
The last three are the completed rifle.
I am still waiting on my one piece base and rings so the Sightron scope can be mounted.
Oh, and the trigger is Shilen 2 oz.

Richard


 Including Paratzzi's, Krieghoff, Purdy's, English double's and drillings etc. And by looking at all the pattern rifles in his shop, I don't doubt it. This man made the stock for the rifle that was auctioned off at the 2010 NRA Convention in Charlotte. His name is Evans Comption........(he can be googled). Anyway I picked up a scrap of laminated wood and made the "add on" 3" forend for this rifle. Unfortunately he did not have the color to match my stock
  . This piece has been bedded to the underside of the forend and the bottom of it has two layers of fiberglass mat bonded to it. It looks a bit crude, but it is perfectly flat and smooth. I could have painted it , by that would eventually wear off
  .
.