Post by hankinsrfls on Jun 29, 2015 9:36:06 GMT -5
Someone ask me to make a thread on a "HOW TOO" make a shooting bench. Well, in the next couple pages of pictures is how I did it. Now. I am not a concrete man or care to be, but I have pored several garage floors, a basement and I did a patio around an in-ground pool once. The only thing I know for sure about concrete is it's gonna crack... and never pore it with out rebar....

Start out getting enough concrete to do the job. You don't want to run out a 1/2 bag short..

Next, get the lumber you will need. I bought several 8 foot 2X4's, a sheet of 1/2 inch plywood and all the 4x4 post that I needed to do this job at one time at Lowe's. Buy nothing but pressure treated lumber... especially if you are going to use it outside.

Next construct a mold to pore the concrete into. Line the bottom with a sheet of plastic. This shape can be any thing you want it to be. Most shooting benches I have seen look like a T, I prefer mine in the shape of a U, Here's why. On a T bench you (the shooter) are sitting on the left side of the bench, the rifle is on your right side and all your accessories are on the right side of the rifle, You have to reach over the rifle to get to your stuff, with a U shaped bench you (the shooter) are sitting in the middle of the bench and you have the rifle on the right side and all your accessories are conveniently located on the left side within easy reach. I have found this to work out very well for me.. If you are left handed it works just the opposite.

Next I made up the rebar frame work with some cross pieces. I added an old piece of fence wire in there just for added strength.

Now its time to mix the concrete, I use a wheel barrel, and a hoe to mix it. You will also need a concrete trial to finish off the tops. I have been able to teach Lapua (the pitbull) a lot of things but mixing concrete is not one of them.

Mix it to a thick mud like consistency, it needs to be thick enough to hold your hoe straight up when placed in the mixture. If its to wet. the water will all come to the top and create you a problem when your are trying to finish off the surface.

Next, Start poring the concrete into the form.

Fill the form half full.

Place your rebar construction in the form, being careful not to over work it or it will sink to the bottom.

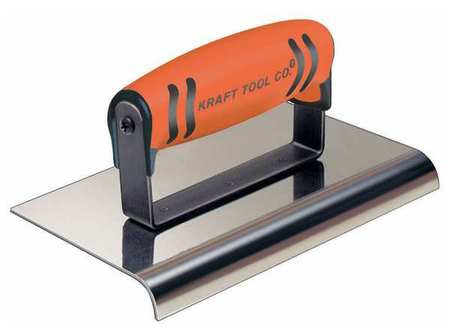
Now finish filling the form and screat it off, then use your hand trial to finish, Now a little tip, when finishing off the top, don't over work it or you will bring to much of the cream to the top, just get it level and let is sit for 30 minutes or so, then go back and trial it again, waith 30 more minutes, then trial it again, do this for the next couple hours or until the surface begins to harden, then you can put some muscle into it and really burn in a smooth finish.

Once you have the surface burned in the way you want it, let the concrete harden for a week or so and then you can move it. Also take into consideration how heavy the tops will be, make sure you can move them once they are ready to be moved.. My tops weigh 500 pounds, it took 6 1/2 bags of concrete to make them so in a form a two at a time I have to be able to move a 1000 pounds. The loader on my John Deere tractor handles the job with no problem.

A week later and its time to remove the forms. This is why I use torx head deck screws and don't sink them below the surface.

Carefully remove the 2X4's

You might need a hammer to brake them loose.

Removing the U shape.

After you have removed the forms., it's time to lift out the top. Notice how clean the plastic is under the concrete. It also leaves a smooth surface on the bottom.

All the way around the form you will have an edge, You will need to remove this in order to make a user friendly table top.

Using a big grinder with a stone wheel you can grind off the edge and form a corner round all the way around the top. This completes the tops, now all you have to do is get some help and set them in place.

I was lucky enough to get these two guys to come help me for a day (a long day) to get the new benches set into place. I already had two benches at the range but they needed moved in order to make the layout of the other three benches fit into place. So we started by pulling up the existing post. (all 8 of them).

I promised Bill I would dig the holes if he would mix the concrete, so here I am digging. We were able to drill most of the holes without to much problems. However two of the holes were laid out directly over small tree stumps. (approx. 8 inches in diameter) we had to dig those out with a Giant Killer (also know as a Spud Bar) and that was a big job. We also hit a few rocks that had to be dug out.

Her we are, almost done digging.

Here is Kyle and Bill cleaning out the holes, looks like we were on table #4.

Here's Kyle eatin up the best Roast Beef sandwich he ever had. I have to wonder if that's because he was hungrier than he's ever been.

By the end of the day we had all 20 post set into concrete. Kyle and Bill headed home around 6:00 and I let the post set up over night and finished the job the next day.

Here are the benches all set into place. Fill dirt added and grass seed sowed, I mowed the range and raked up some grass to put on top of the new grass seed.

You might not be able to tell but the ground there was really wavy so I built this little retaining wall and back filled it with dirt. I hauled 27 bucket full loads yesterday and smoothed it out with a hoe and rake. Last year when I set the first two benches I hauled about the same amount, and I could probably use 27 more bucket full loads to finish off the other side.

Here's a picture of the benches all set and painted grey. They are 40 inches off the ground and it took 8 inches of dirt to level out the ground so they were all the same. It looks like the one side is higher but that's an optical illusion.