
Hillbill bedding 101
May 26, 2015 9:17:59 GMT -5
Post by edge on May 26, 2015 9:17:59 GMT -5
author="@hillbill":
this will be a very long thread with a lot of pics and details so it will likely be done in two parts.
Mods will likely want to move this but I thought I would put it here for all to see first...
this is a used B&C sendero style stock with a bedding block, it was previously skim bedded.
to start I will say that I make no claims to be a pro or even close BUT since Im no professional and don't do this for a living I feel some knowledge can be passed on to the brotherhood. what I know about bedding is pretty much self taught so keep an open mind and take it for what its worth.
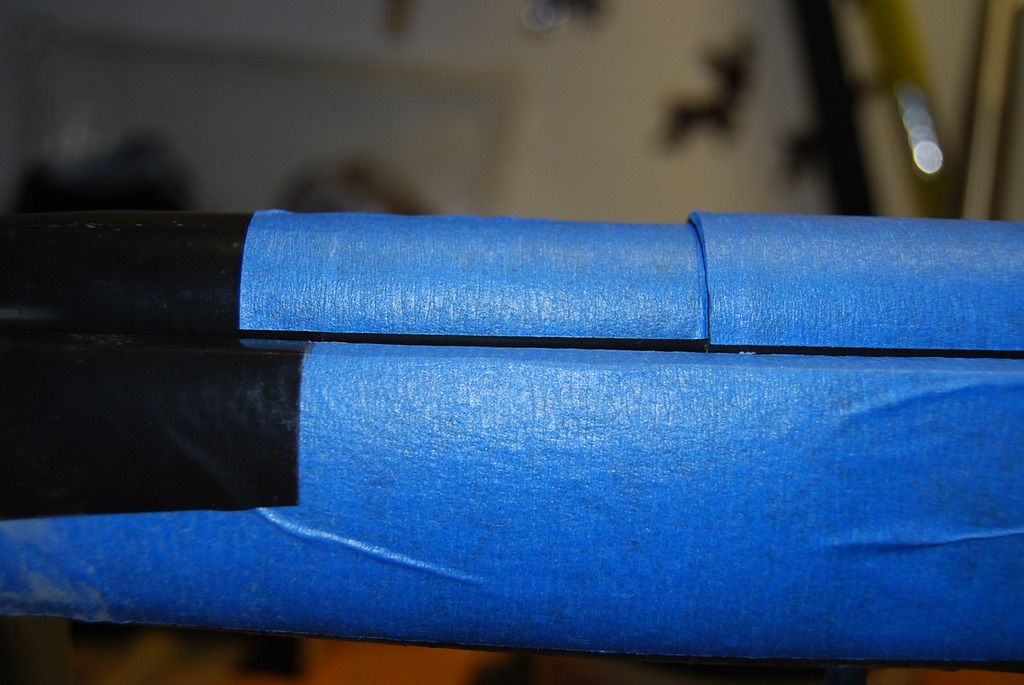
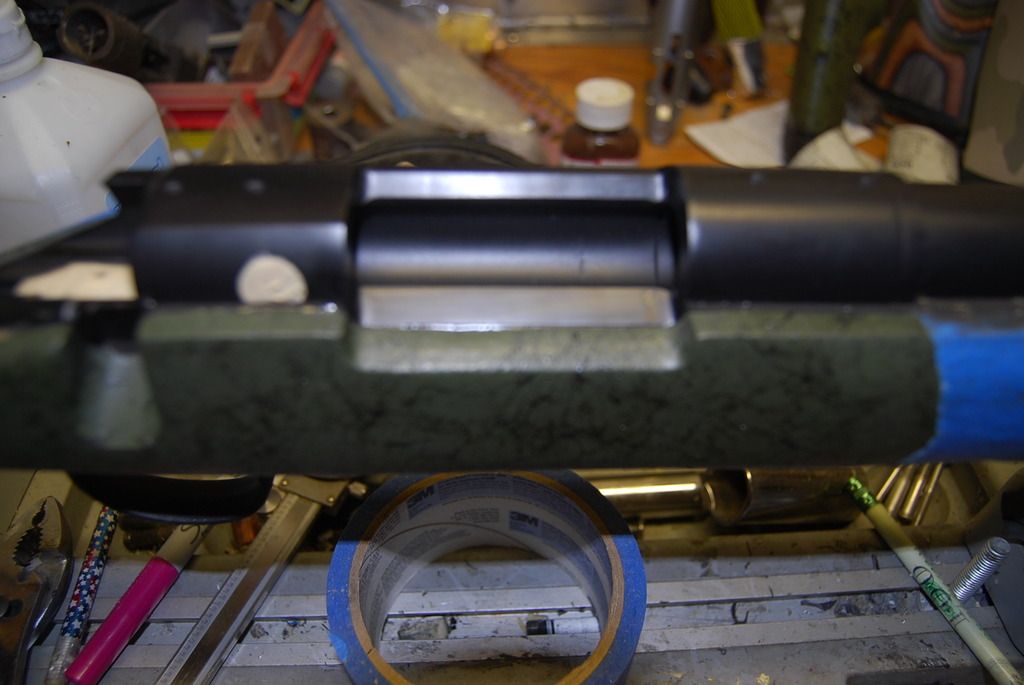
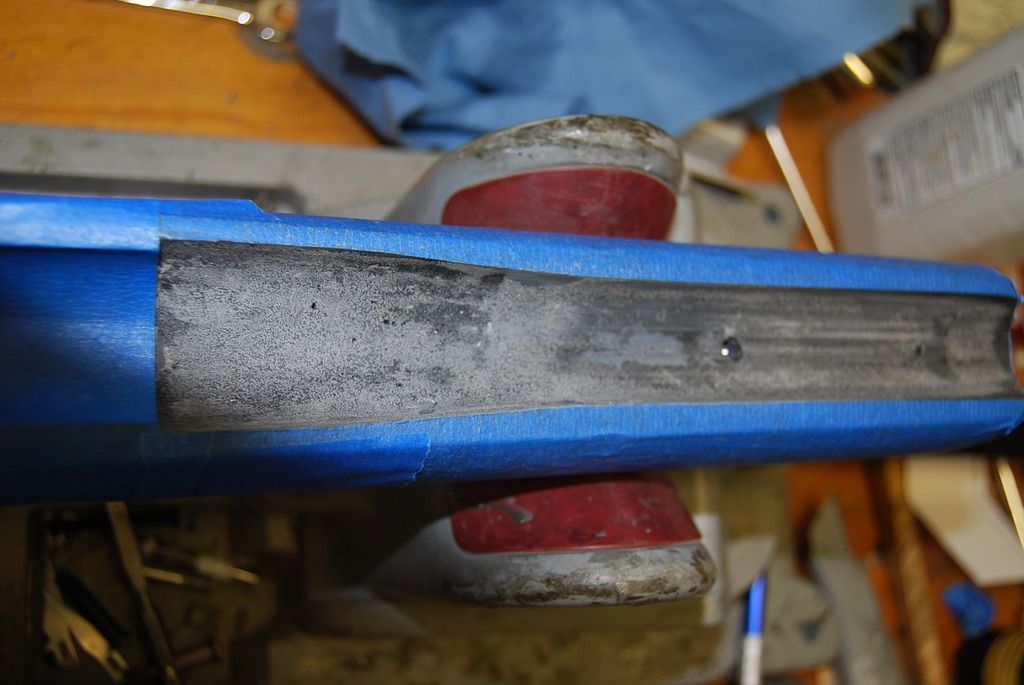
1. tape the barrel channel and action recess with 3M painters tape, I try to follow the edges as closely as possible. Its a good idea to clean the edges first with alcohol and let it dry before taping.
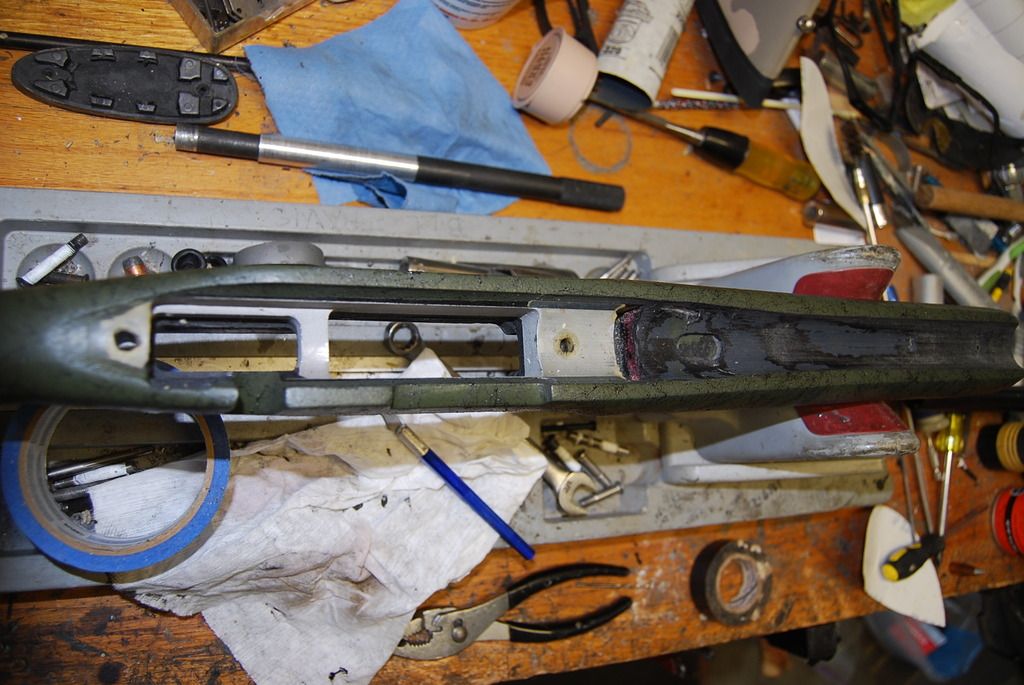
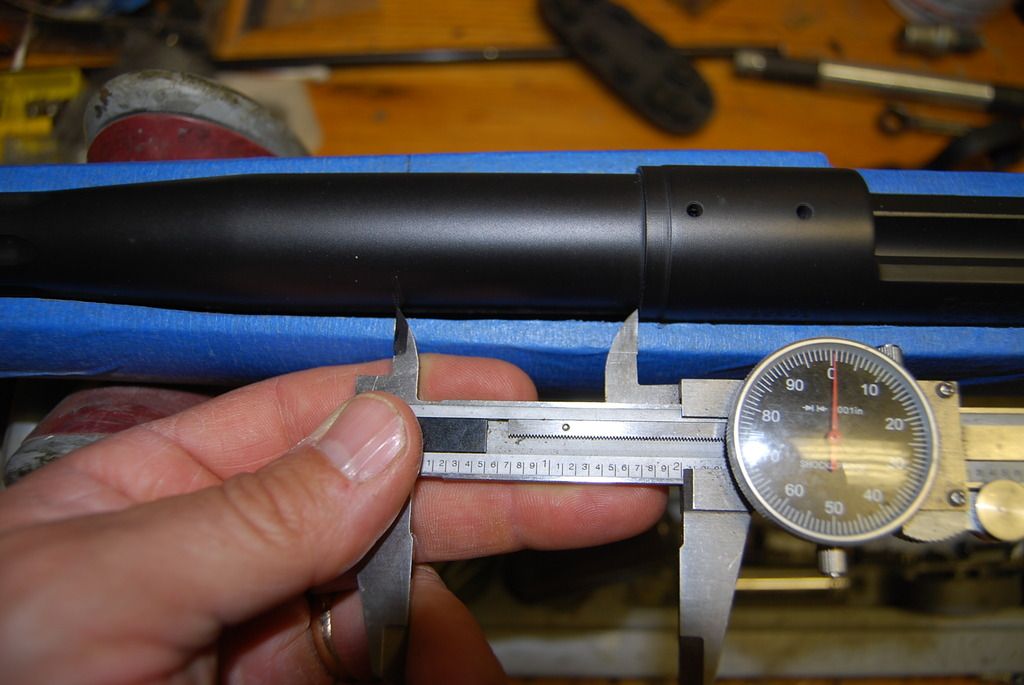
2. I sit he barreled action into the stock and line up the screw hole so I know its very close to where it sits.
using a pencil I trace a line on the tape where the channel will be cut out to fit the stock, I allow float space so its traced accordingly
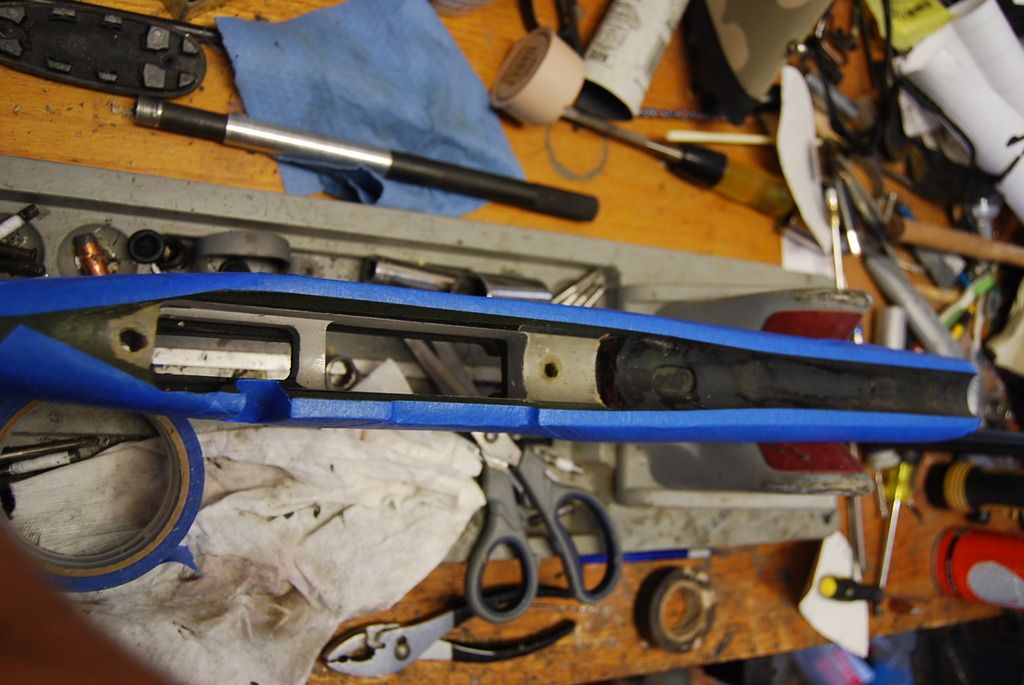
3. after getting the lines down I put the 120 grit flapper wheel on the dremel and sand to the line VERY carefully, after a few years I have developed a two hand hold for the dremel holding the front with my left hand and sitting my fingers on the stock while doing the movement with my right hand on the back of the tool, it keeps the tool very steady and keeps down the boo boos.. you will notice I keep the shop vac in front of the cutting to keep the dust to a minimum.
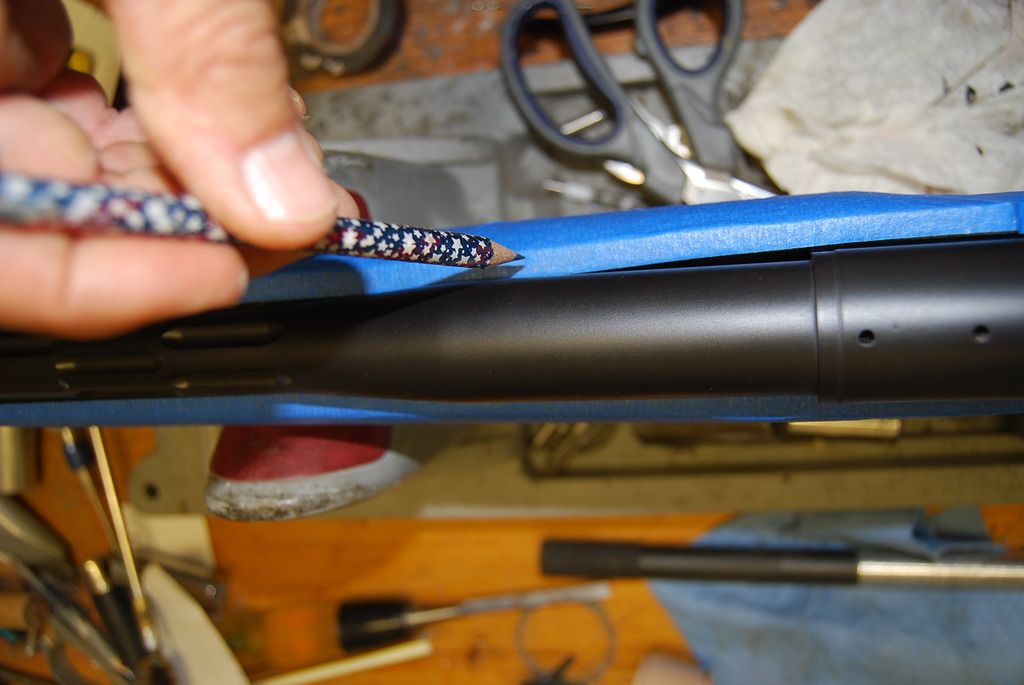
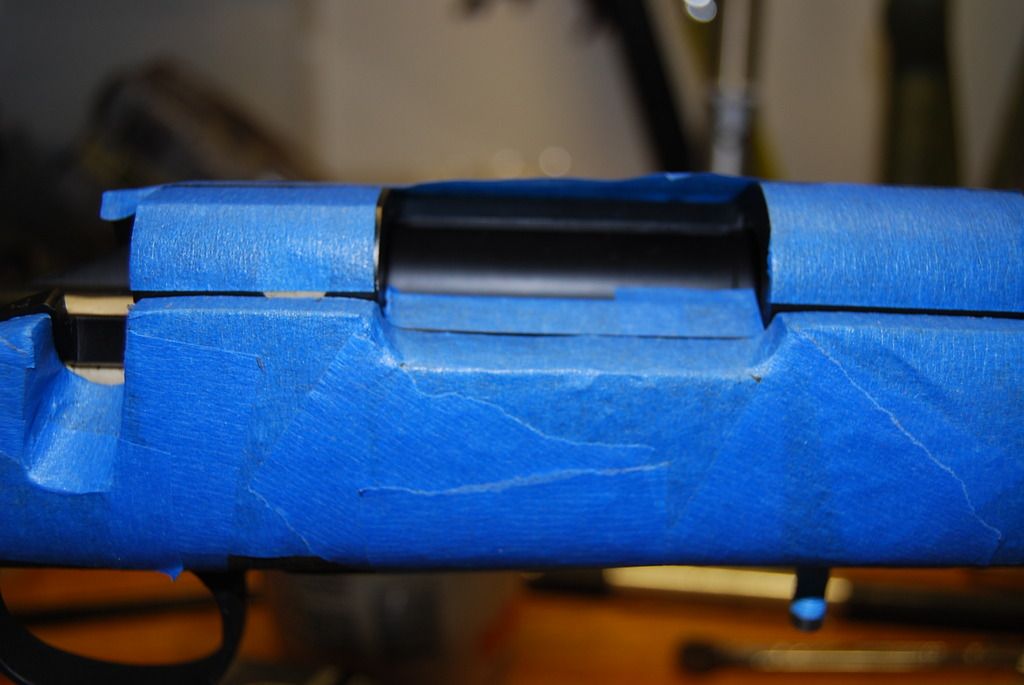
4. after the barreled action will sit in the stock with barrel clearance I install the rear action screw to line things up and then scribe a cut line around the back of the tang
5. while its in the stock I mark a line in front of the tang for the bedding stop, in this case 2"
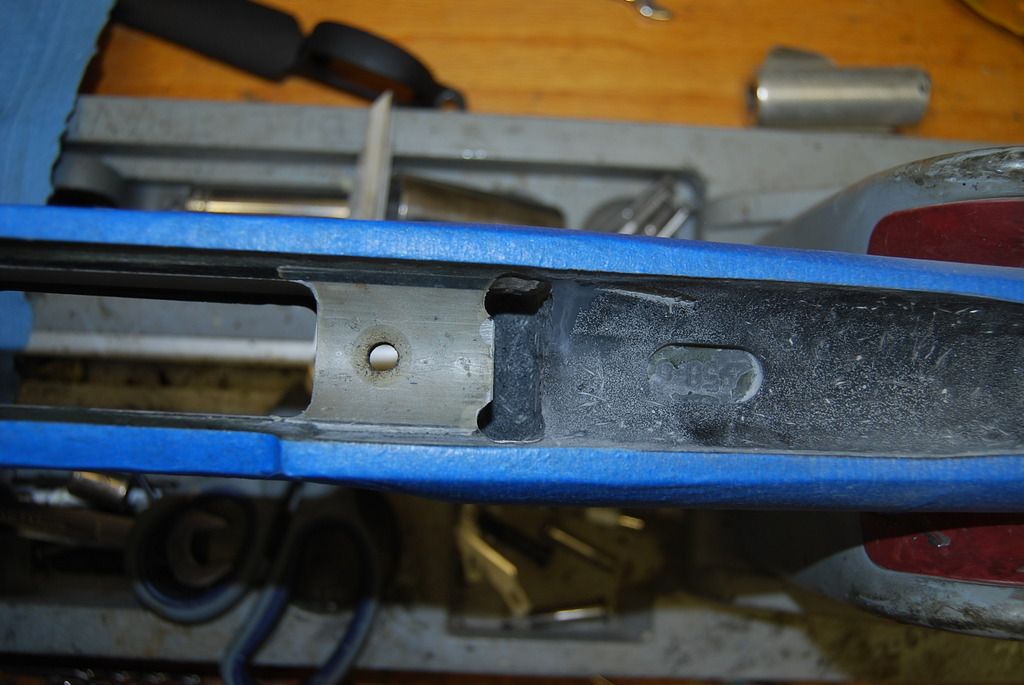
this gives me a line to cut to for the barrel support. as you can see I have already prepped the stock by cutting out the old bedding and giving the new something to bite to.
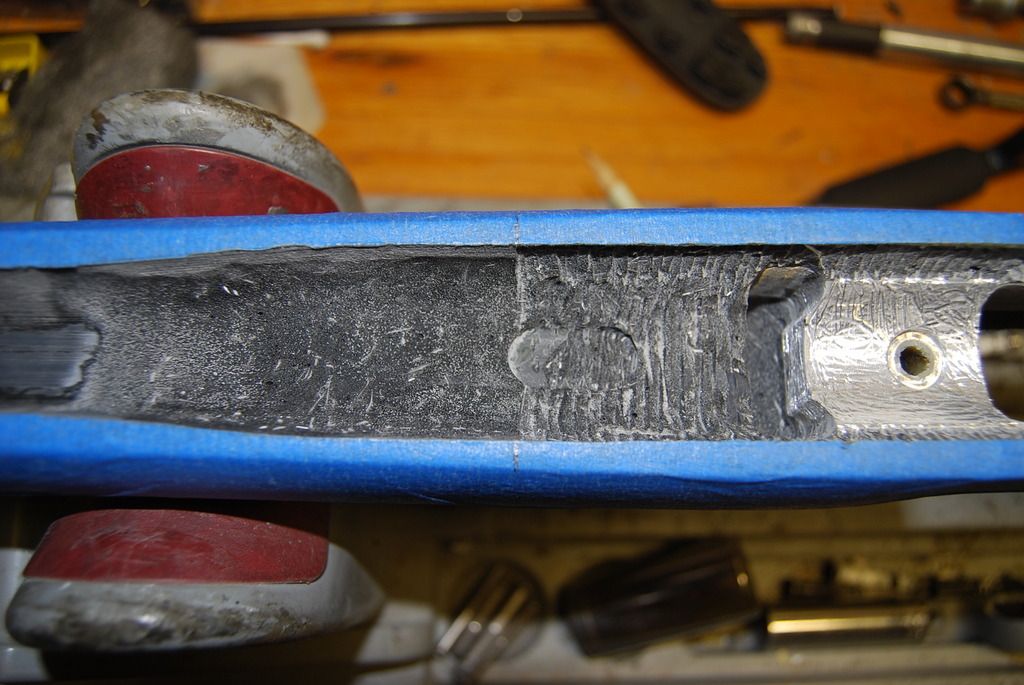
I also cut to the rear traced line and to the edge of the blue tape all around the action recess
6. while some use modeling clay etc I have found this works best for me.
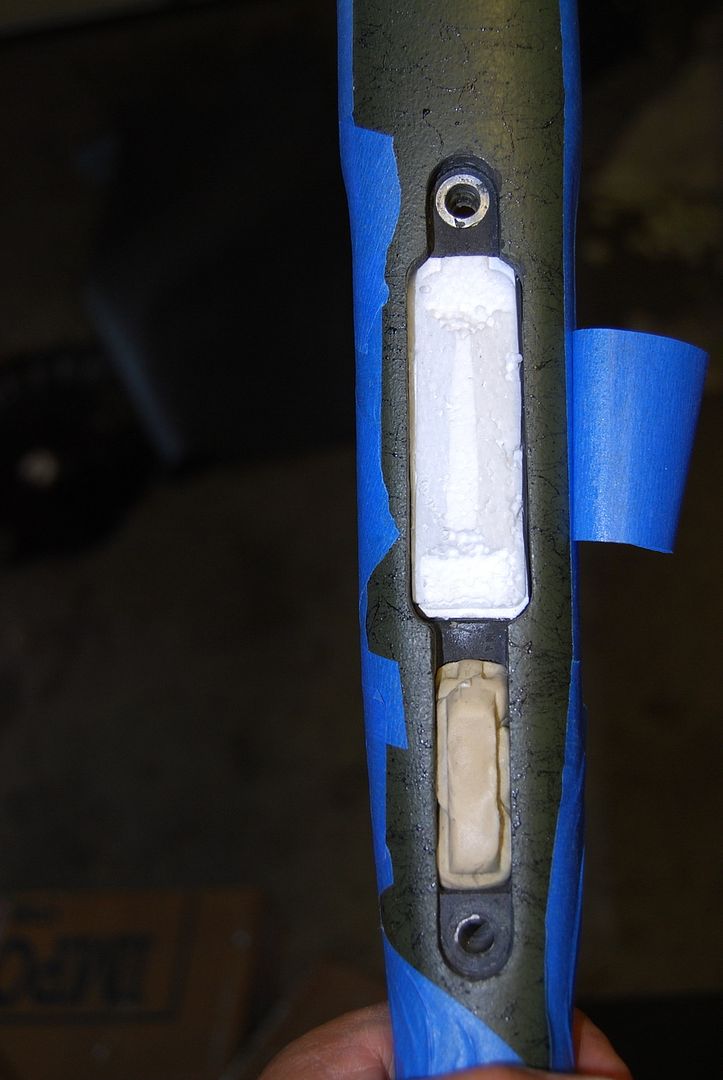
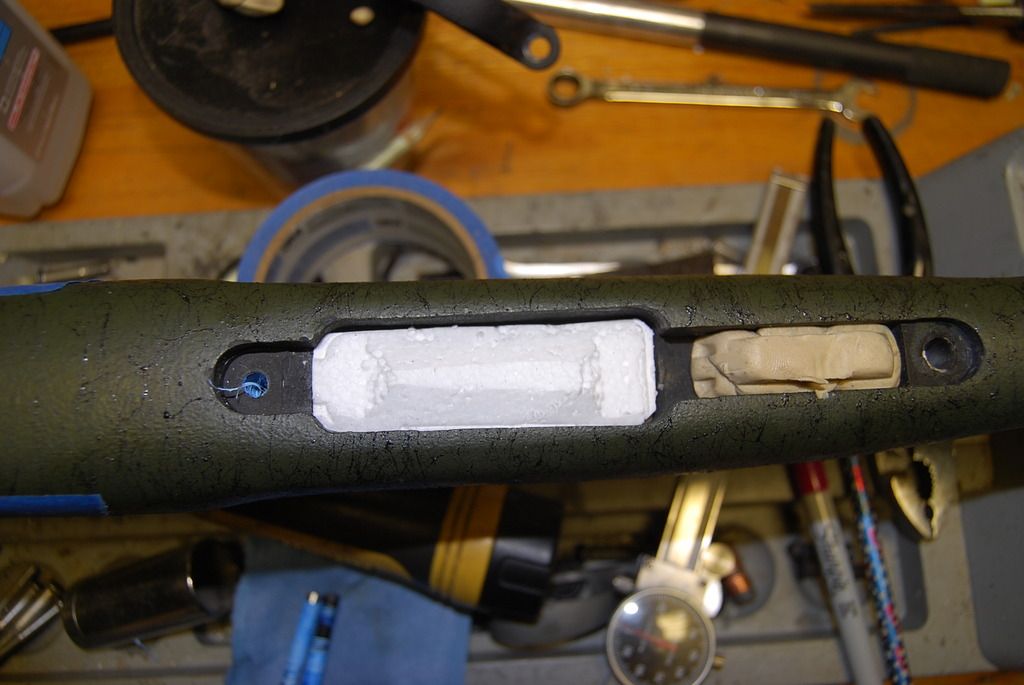
the bottom metal is installed and the trigger recess is filled in. this is a BDL stock and will have a storage compartment, the action will be bedded solid.
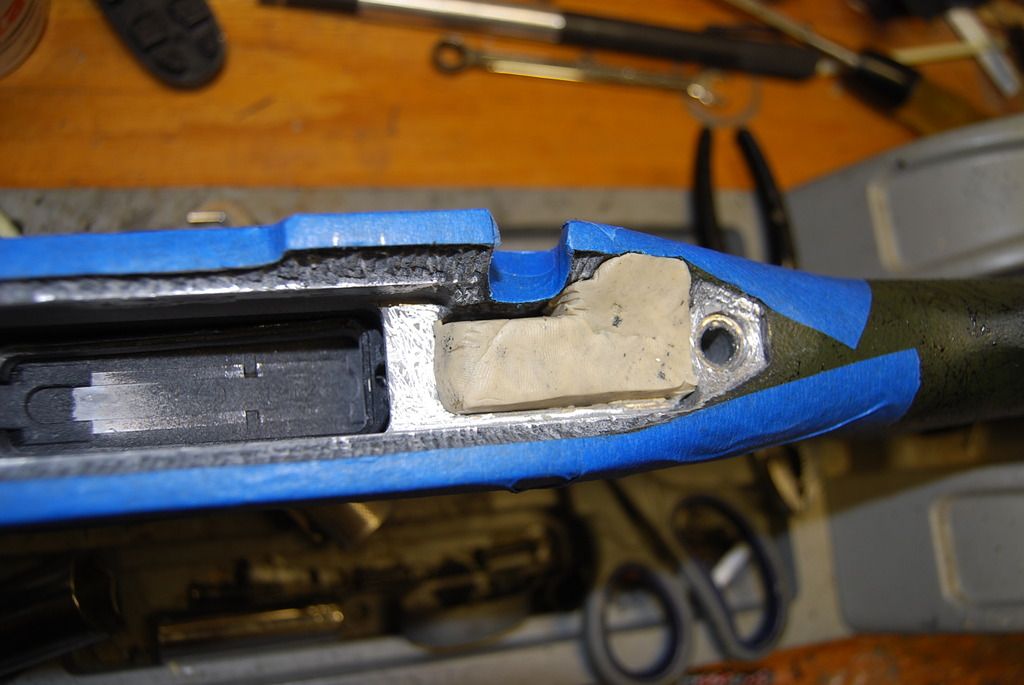
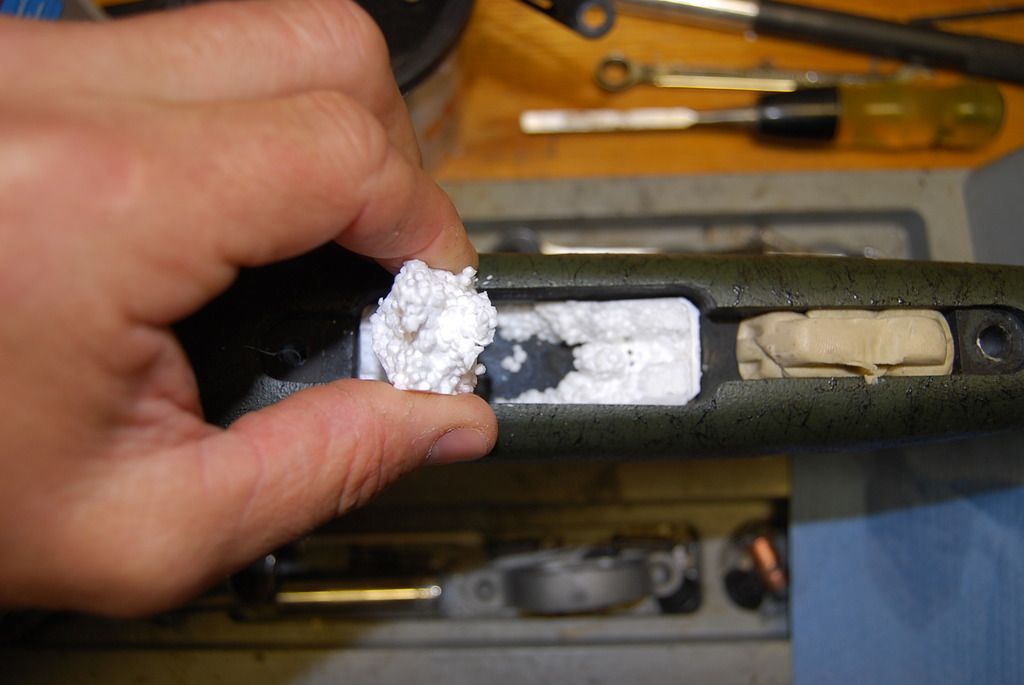
I then cut a Styrofoam block to fill in the mag well and fill any cracks with putty.
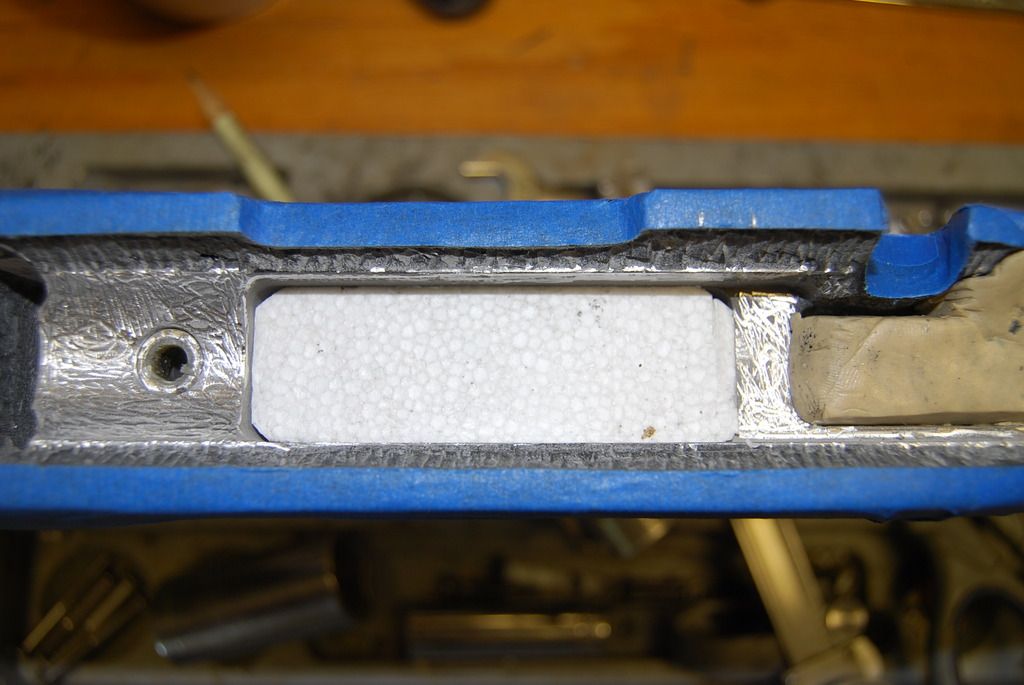
some of you have ask how I get the bottom of the storage compartment so smooth, a trick I learned through trial and error.
this is a thin piece of plastic from a scope ring box.
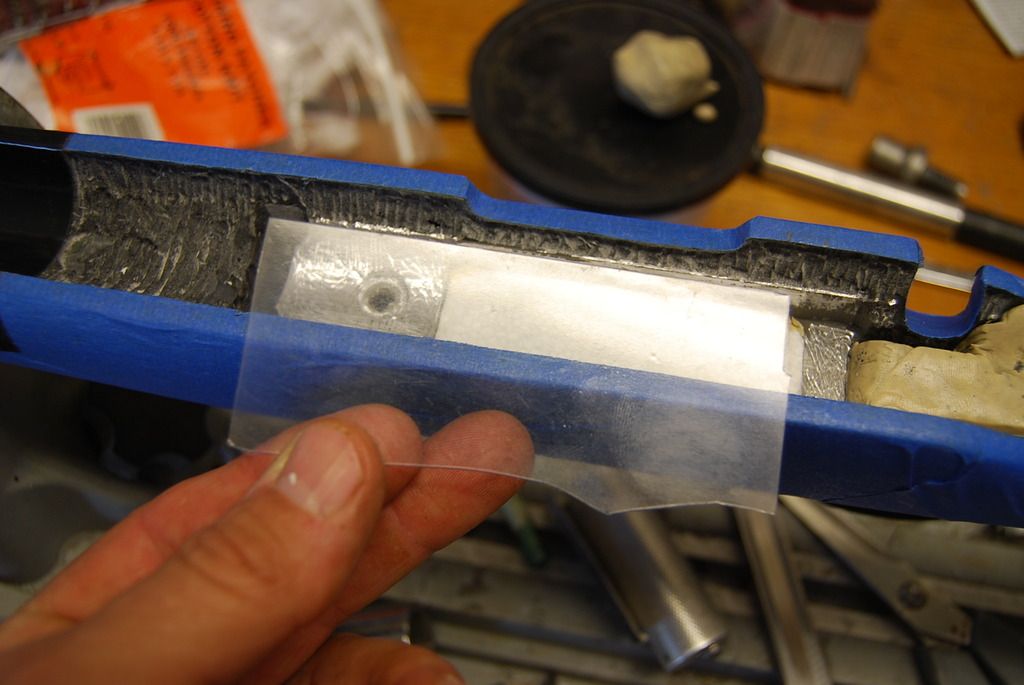
cut to size and placed over the foam. the bedding will be as smooth as glass when its peeled out.
the bottom side with the metal removed.
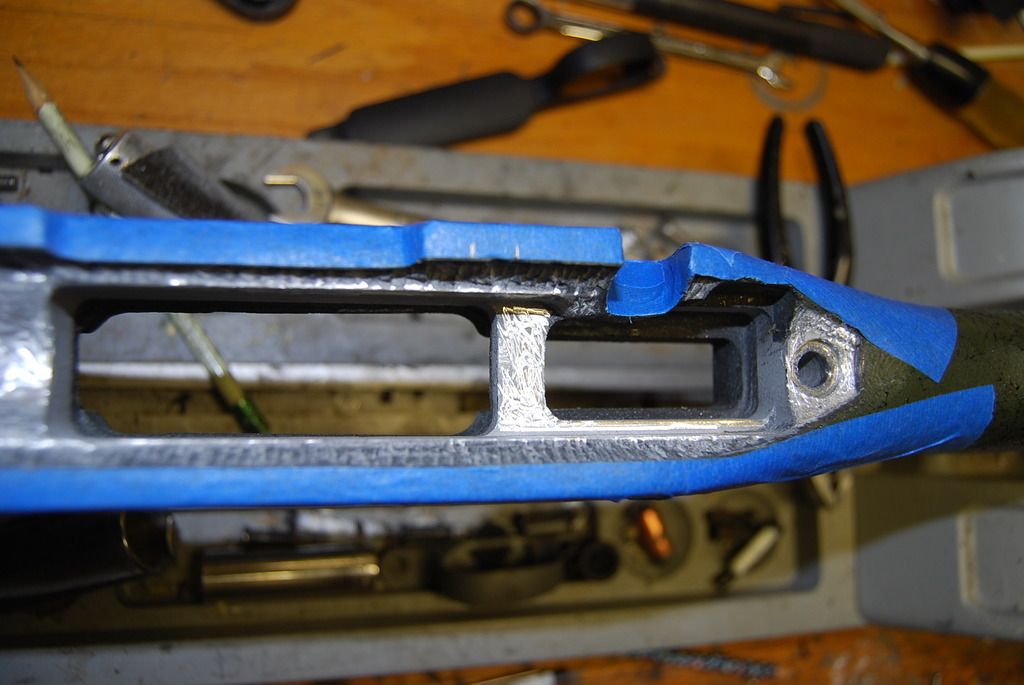
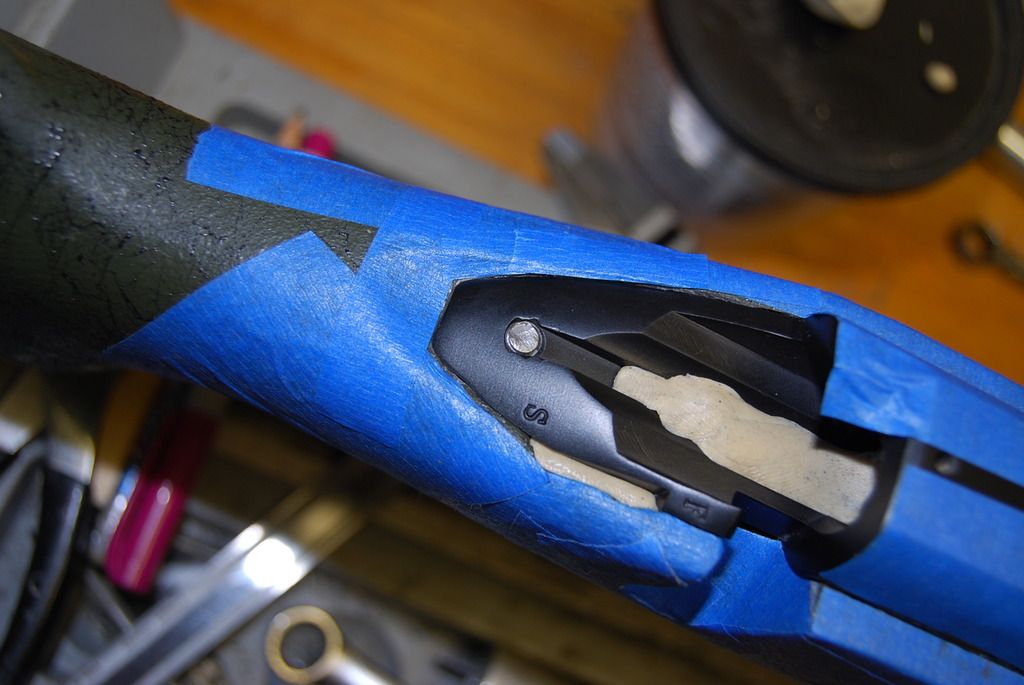
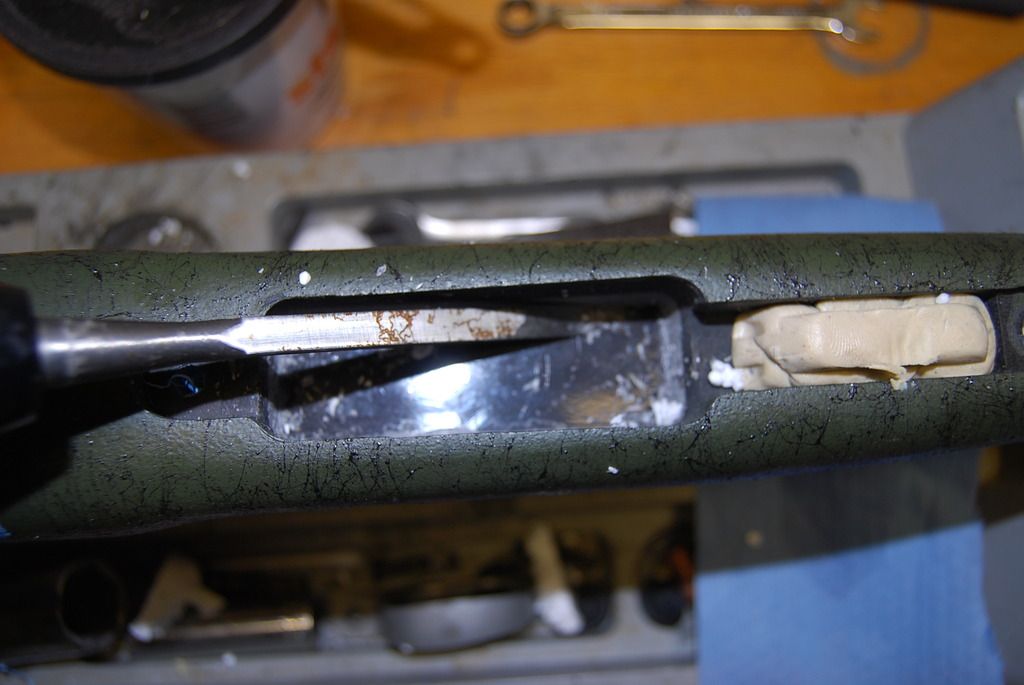
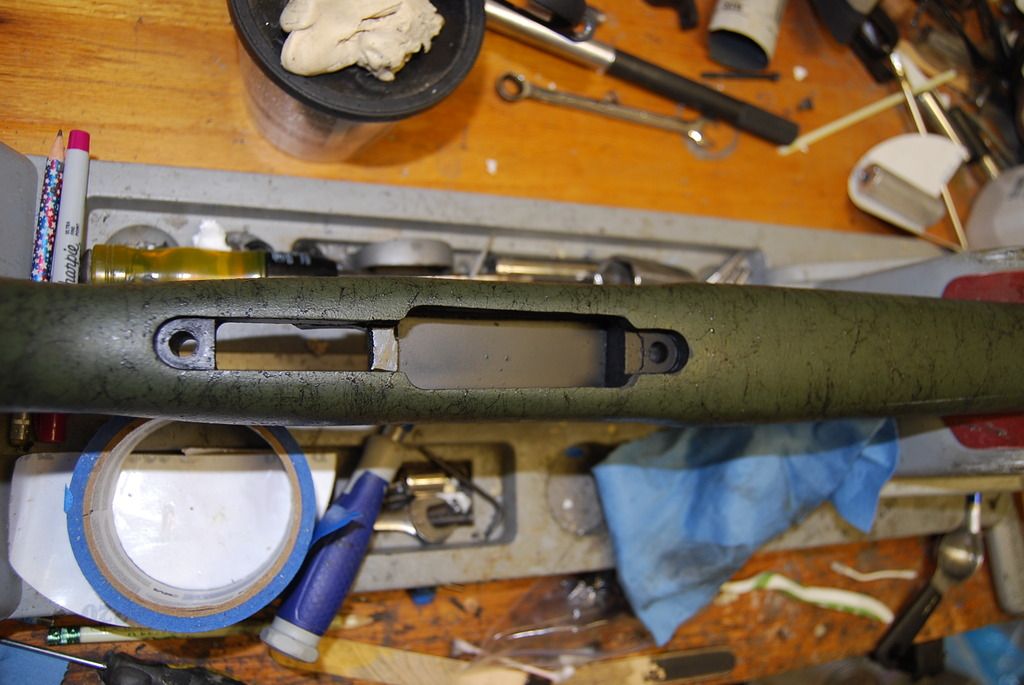
7.now to fill in the action voids, I fill a chamfer in the 700 ML rod recess because many times it will chip out upon initial removal from the stock
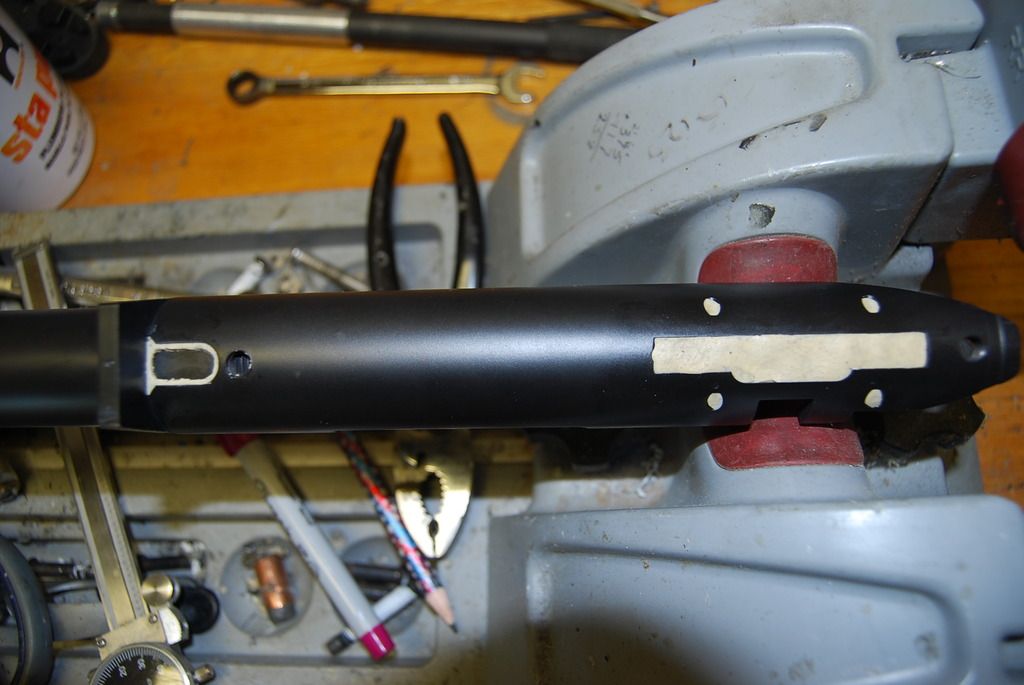
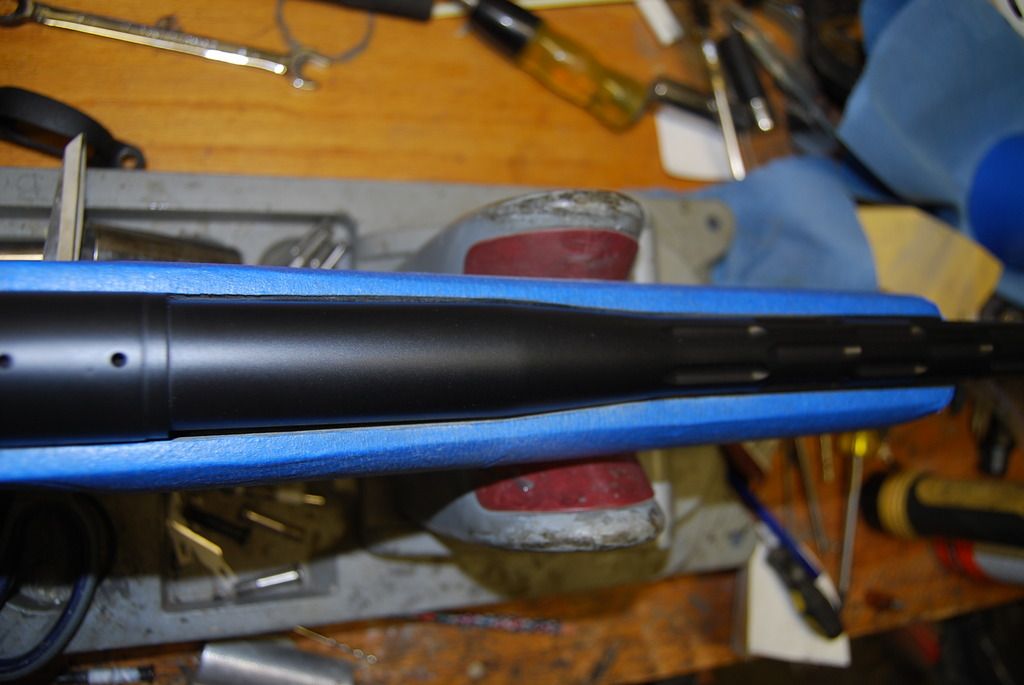
8. remember the line on the stock? this one matches it on the barrel
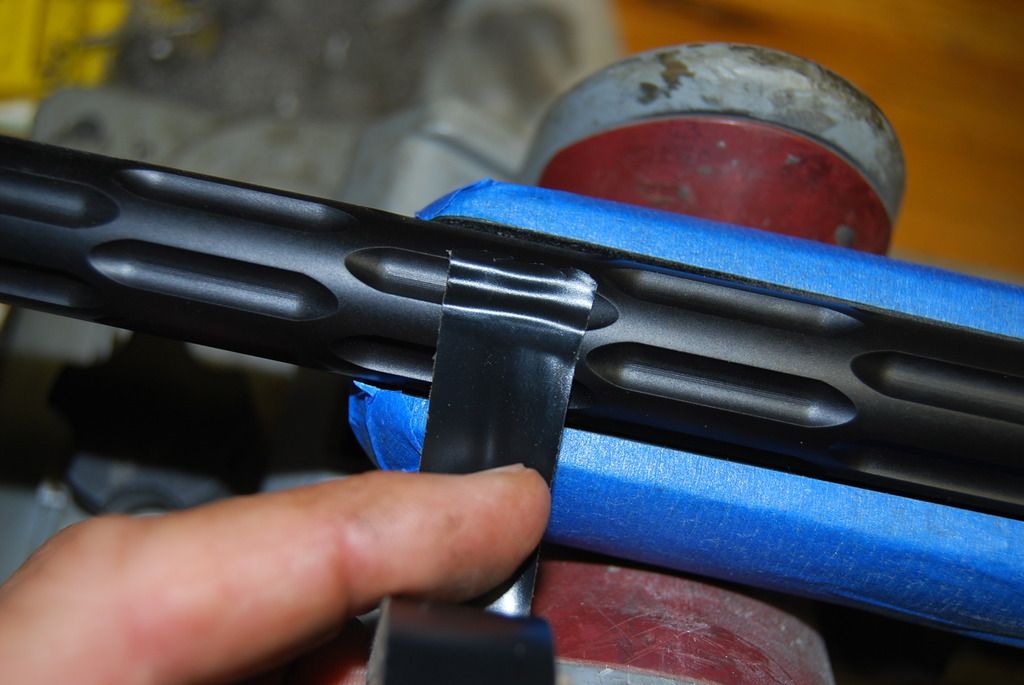
I place a piece of 2" wide electrical tape around the barrel in a straight line, I will explain later
I do the same thing inside the stock on the line that I cut to. the tape will give a straight line @ both points to cut the bedding and since it will not stick to the tape on either it makes for a neat clean job.
next: to cut some electrical tape for the front, sides, and bottom of the lug

applied to the front of the lug and trimmed with a very sharp exacto knife
the same is done on the sides and bottom.
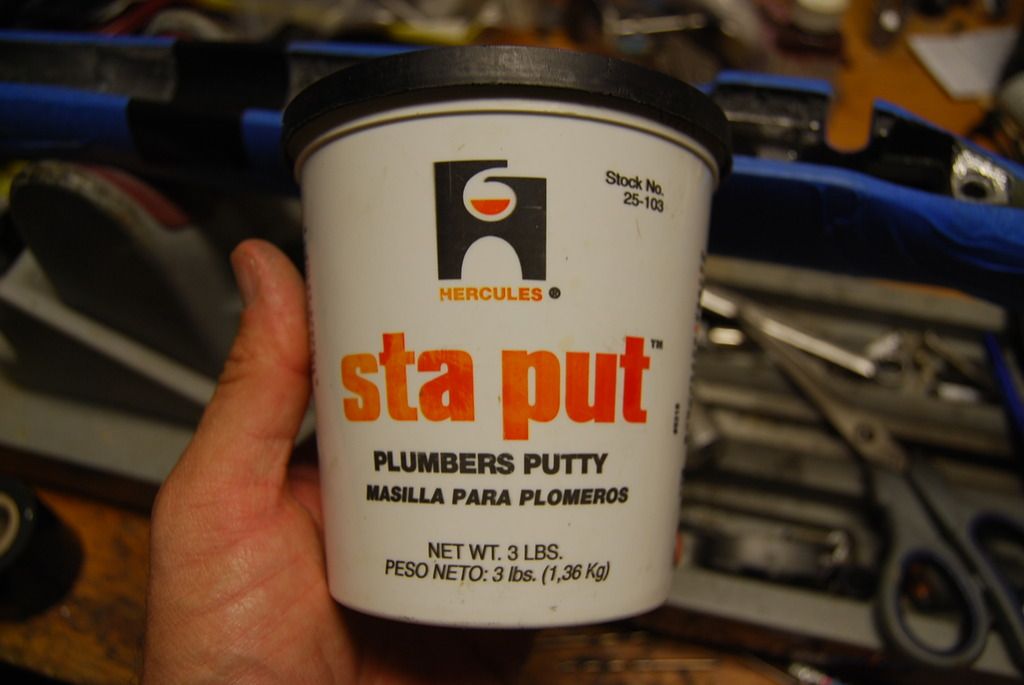
9. now for release agent, it don't get any better than this.

I put it on with a cotton patch and qtips in the tight places. I coat the whole action and the first few inches of the barrel.
don't cake it on, just a decent coat is all it takes. let it sit for 30 min or so and buff it off with a lint free cloth. buff to a shine.
now to put release agent on the stud and action screw.
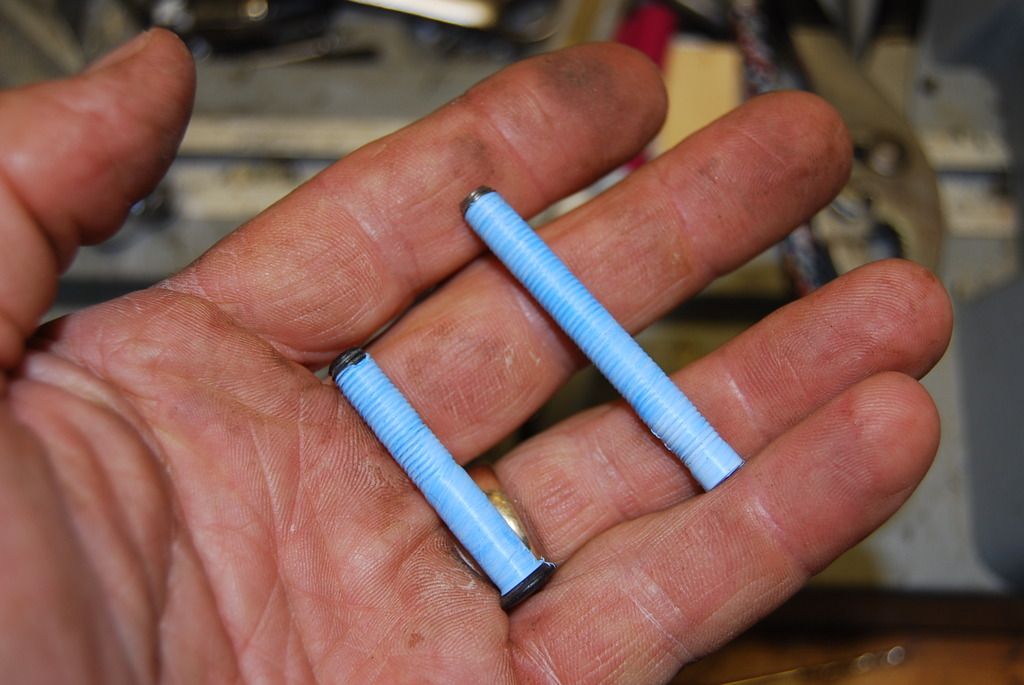
as you can see this is Teflon tape, the bedding will not stick to it and it will allow the screws to be backed out after bedding dries
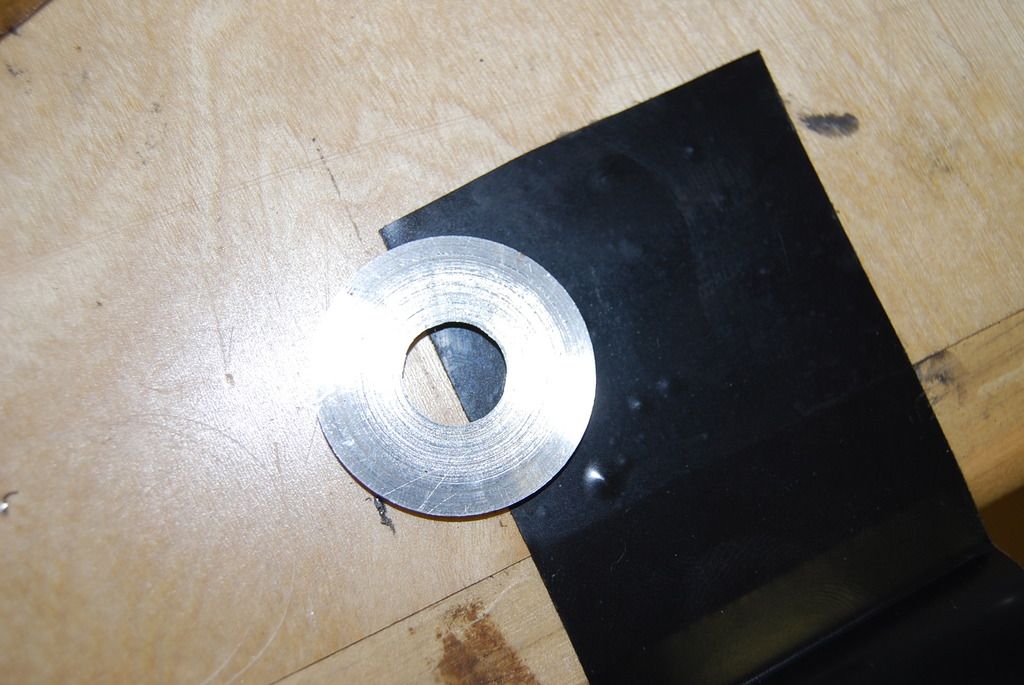
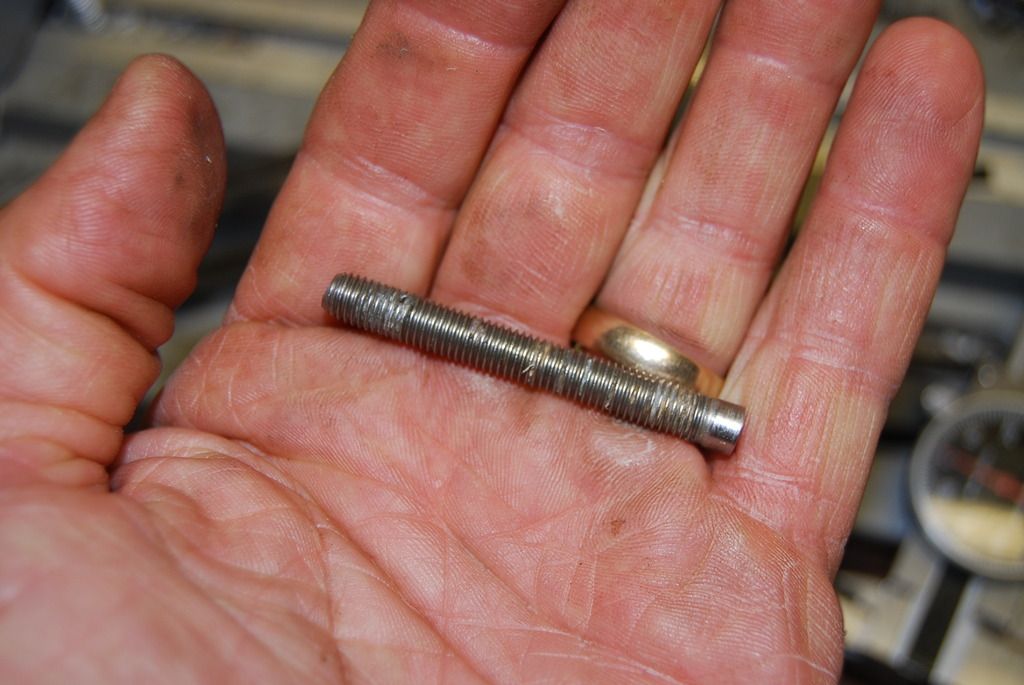
the stud goes in the action; simply a 1/4" x 28 with the head turned down flush.
now its time to sit it in the stock and make sure everything fits well, if so its time to tape the barrel to center it in the barrel channel
put just enough tape on to contact the sides, not so much as to bring the front of the action up, in this case 7 wraps of electrical tape.
next is a very important step to keep the mess to a minimum.
with the barreled action sitting in the stock where you want it install the rear action screw so its where it will be when it bedded and add tape just above the stock line.
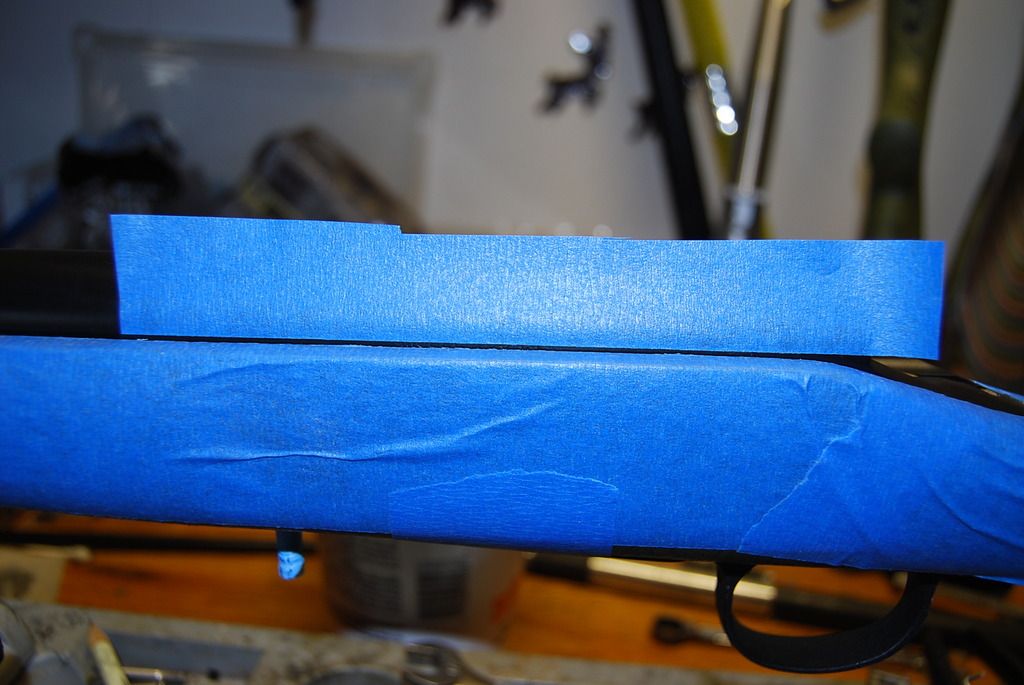
slightly higher from the lug forward
when you pull the action from the stock make sure the tape edges are rubbed down flat.
10. now its time to mix the bedding, in this case Marinetex.
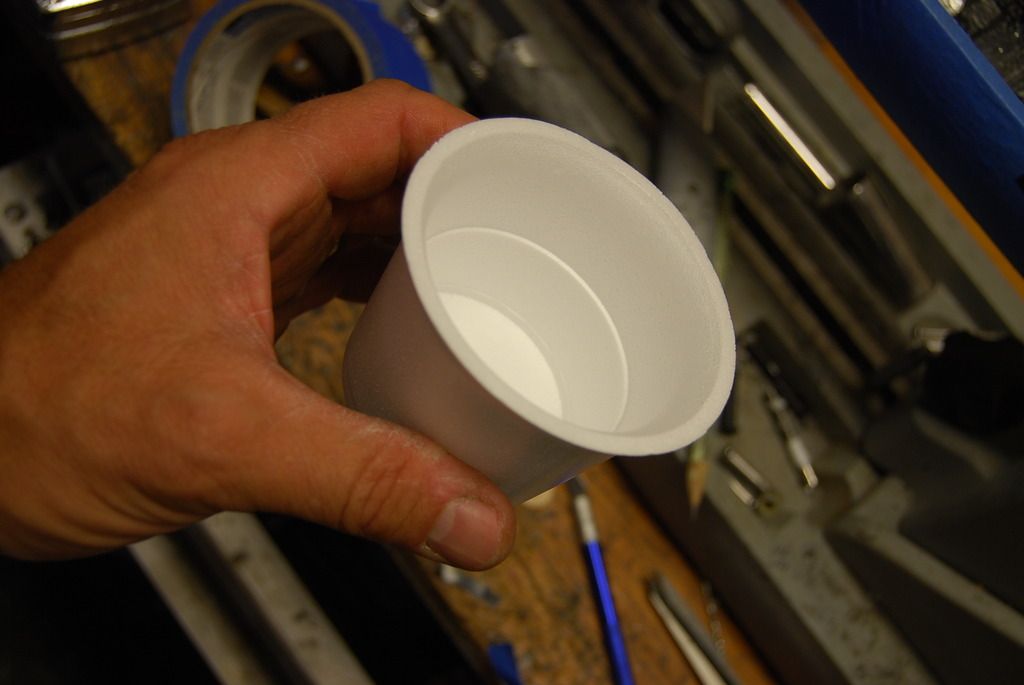
my mixing cup, not ideal but it works.
I simply cut it to size with a razor knife.
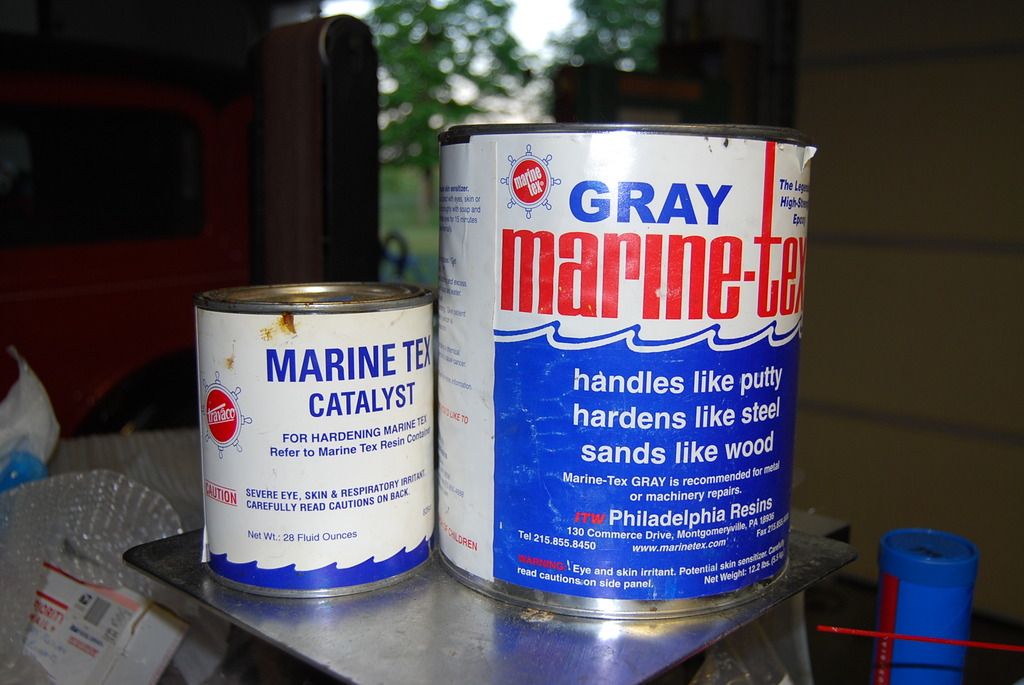
marinetex works very well but so does other epoxies, I prefer marinetex and Devcon aluminum putty, they are neck and neck. marinetex is a little more snotty but it flows better.
into the mixing cup; follow directions to the letter when measuring.
a trick here is to heat it with a hair dryer while mixing, just get it very warm so it mixes and flows easier, it will also set up faster.
when you put it in the stock start with any recesses or low points and fill from the bottom up taking care not to make air pockets.
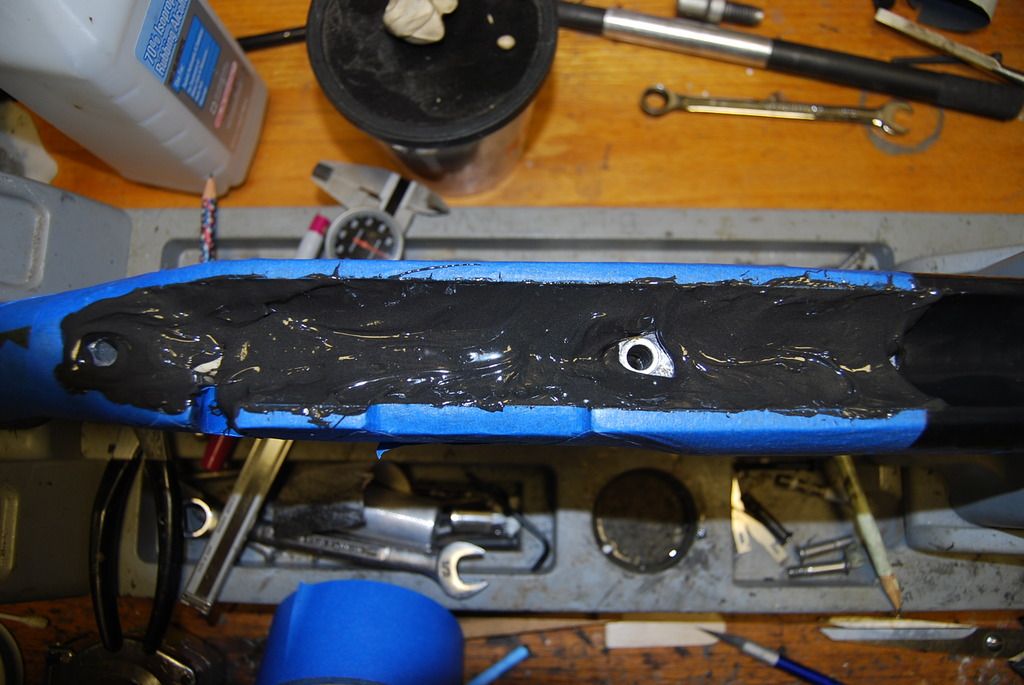
then lower the barreled action into the bedding, the bottom metal is taped to the stock but take care not to knock it loose with the stud.
start the rear screw and slowly snug it up. I usually put a small clamp with minimal pressure on the barrel/ tape intersection just to mash the bedding out.
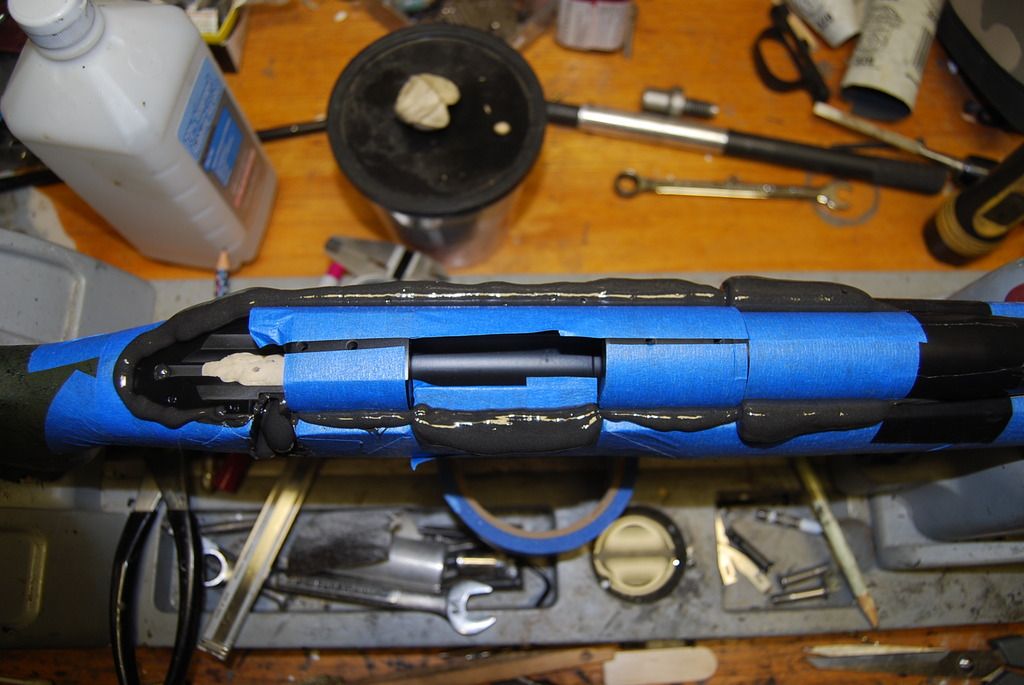
now it clean up time, I initially use the mixing stick to get the big stuff back in the cup.
I then use cotton swabs to clean the excess mess; take care not to get all the bedding from the action/ stock line, will explain later.
this is after the excess is cleaned off.
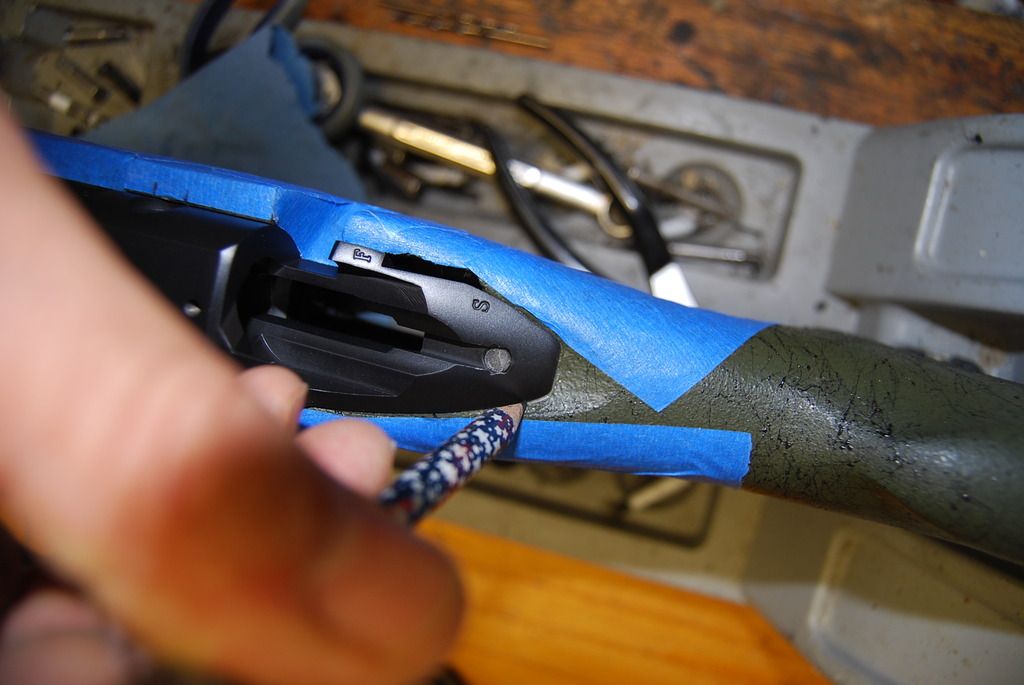
now to see what the tape is all about. tear the tape off and the mess comes with it. take the tape off the action first, then off the stock. ONLY take the tape off the stock to the front of the recoil lug, place your razor knife @ the lug and tear the tape at that point, you will see why later. you will notice a raise line of bedding around the action, its there for a reason, do not remove it!
with a cotton swab clean around the tang and ejection port; use alcohol on the swabs to clean it all off til it looks like this
you can see the raised bedding, it needs to stay this way for a reason that you will see later.
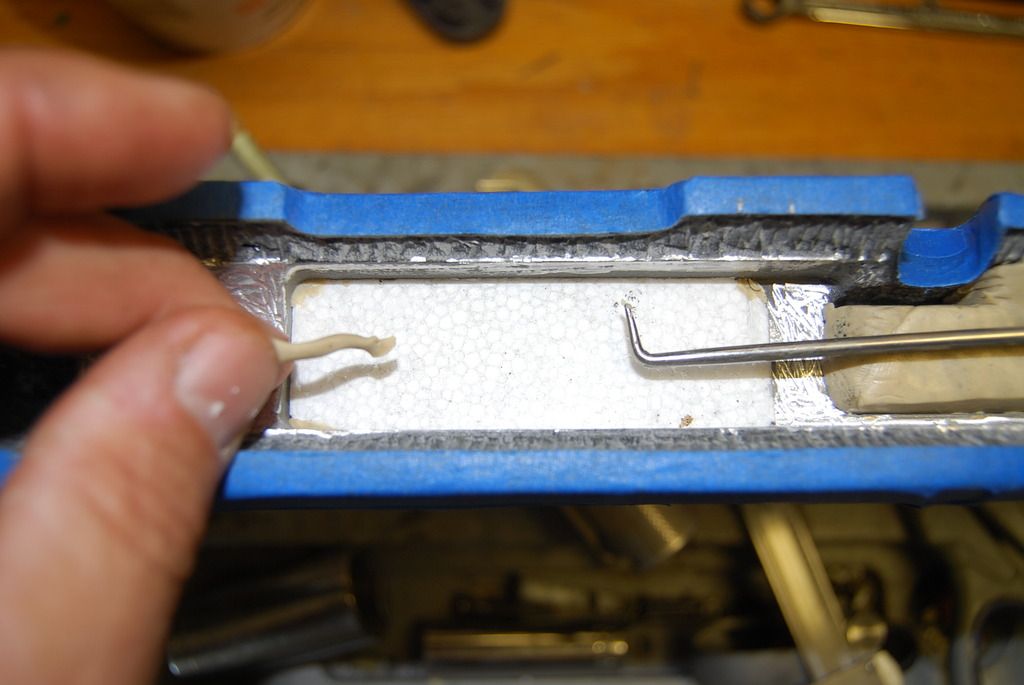
after drying 8 hours the screws can be removed and the Styrofoam block removed along with the plastic sheet, the sheet must be removed after no longer than 8 hours or it will come out in chips.
I use a 1/4" wood chisel to clean the edges and ends before removing the plastic sheet.
after its cleans up....
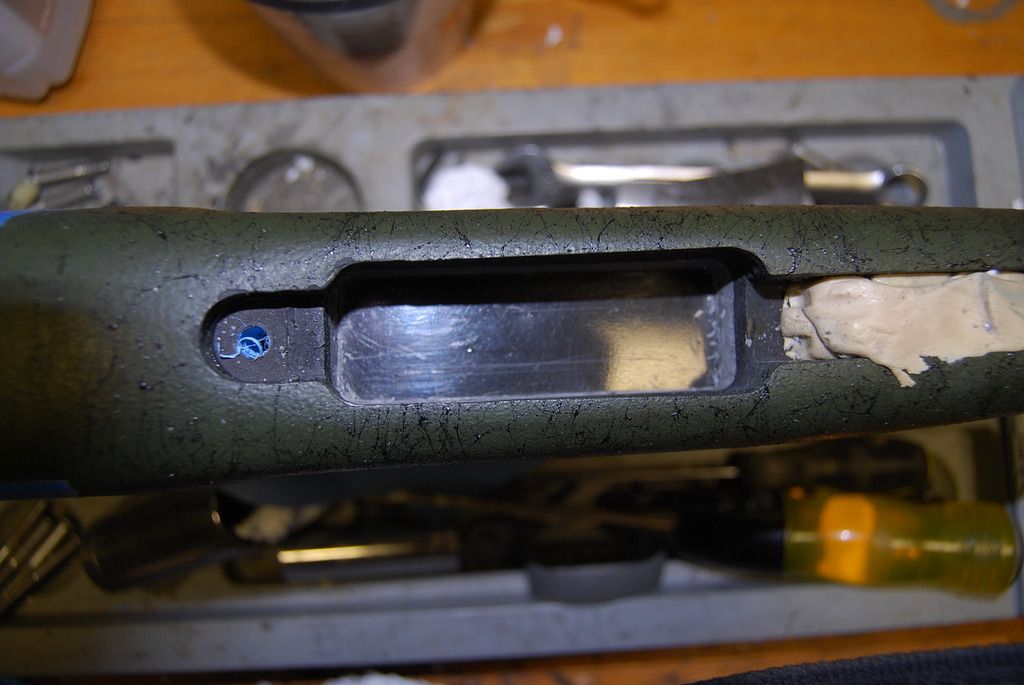
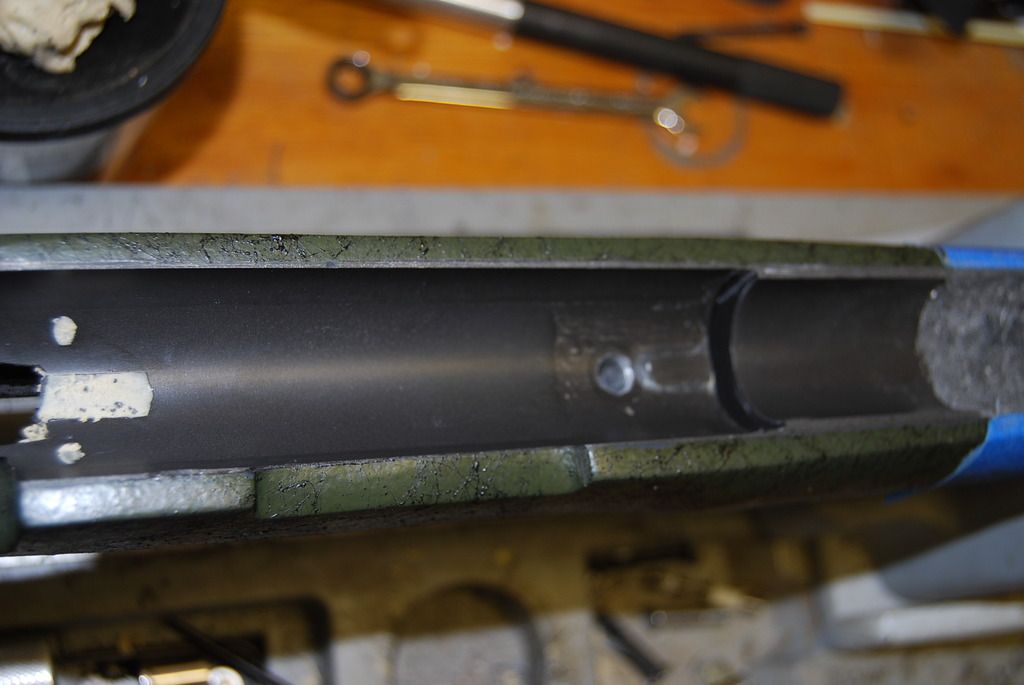
a peek at the top side after popping it out of the stock; came out well, you can see that its a skim bed over the block.
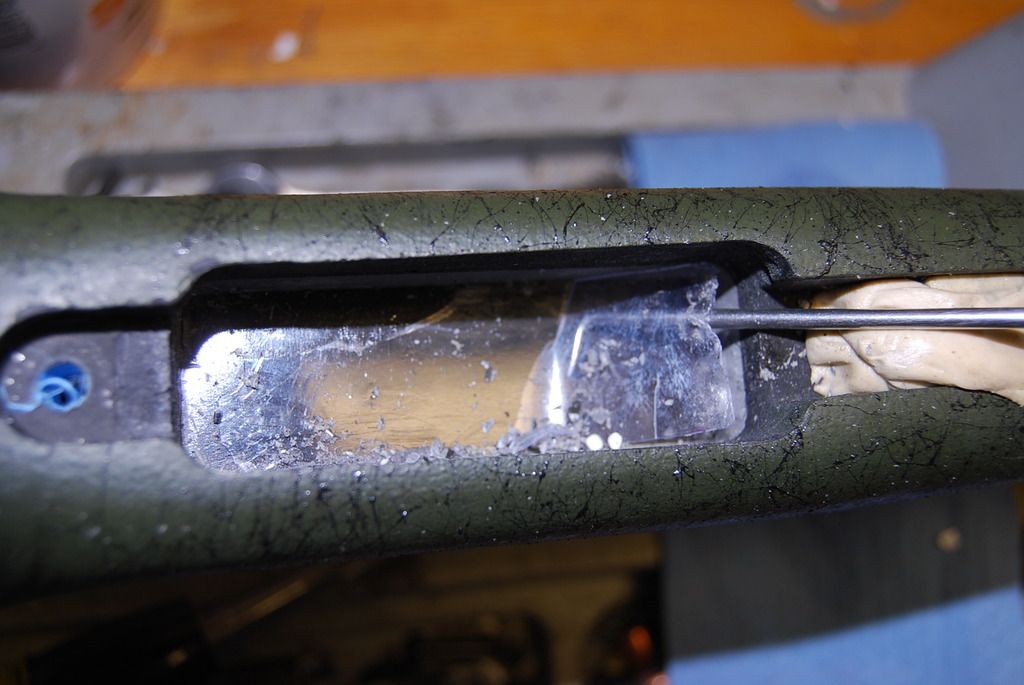
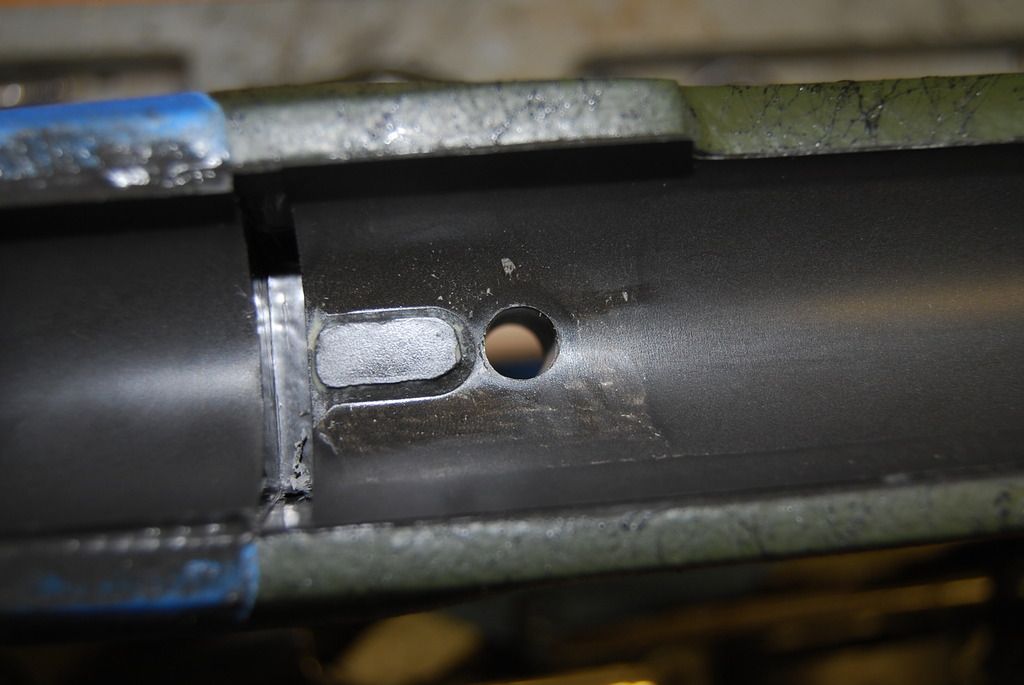
you will need a pic or something similar to dig the tape pieces out of the bedding in the lug area, they will not come out with the action.
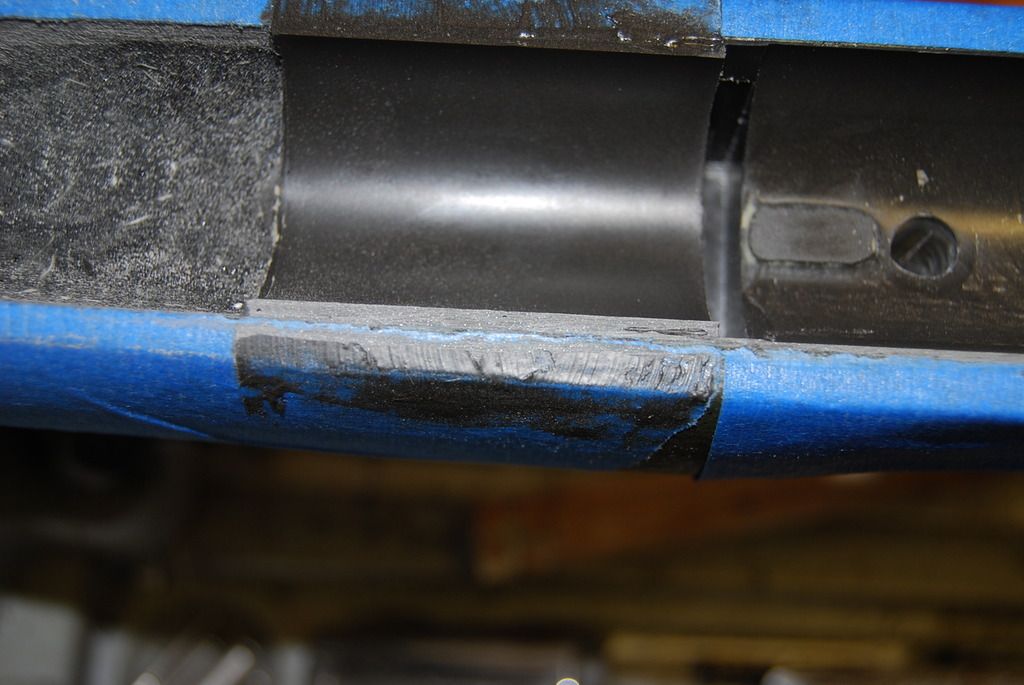
now you can see what the tape on the barrel and the stock are used for. cut the tape line with a utility knife and peel out the bedding..
I had no idea it would take tis many pictures but I will get it done sooner or later.
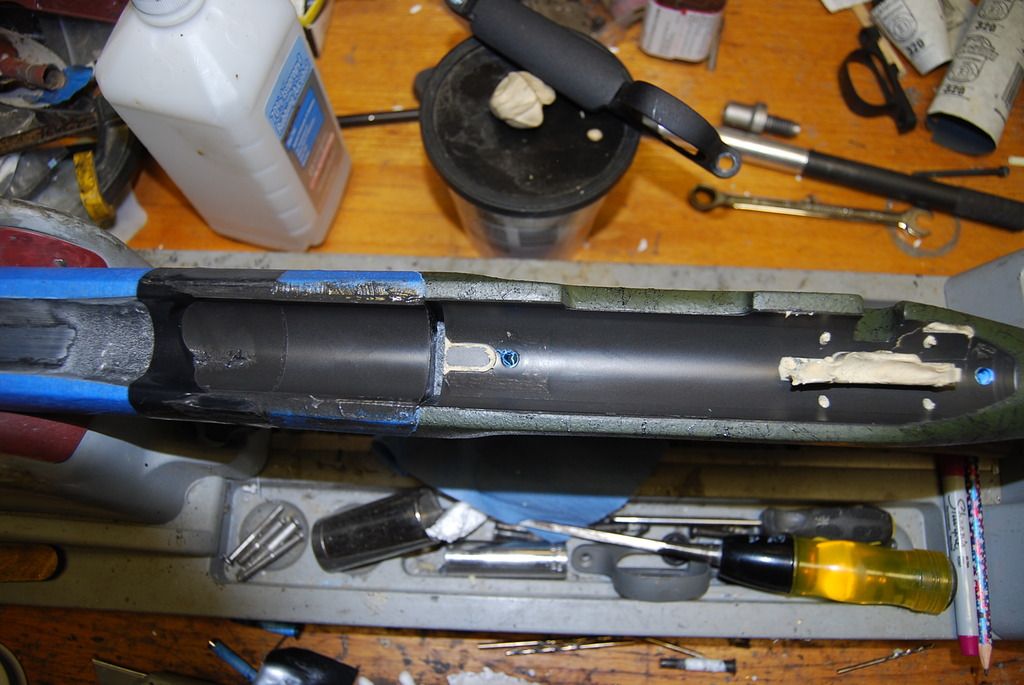
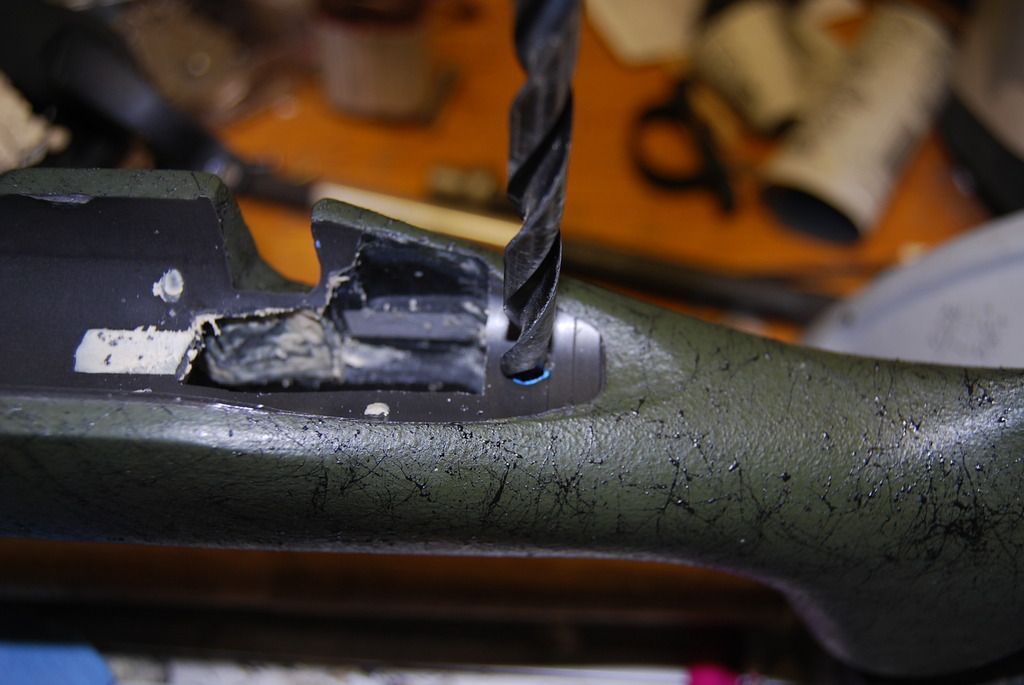
now its time to drill out the action screw holes. choose a bit that will fit the pillar from the bottom but drill initially from the top, if you don't it will chip out the bedding around the hole when it comes out the top; been there.
use very light pressure or it will chip, go 1/4" deep then you can drill from the bottom. the Teflon will come out when you do this.
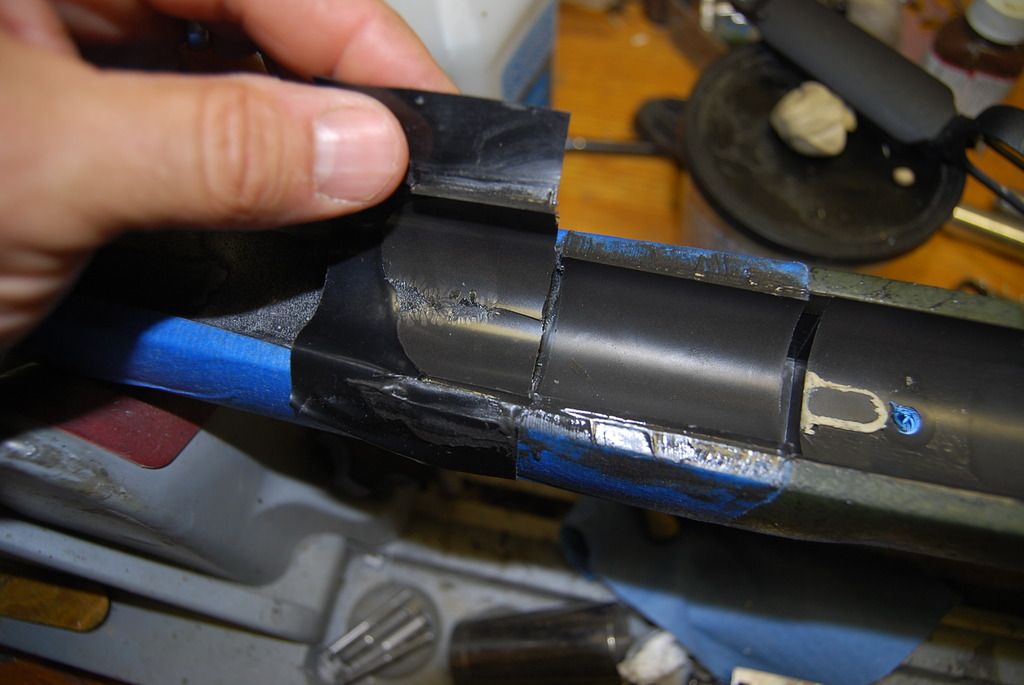
now retape the edges of the stock, be careful, the bedding will cut you like a knife.
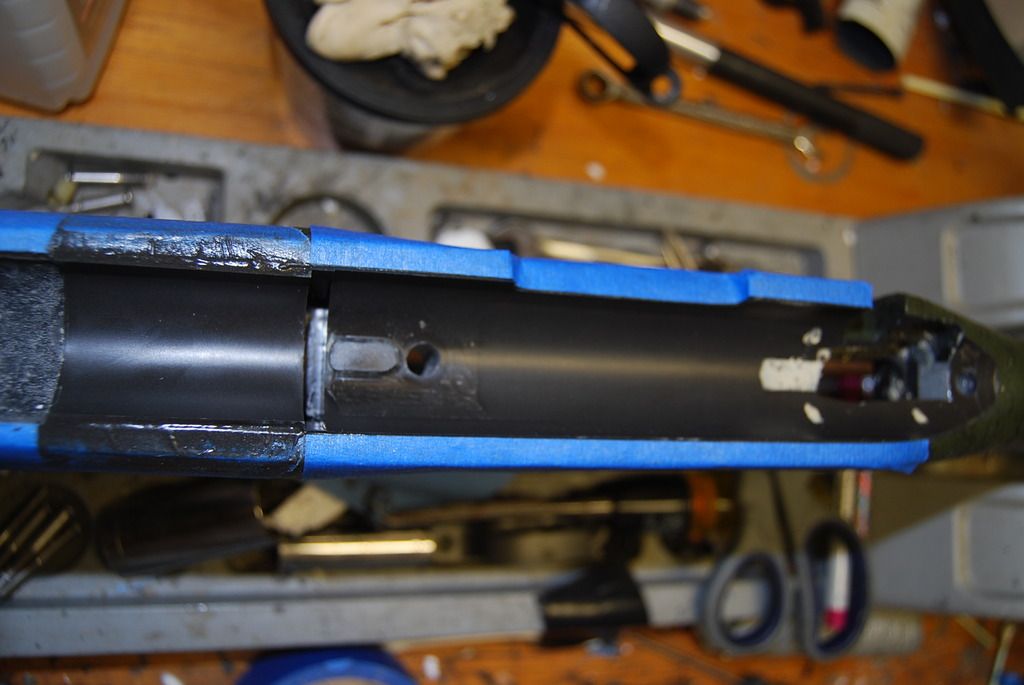
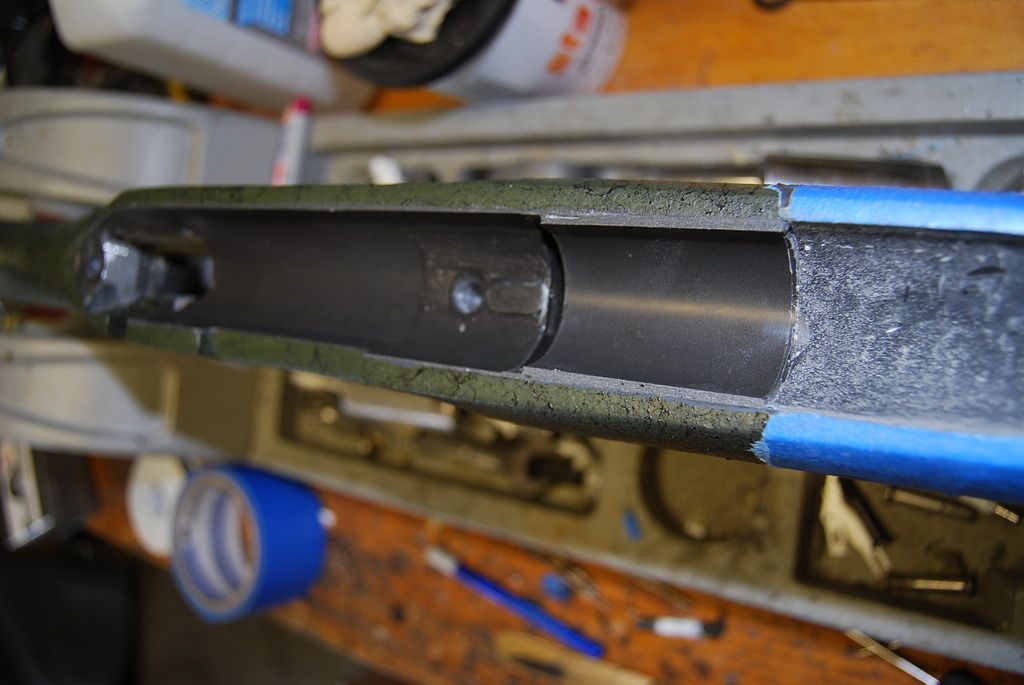
now you will see why the bedding was left high.
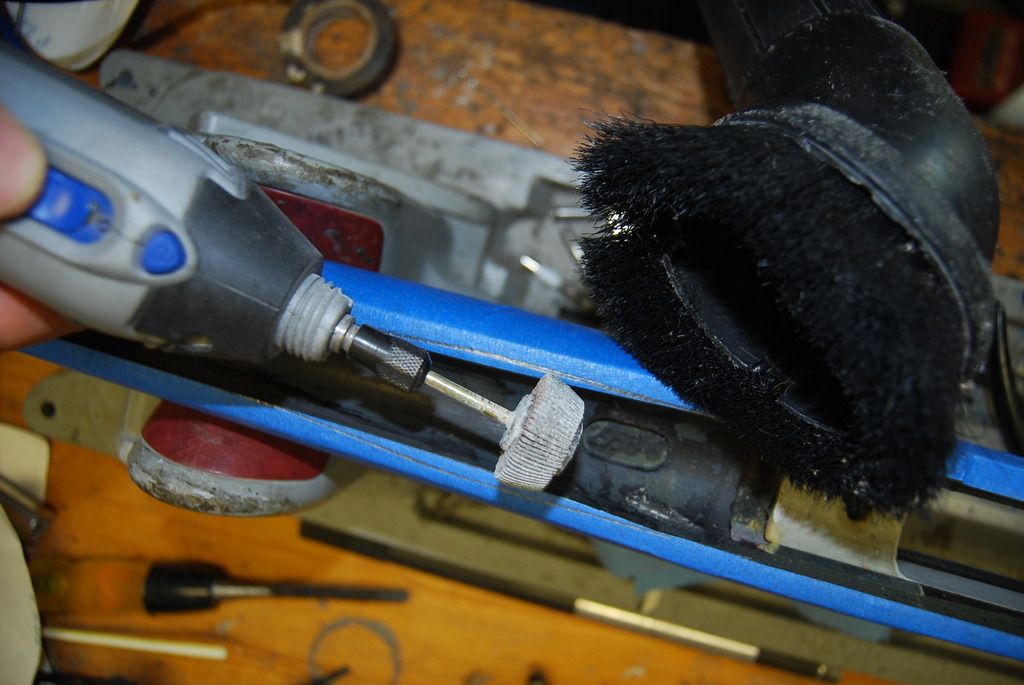
using a sanding drum I sand VERY LIGHTLY with the vac in front of the drum to catch dust. care must be taken doing this or you can get into finish in a big hurry.
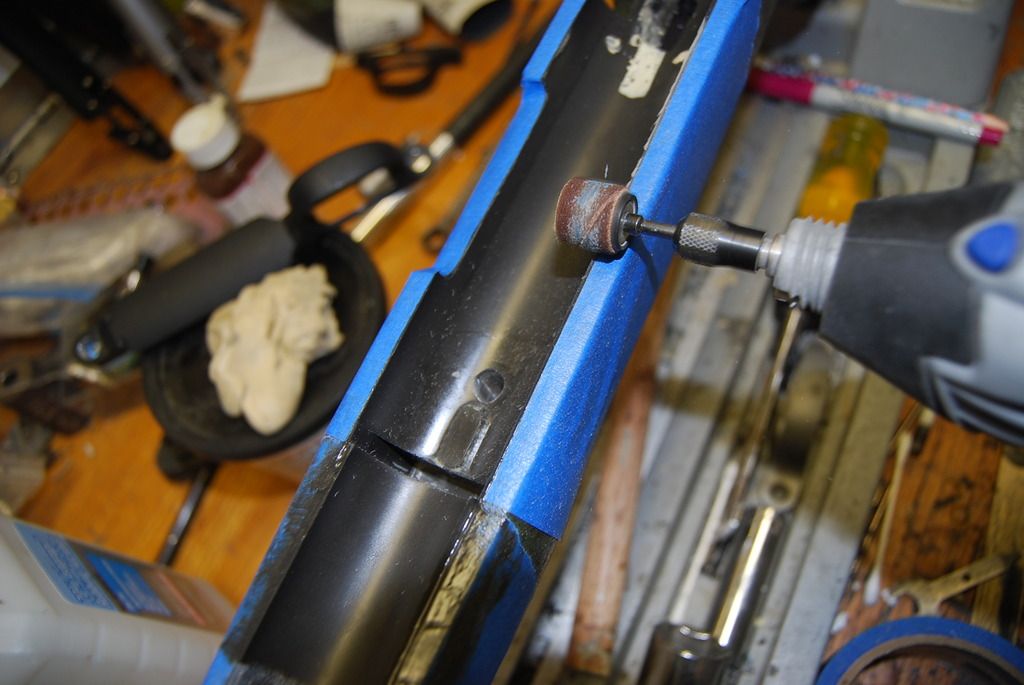
sand until you see the edge of the blue tape start to come off and STOP!
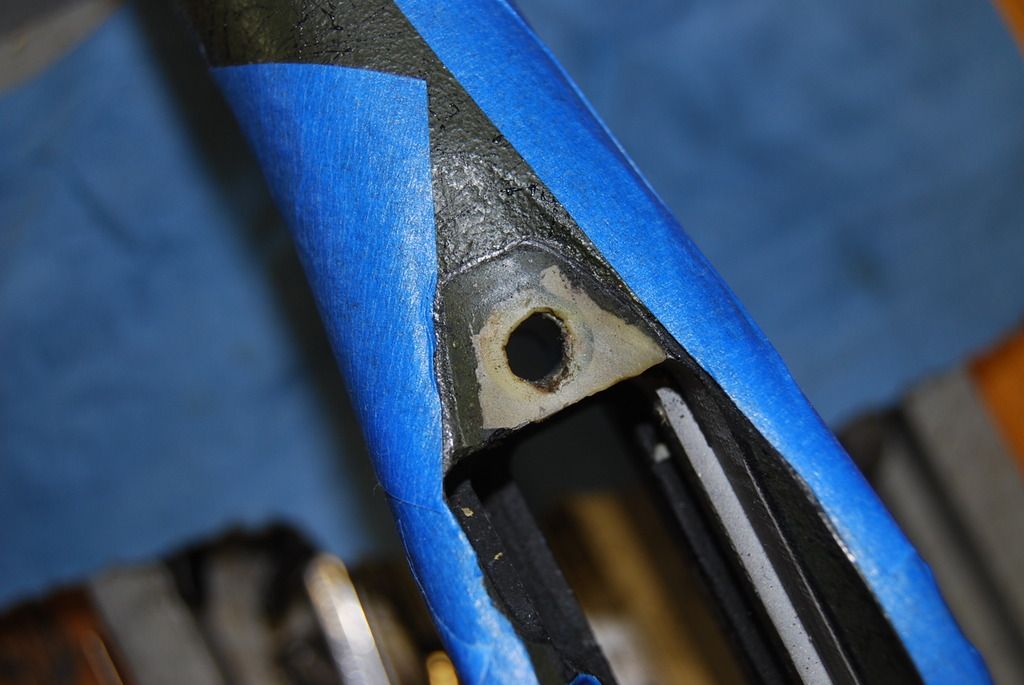
as you can see there is a very small depression in front of the lug that will have to be filled, that's the reason the bedding is left high, it will shrink during drying and end up with a ditch in it.
![]()
i305.photobucket.com/albums/nn218/billsheliatravis/DSC_0491_zpsnhxmff5j.jpg[/quote][/IMG][/URL]
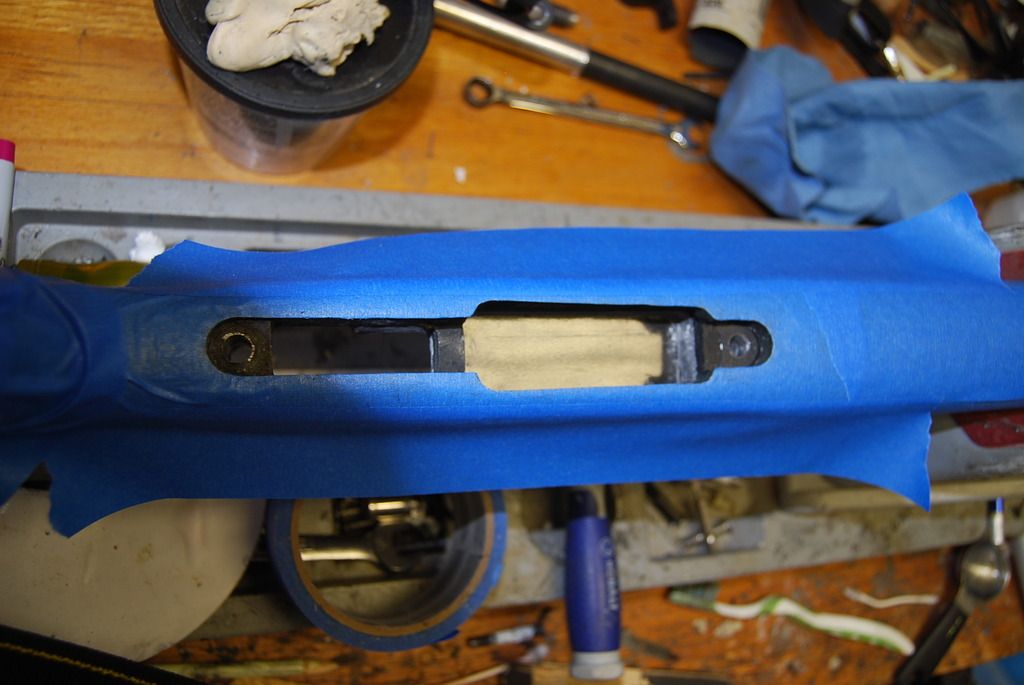
now to add some finishing touches
a cut made for the retention screw

taping off the mag well for paint

cut out with the exacto knife
the action recess gets taped off as well and the barrel channel and storage/ trigger recess gets flat black paint along with the retention screw cut
and black it is

and the finished product...
the tools to get it done
dremel 4000
small sanding drum
large drum
120 grit flapper wheel
carbide burr
high speed cutter
pick
tape
alcohol
about 5 hours of your time and a good dose of patience

WHEW! glad to be done with the longest post ever!
this will be a very long thread with a lot of pics and details so it will likely be done in two parts.
Mods will likely want to move this but I thought I would put it here for all to see first...
this is a used B&C sendero style stock with a bedding block, it was previously skim bedded.
to start I will say that I make no claims to be a pro or even close BUT since Im no professional and don't do this for a living I feel some knowledge can be passed on to the brotherhood. what I know about bedding is pretty much self taught so keep an open mind and take it for what its worth.
1. tape the barrel channel and action recess with 3M painters tape, I try to follow the edges as closely as possible. Its a good idea to clean the edges first with alcohol and let it dry before taping.


2. I sit he barreled action into the stock and line up the screw hole so I know its very close to where it sits.
using a pencil I trace a line on the tape where the channel will be cut out to fit the stock, I allow float space so its traced accordingly

3. after getting the lines down I put the 120 grit flapper wheel on the dremel and sand to the line VERY carefully, after a few years I have developed a two hand hold for the dremel holding the front with my left hand and sitting my fingers on the stock while doing the movement with my right hand on the back of the tool, it keeps the tool very steady and keeps down the boo boos.. you will notice I keep the shop vac in front of the cutting to keep the dust to a minimum.


4. after the barreled action will sit in the stock with barrel clearance I install the rear action screw to line things up and then scribe a cut line around the back of the tang


5. while its in the stock I mark a line in front of the tang for the bedding stop, in this case 2"

this gives me a line to cut to for the barrel support. as you can see I have already prepped the stock by cutting out the old bedding and giving the new something to bite to.

I also cut to the rear traced line and to the edge of the blue tape all around the action recess

6. while some use modeling clay etc I have found this works best for me.
the bottom metal is installed and the trigger recess is filled in. this is a BDL stock and will have a storage compartment, the action will be bedded solid.


I then cut a Styrofoam block to fill in the mag well and fill any cracks with putty.


some of you have ask how I get the bottom of the storage compartment so smooth, a trick I learned through trial and error.
this is a thin piece of plastic from a scope ring box.

cut to size and placed over the foam. the bedding will be as smooth as glass when its peeled out.
the bottom side with the metal removed.

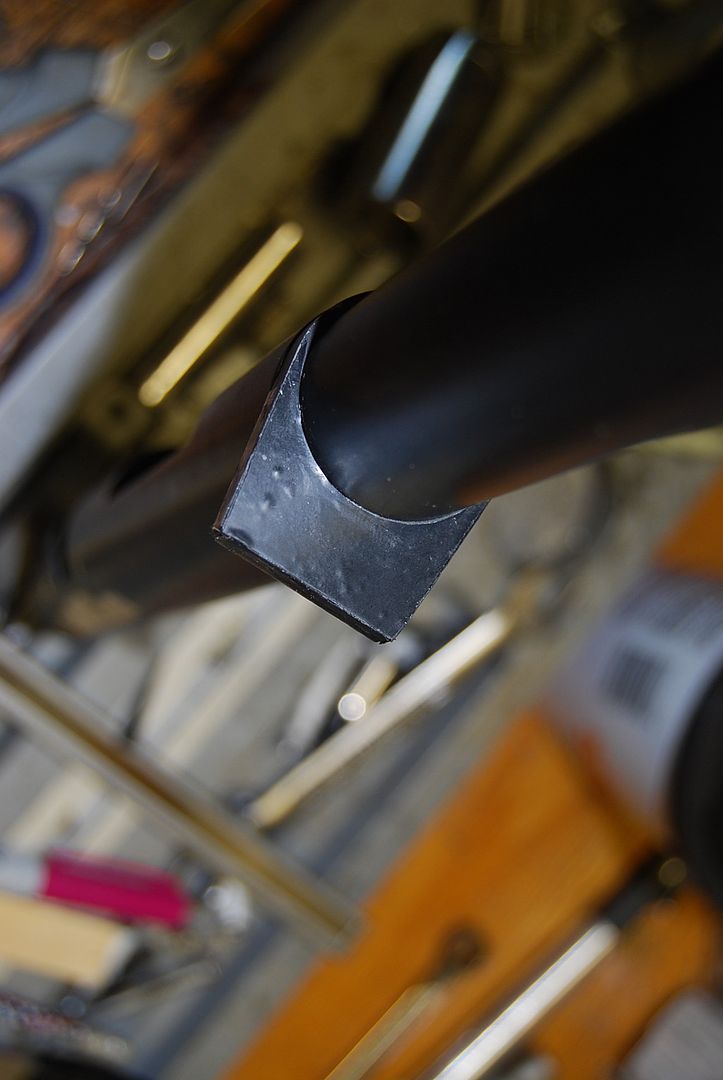
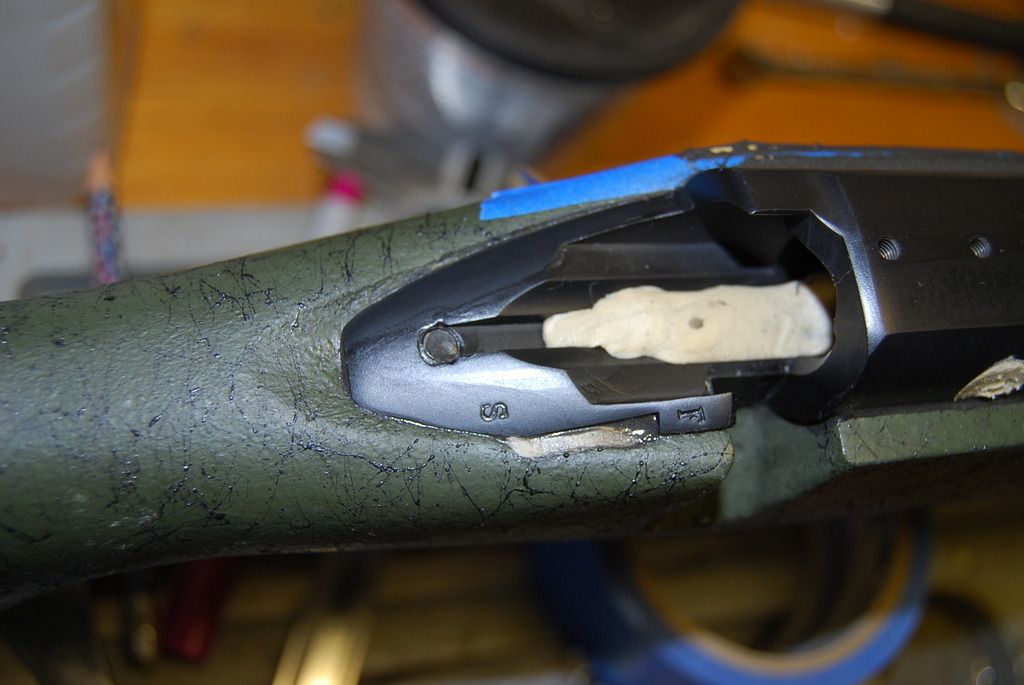
7.now to fill in the action voids, I fill a chamfer in the 700 ML rod recess because many times it will chip out upon initial removal from the stock

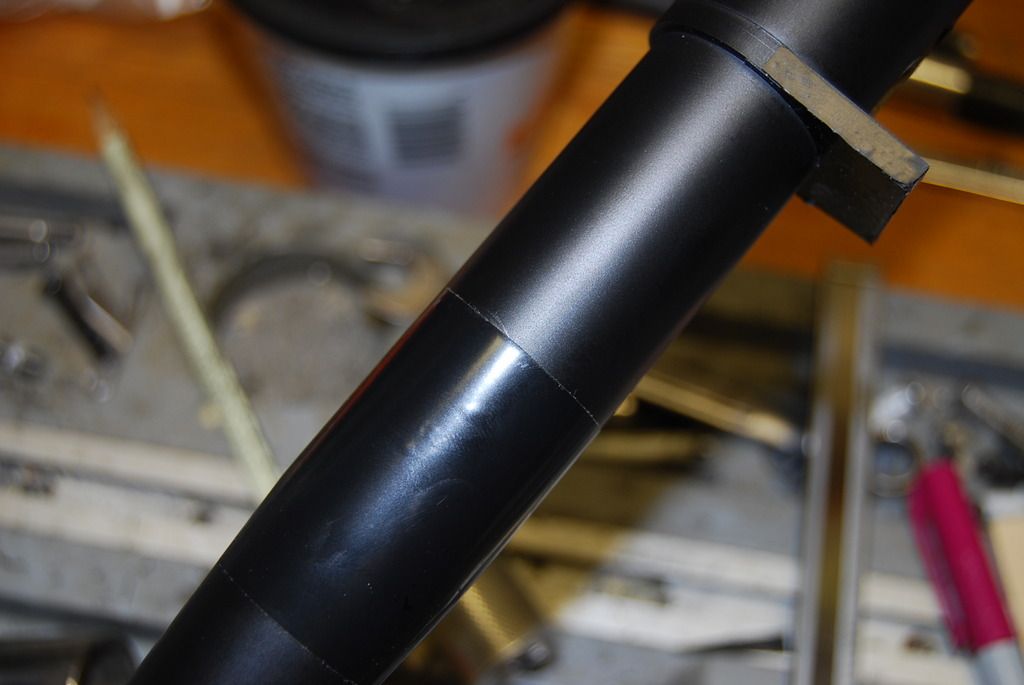
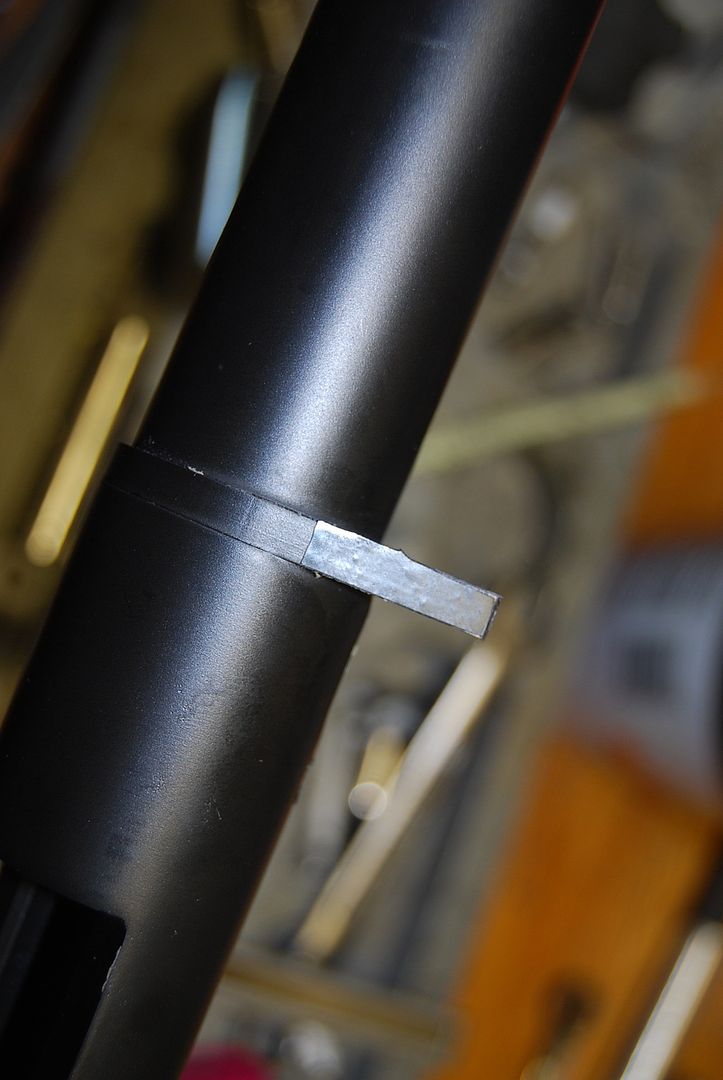
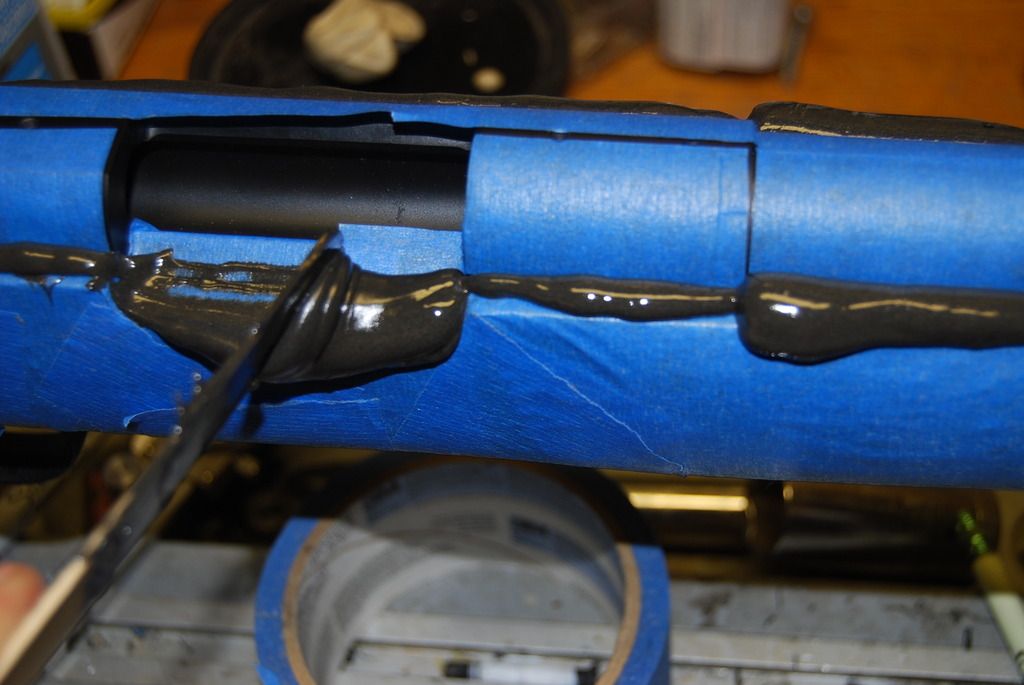
8. remember the line on the stock? this one matches it on the barrel

I place a piece of 2" wide electrical tape around the barrel in a straight line, I will explain later

I do the same thing inside the stock on the line that I cut to. the tape will give a straight line @ both points to cut the bedding and since it will not stick to the tape on either it makes for a neat clean job.
next: to cut some electrical tape for the front, sides, and bottom of the lug


applied to the front of the lug and trimmed with a very sharp exacto knife

the same is done on the sides and bottom.

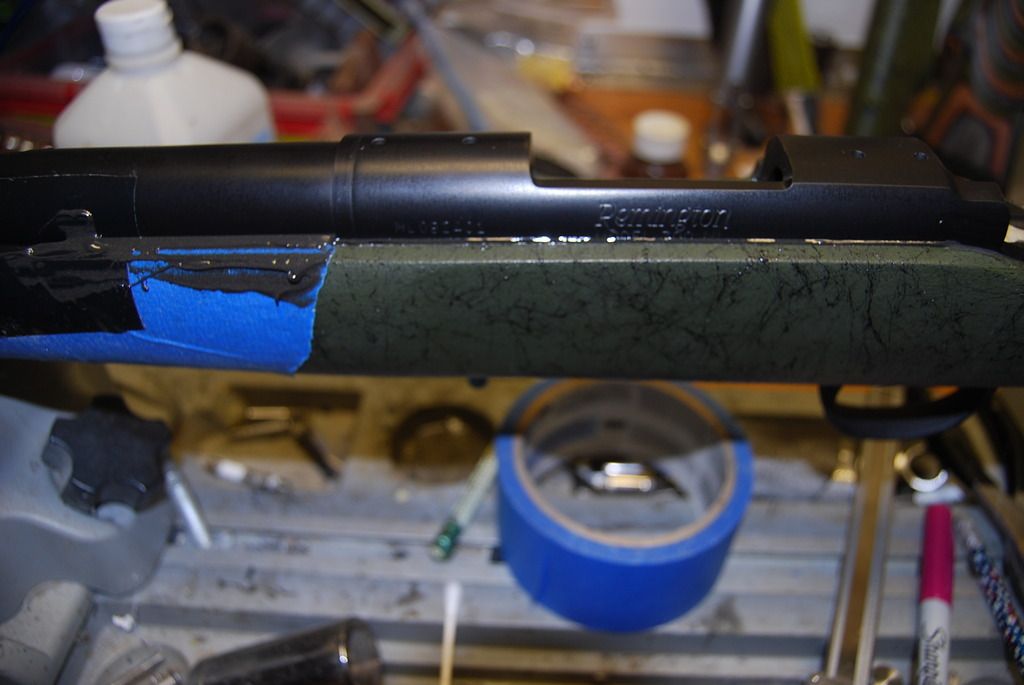
9. now for release agent, it don't get any better than this.

I put it on with a cotton patch and qtips in the tight places. I coat the whole action and the first few inches of the barrel.
don't cake it on, just a decent coat is all it takes. let it sit for 30 min or so and buff it off with a lint free cloth. buff to a shine.

now to put release agent on the stud and action screw.


as you can see this is Teflon tape, the bedding will not stick to it and it will allow the screws to be backed out after bedding dries
the stud goes in the action; simply a 1/4" x 28 with the head turned down flush.
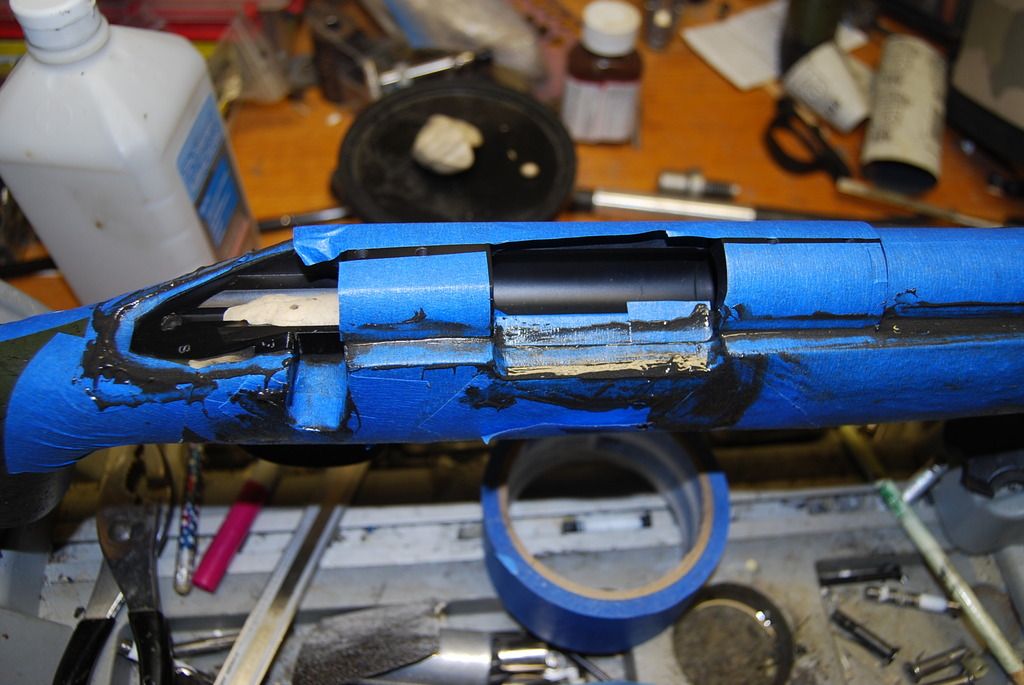
now its time to sit it in the stock and make sure everything fits well, if so its time to tape the barrel to center it in the barrel channel

put just enough tape on to contact the sides, not so much as to bring the front of the action up, in this case 7 wraps of electrical tape.
next is a very important step to keep the mess to a minimum.
with the barreled action sitting in the stock where you want it install the rear action screw so its where it will be when it bedded and add tape just above the stock line.

slightly higher from the lug forward


when you pull the action from the stock make sure the tape edges are rubbed down flat.
10. now its time to mix the bedding, in this case Marinetex.
my mixing cup, not ideal but it works.

I simply cut it to size with a razor knife.


marinetex works very well but so does other epoxies, I prefer marinetex and Devcon aluminum putty, they are neck and neck. marinetex is a little more snotty but it flows better.
into the mixing cup; follow directions to the letter when measuring.
a trick here is to heat it with a hair dryer while mixing, just get it very warm so it mixes and flows easier, it will also set up faster.
when you put it in the stock start with any recesses or low points and fill from the bottom up taking care not to make air pockets.

then lower the barreled action into the bedding, the bottom metal is taped to the stock but take care not to knock it loose with the stud.
start the rear screw and slowly snug it up. I usually put a small clamp with minimal pressure on the barrel/ tape intersection just to mash the bedding out.

now it clean up time, I initially use the mixing stick to get the big stuff back in the cup.

I then use cotton swabs to clean the excess mess; take care not to get all the bedding from the action/ stock line, will explain later.
this is after the excess is cleaned off.

now to see what the tape is all about. tear the tape off and the mess comes with it. take the tape off the action first, then off the stock. ONLY take the tape off the stock to the front of the recoil lug, place your razor knife @ the lug and tear the tape at that point, you will see why later. you will notice a raise line of bedding around the action, its there for a reason, do not remove it!
with a cotton swab clean around the tang and ejection port; use alcohol on the swabs to clean it all off til it looks like this

you can see the raised bedding, it needs to stay this way for a reason that you will see later.


after drying 8 hours the screws can be removed and the Styrofoam block removed along with the plastic sheet, the sheet must be removed after no longer than 8 hours or it will come out in chips.


I use a 1/4" wood chisel to clean the edges and ends before removing the plastic sheet.


after its cleans up....

a peek at the top side after popping it out of the stock; came out well, you can see that its a skim bed over the block.

you will need a pic or something similar to dig the tape pieces out of the bedding in the lug area, they will not come out with the action.
now you can see what the tape on the barrel and the stock are used for. cut the tape line with a utility knife and peel out the bedding..

I had no idea it would take tis many pictures but I will get it done sooner or later.
now its time to drill out the action screw holes. choose a bit that will fit the pillar from the bottom but drill initially from the top, if you don't it will chip out the bedding around the hole when it comes out the top; been there.
use very light pressure or it will chip, go 1/4" deep then you can drill from the bottom. the Teflon will come out when you do this.


now retape the edges of the stock, be careful, the bedding will cut you like a knife.

now you will see why the bedding was left high.
using a sanding drum I sand VERY LIGHTLY with the vac in front of the drum to catch dust. care must be taken doing this or you can get into finish in a big hurry.

sand until you see the edge of the blue tape start to come off and STOP!

as you can see there is a very small depression in front of the lug that will have to be filled, that's the reason the bedding is left high, it will shrink during drying and end up with a ditch in it.

i305.photobucket.com/albums/nn218/billsheliatravis/DSC_0491_zpsnhxmff5j.jpg[/quote][/IMG][/URL]

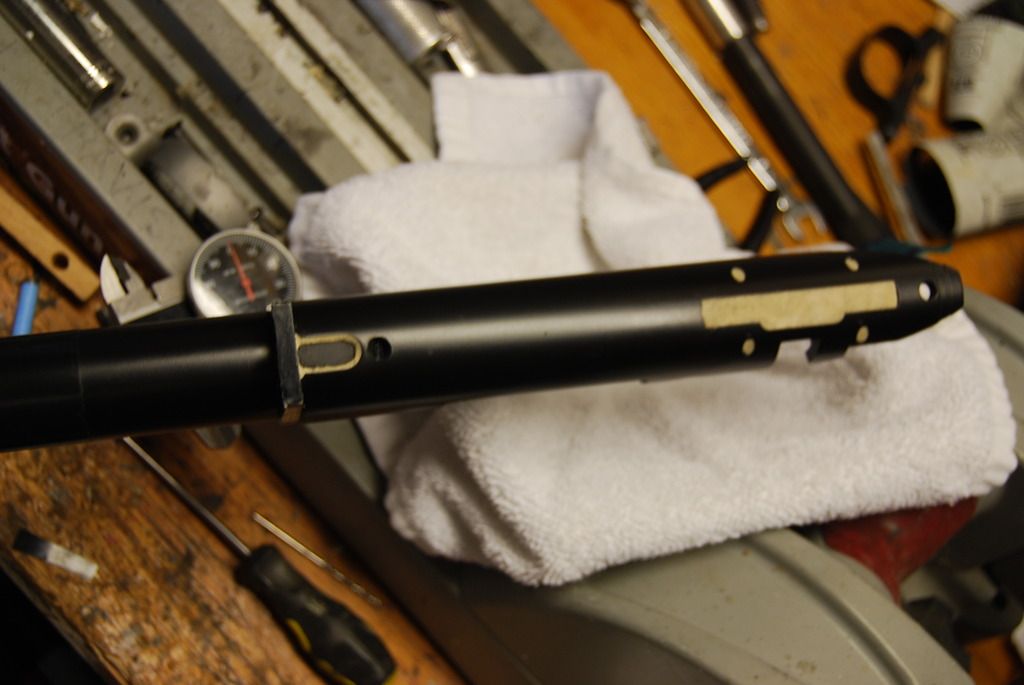
now to add some finishing touches
a cut made for the retention screw

taping off the mag well for paint

cut out with the exacto knife

the action recess gets taped off as well and the barrel channel and storage/ trigger recess gets flat black paint along with the retention screw cut

and black it is


and the finished product...
the tools to get it done
dremel 4000
small sanding drum
large drum
120 grit flapper wheel
carbide burr
high speed cutter
pick
tape
alcohol
about 5 hours of your time and a good dose of patience


WHEW! glad to be done with the longest post ever!